
How to Replace Parking Brake Shoe Set 2003-11 Ford Crown Victoria
Created on: 2014-02-28
Check out this video to learn how to replace the emergency brake shoes on your 03-11 Ford Crown Victoria.
-
step 1 :Removing the Wheel
- Pry off the center cap with a flat blade screwdriver
- Loosen the lug nut covers with a 21mm socket
- Loosen the lug nuts with the vehicle on the ground
- Raise the vehicle with a floor jack
- Secure the vehicle on jack stands
- Remove the lug nuts
- Pull off the wheel
-
step 2 :Removing the Brake Rotor
- Remove 10mm bolts from the brake caliper bracket
- Pull off the brake caliper bracket
- Pull the rotor off
-
step 3 :Removing the Brake Shoes
- Remove the brake shoe springs with the vise grip pliers
- Hold the front retaining pin in place by hand
- Twist off the front retaining spring with the vise grip pliers
- Remove the brake adjuster
- Hold the rear retaining pin in place by hand
- Twist off the rear retaining spring with the vise grip pliers
- Remove the rear brake shoe
-
step 4 :Installing the New Brake Shoes
- Lift the front brake shoe into place
- Thread the retaining pin into the brake shoe
- Twist on the retaining spring with vise grip pliers
- Put the rear brake shoe into place
- Thread the retaining pin into the brake shoe
- Twist on the retaining spring with vise grip pliers
- Put the adjuster into place
- Push the brake shoes together by hand
- Put the adjuster clip into place
- Hook the springs on with the vise grip pliers
-
step 5 :Attaching the Rotor
- Slide the rotor on
- Adjust the emergency brake, if necessary
- Put the bracket back into place
- Replace and tighten the 10mm caliper bolts
- Torque the 10mm bolts to 20-25 ft/lbs
-
step 6 :Reattaching the Wheel
- Slide the wheel into place
- Start the lug nuts by hand
- Tighten the lug nuts preliminarily
- Lower the vehicle to the ground
- Tighten the lug nuts to 100 ft/lbs in a crossing or star pattern
- Reattach the center cap
- Tighten the lug nut covers with a 21mm socket
- Replace the hub cap
-
step 7 :Testing the Brakes
- Pump your brakes repeatedly until they feel firm
- Test your brakes at 5 miles per hour and then 10 miles per hour
- Road test the vehicle
Tools needed
-
21mm Socket
Hammer
Flat Blade Screwdriver
Jack Stands
10mm Socket
Ratchet
Floor Jack
Brought to you by 1AAuto.com, your source for quality replacement parts and the best service on the Internet.
Hi, I'm Mike from 1A Auto. I hope this how-to video helps you out, and next time you need parts for your vehicle, think of 1AAuto.com. Thanks.
In this video, we're going to show you how to replace the emergency brake shoes on this 2004 Ford Crown Victoria. We show you on the passenger's side, but the driver's side is the same procedure. You'll need for this is new brake shoes from 1AAuto.com, 10mm and 21mm sockets, a ratchet, a flat blade screwdriver, locking pliers, a hammer, and jack and jack stands.
Start off prying off your hubcap. Then use this 21mm socket to loosen up your wheel cover. After the wheel cover is removed remove these 21mm lug nuts. If you don't have air powered tools, you want to loosen the lug nuts up while the vehicle is on the ground, jack it up, and remove them the rest of the way. Once those are removed the wheel falls right off.
You want to remove your brake caliper first by removing these two 10mm nuts. We'll just fast-forward as Don does this. Now, using a flat blade screwdriver, pry the inner brake pad in to push that caliper piston in. Then, using your flat blade screwdriver, just pry that caliper off. Now just set it aside. Now using a hammer just slightly tap off your rotor unless you can just pull it off freely without a problem.
Next, we need to remove the springs. You want to remove this one and this one right here. Using locking pliers, grab on to the bottom of the spring and pull it out of that lower brake shoe, and then carefully lift the spring up and pull it down and out. You may have to maneuver it a little bit to get it out of there. Then use your locking pliers on the other spring, pull it out of that top shoe and it just pulls down and off. Next you want to push that clip off that pin so you can pull the shoes forward and off. You want to do the same thing with the lower one. There's a clip with a pin on the back and you just want to pull that pin free and it should pull off.
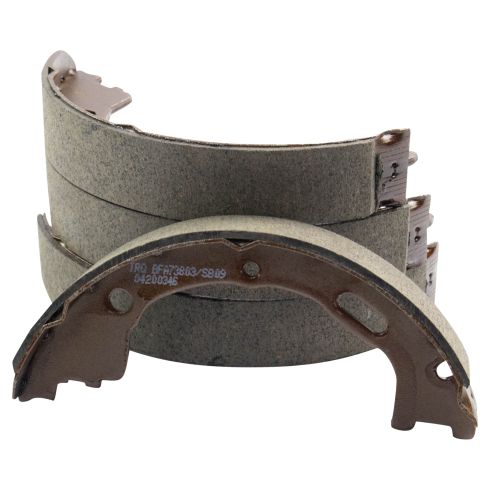
On the right are the old brake shoes; on the left are the new ones from 1A Auto. You can see they're identical, and they're going to mount exactly the same. Take your first brake shoe, push that pin through, and then push that clip back on and slide it back. Then take your lower brake shoe and do same thing. Now, you want to line up the brake shoes onto this clip. Once you got it lined up put that large spring back in. You want to clip it into that top brake shoe, and then, using those locking pliers, pull it down and clip it into the lower brake shoe. Now put your adjustor into place on the brake shoes.
Then once you've got adjuster lined up, take that spring and clip it back into place. Now put your rotor back into place. You want just a little bit of resistance here. If you don't have any resistance, or you have too much, then you want to use this adjuster to just remove your brake shoes in and out. Now push your caliper back into place. We'll fast-forward as Don replaces those two 10mm bolts and tightens them up. You want to torque those bolts to about 20 to 25 foot-pounds.
Once you're all set put your wheel back on, replace your lug nuts, and tighten them preliminarily, lower the vehicle and tighten them the rest of the way. Then torque each of them in a crossing pattern to 100 foot-pounds. We'll fast-forward as he replaces the wheel cover and tightens up those 21mm lug nut caps and then replaces that hubcap.
We hope this video helps you out. Brought to you by www.1AAuto.com, your source for quality replacement parts and the best service on the Internet. Please feel free to call us toll-free, 888-844-3393. We're the company that's here for you on the Internet and in person.
Shop Products

How to Replace Rear Parking Brake Shoes and Hardware 2010-14 GMC Terrain
How to repair, install, fix, change or replace your own worn, squeaky, fading old brakes on 10, 11, 12, 13, 14 GMC Terrain.

