
How to Replace Oil Pan Gasket 2001-09 Chrysler Sebring
Created on: 2013-10-31
Watch this video to learn how to replace the oil pan gasket in your 01-09 Chrysler Sebring
-
step 1 :Removing the Oil Filter
- Have a drain pan ready
- Remove the plug from the oil pan gasket
- Allow the oil to drain
- Remove the oil filter using an oil filter wrench
-
step 2 :Removing the Oil Pan
- Remove the four 15mm bolts from the oil pan bracket
- Remove the ten 13mm bolts from the oil pan
- Remove the long 13mm bolt from the oil pan
- Remove the two 10mm nuts from the oil pan
- Remove two 10mm bolts from the side of the oil pan
- Start threading two 13mm bolts on opposite sides of the oil pan
- Remove the 18mm bolt from the oil pan plate
- Remove the two 10mm bolts from the oil plan plate
- Pull down the oil pan plate
- Remove the two 10mm nuts behind the plate
- Pry the oil pan away from the engine with a pry bar
- Remove the two 13mm bolts from the oil pan
-
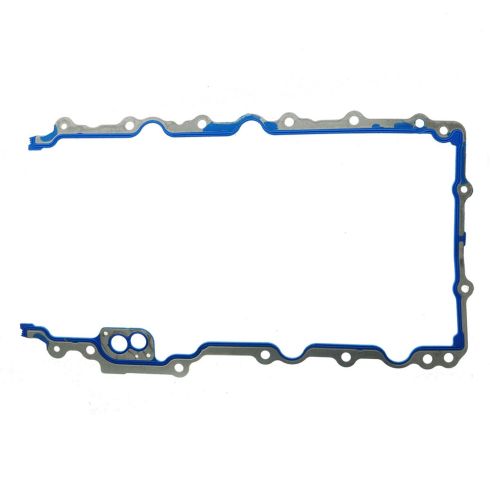
step 3 :Removing the Oil Pan Gasket
- Pry the oil pan gasket off the engine or the oil pan with a flat blade screwdriver
- Pull off the gasket connection
- Pull out the gasket
-
step 4 :Installing the New Oil Pan Gasket
- Clean the oil pan gasket mounting area
- Feed the oil pan gasket into place from the driver side
-
step 5 :Reinstalling the Oil Pan
- Push the oil pan into place
- Start the ten 13mm bolts into the oil pan
- Tighten the 13mm bolts to 20 foot-pounds of torque in a crossing pattern
- Fasten the two 10mm nuts behind the oil pan plate
- Fasten the two 10mm nuts onto the oil pan
- Insert the two 10mm bolts into the side of the oil pan
- Insert the long 13mm bolt into the oil pan
- Push the oil pan plate into place
- Insert the 18mm bolt into the oil pan plate
- Insert the two 10mm bolts into the oil pan plate
- Put the oil pan bracket into place
- Insert the four 15mm bolts into the oil pan gasket
-
step 6 :Reinstalling the Oil Filter
- Clean the oil filter mounting area
- Apply fresh oil to the oil filter gasket
- Twist the oil filter into place
- Tighten the oil pan drain plug
-
step 7 :Refilling the Oil
- Remove the oil cap
- Add oil to the crank case
- Put on the oil cap
- Remove the dipstick and check the oil level
- Add more oil if necessary
Tools needed
-
13mm Socket
Socket Extensions
Torque Wrench
15mm Socket
Pry Bar
Jack Stands
18mm Socket
Flat Blade Screwdriver
Oil Filter Wrench
10mm Socket
Ratchet
Floor Jack
Swivel
Cloth Rags
Brought to you by 1AAuto.com, your source for quality replacement parts and the best service on the Internet.
Hi, I'm Don from 1A Auto. I hope this how-to video helps you out, and next time you need parts for your vehicle, think of 1AAuto.com. Thanks.
In this video, we show you how to replace the oil pan gasket on this 2004 Chrysler Sebring with the 2.7-liter V6. The tools you're going to need for this repair are jack and jack stands, 13 millimeter and 15 millimeter sockets, and a ratchet with an extension. You're also going to want a swivel. You need an oil filter wrench, 10 millimeter and 18 millimeter wrenches, a pry bar, a flat-blade screwdriver, a rag, oil, and an oil filter.
Now with your vehicle jacked up, you go under the front here. You can see, here's your oil pan. You're going to want to start off by removing this plug here. Make sure you have a drip pan below it before you remove it. You just want to let your oil drain. Once it stops draining, just put the plug back in. Now you want to just use an oil filter wrench to remove your oil filter.
Now on this plate there are four 15 millimeter bolts. You just want to go ahead and remove those. We'll just fast forward as Don does this. Now, you can see, lining your oil pan gasket, there are actually ten 13 millimeter bolts. There are five on this side. Then there are five more on this side. You just want to go ahead and remove those. We'll use a little fast forward here to go through this. As you can see, some of those bolts are a little tough to get to behind the exhaust pipe and whatever. That's where you use that swivel joint or the U-joint to be able to get the socket in there and onto the head of the bolt. Next, you want to remove this 13 millimeter bolt right here. Now remove these two 10 millimeter nuts. Remove these two 10 millimeter bolts up here. Now you want to take two of those 13 millimeter bolts. You want to put one in the center hole on this side and one on the center hole on the other side. You don't really want to tighten them up. They're really just in there to secure the oil pan from falling. Now, the next thing that you need to do is remove this one 18 millimeter bolt there and these two 10 millimeter bolts on this plate here. You're going to have to use a pair of wrenches to do it. You can just pull down that plate. Behind it, you can see there are two 10 millimeter nuts there. You just want to go ahead and remove those. Using a pry bar, you want to pry down on the oil pan. You're just trying to separate it from the engine. Then, you can remove those bolts once it's separated.
Now that the oil pan is down, you can just reach in there. You want to use a flat-blade screwdriver to pry your oil pan gasket down from the engine or up from the oil pan depending where it's stuck. Now, we're going to fast forward here as he just pulls thus oil-pan gasket back towards the driver's side. You'll see that on that end of the gasket that it's actually connected. You just want to break that connection. Then, just pull each half of the oil pan gasket out.
Using a rag you just want to clean up the area where the oil pan gasket sits. From the driver's side you just want to feed that oil pan gasket back up into the oil pan. You just want to maneuver it back and forth along the sides until you can line it up properly. You can see this is what it should look like. It should be on those studs right there.
Then, you want to just push the oil pan backup, making sure that the dip stick there pushes back into place properly. Fast forward here as we put all those bolts in. You want to put them in get them hand-tight first. Then snug them. Then you're going to torque them to 20 foot-pounds. You start in the middle and go back and forth across the oil pan and work your way to the ends. Then, you want to replace those two 10 millimeter nuts, the other two 10-millimeter nuts on this side as well as the two 10 millimeter bolts. Now, replace the long 13 millimeter bolt over on this side. Double check and make sure that those two nuts are tight, and then put that plate back up into place and replace your 18 millimeter bolt and the two 10 millimeter bolts. You want to just put this place back into place and replace the four 15 millimeter bolts that secure it.
Be sure to clean the area where your oil filter seals. Coat the gasket of the oil filter with a little bit of fresh oil. Spin your oil filter into place. Generally you want to make it as tight as you can by hand which is usually about 3/4 of a turn after it's seated. Make sure that your drain plug is tight.
Refill your crank case. Check your owner's manual to see how much oil your car takes, and also just refill it until the dip stick says it's full. Run the engine a little bit. Check it again, and refill it as necessary
We hope this video helps you out. Brought to you by www.1AAuto.com, your source for quality replacement parts and the best service on the Internet. Please feel free to call us toll-free, 888-844-3393. We're the company that's here for you on the Internet and in person.
Shop Products

How To Replace Valve Cover Gasket 2007-14 Cadillac Escalade
This video shows you how to install a new valve cover gasket on your 2007-14 Cadillac Escalade.

