How to Replace Master Power Window Switch 2006-08 Chevy Impala
Created on: 2013-08-22
Power master window switch malfunctioning? This video will show you how to do this simple and easy repair yourself
-
step 1 :Removing the Switch Panel
- Pry off the trim piece inside the door pull with a flat blade screwdriver
- Remove the two T30 screws inside the door panel
- Pry up the switch panel with a flat blade screwdriver
- Remove the wiring harnesses
-
step 2 :Removing the Window Switch
- Pry between the tabs that hold the switch to the panel with a flat blade screwdriver
- Remove the switch
-
step 3 :Installing the Window Switch
- Push in the window switch to the panel until it clicks
-
step 4 :Reinstalling the Switch Panel
- Connect the wiring harnesses
- Push in the switch panel
- Insert and tighten the two T30 Torx screws in the door pull
- Insert the trim piece inside the door pull
Tools needed
-
Flat Blade Screwdriver
T30 Driver
Brought to you by 1AAuto.com, your source for quality replacement parts and the best service on the Internet.
Hi, I'm Don from 1A Auto. I hope this how-to video helps you out, and the next time you need a part for your vehicle, think of 1AAuto.com. Thanks.
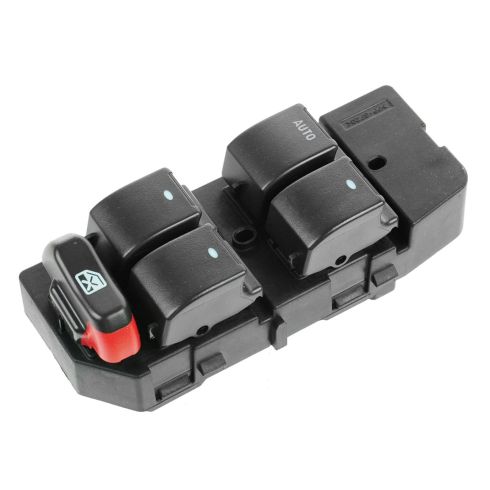
In this video, we're going to show you how to replace the master switch pack on a 2006 Chevy Impala. It's very similar for model years 2006 through 2012. You'll need a new master switch pack from 1A Auto, as well as a T30 Torx bit, extension, socket wrench, and a flat blade screwdriver.
In the inner door handle you'll find a little rubber mat. Use a little pocket screwdriver and pull that out. Then beneath that, you're going to find two T30 Torx screws. Use a T30 Torx bit and socket wrench and driver. Using an extension, get down to those so we can remove them.
Once you have those out, use a little small pocket screwdriver and pry up on that black plastic housing there that holds the handle and the switch pack assembly. You're going to find three connectors. Remove the three connectors by pressing in on the tabs and pulling them out. You'll see the four tabs that hold the switch pack to the housing.
Using a small pocket screwdriver to pry between, I'm also applying pressure with my left hand so that the switch pack starts to pop up and out.
You see the switch pack just goes in from the bottom and clicks in.
Plug the three connectors back into the master switch pack and to your power mirror switch. Set the handle and switch pack assembly back in, and start to reinstall your Torx screws. Reinstall those T30 Torx screws, tighten them down, and then place that mat back on top of them.
We hope this video helps you out. Brought to you by www.1AAuto.com, your source for quality replacement parts and the best service on the Internet. Please feel free to call us toll-free, 888-844-3393. We're the company that's here for you on the Internet and in person.
Shop Products

How To Install Replace Master Power Window Switch Honda Accord 1994-97 1A Auto
Watch this video to learn how to replace the master power window switch on your 94-96 Honda Accord.

