How To Replace Lower Control Arm and Ball Joint 2005-09 Chevy Equinox
Created on: 2013-03-19
If the lower control arm or ball joint on your 05-10 Chevy Equinox needs replacement, check out this 1A Auto video that guides you through the job.
-
step 1 :Removing the Wheel
- Loosen the lug nuts with the vehicle on the ground
- Raise the vehicle with a floor jack
- Secure the vehicle on jack stands
- Remove the lug nuts
- Pull off the wheel
-
step 2 :Removing the Control Arm
- Remove the cotter pin from the ball joint using needle nose pliers and a flat blade screwdriver
- Loosen the ball joint nut with an 18mm wrench, leaving it on the bolt
- Use a ball joint fork and a hammer to loosen the ball joint from the steering knuckle
- Loosen the 21mm front control arm nut, leaving it on the bolt
- Remove the 18mm nuts from the rear control arm mount
- Remove the 15mm bolts from the rear control arm mount
- Remove the 18mm nut from the ball joint
- Remove the 21mm nut from the front control arm mount
- Pull the bolt out of the front control arm mount
- Pull off the control arm
-
step 3 :Installing the New Control Arm
- Remove the shipping protector from the ball joint
- Put the rear mount into place
- Put the front mount into place
- Insert the bolt into the front mount
- Insert the 15mm bolts into the rear mount and start the 18mm nuts by hand
- Push the ball joint into the steering knuckle
- Start the 18mm ball joint nut by hand
- Start the 21mm front mount nut by hand
- Tighten the 21mm nut preliminarily
- Torque the rear mount bolts to 65 foot-pounds
- Tighten the nut on the end of the rear mount preliminarily
- Raise the ball joint with a floor jack
- Tighten the ball joint nut to 55 foot-pounds
- Insert the cotter pin and bend it to lock it in place
- Tighten the front mount bolt to 85 foot-pounds
- Tighten the nut on the end of the rear mount with an adjustable wrench
- Tighten the 18mm rear mount nuts to between 75-80 foot-pounds
-
step 4 :Reattaching the Wheel
- Slide the wheel into place
- Start the lug nuts by hand
- Tighten the lug nuts preliminarily
- Lower the vehicle to the ground
- Tighten the lug nuts to 100 foot-pounds in a crossing or star pattern
-
step 5 :Testing the Brakes and Suspension
- Turn the wheel back and forth and listen for clunking noises
- Pump your brakes repeatedly until they feel firm
- Test your brakes at 5 miles per hour and then 10 miles per hour
- Test turning in the driveway
- Road test the vehicle
Tools needed
-
A Piece of Pipe (for leverage)
Torque Wrench
Hammer
15mm Socket
Jack Stands
18mm Socket
21mm Socket
Pickle Fork
Flat Blade Screwdriver
Ratchet
Floor Jack
Needle nose pliers
1/2 Inch Breaker Bar
Brought to you by 1AAuto.com, your source for quality replacement parts and the best service on the Internet.
Hi, I'm Mike from 1A Auto. I hope this how-to video helps you out, and next time you need parts for your vehicle, think of 1AAuto.com. Thanks.
In this video, we're going to show you how to replace the lower control arm on this 2008 Chevy Equinox. This vehicle has bad ball joints. At 1A Auto, we sell a nice replacement control arm with the ball joint. The tools you'll need for the repair are: jack and jackstands, 15 to 21mm sockets with a ratchet and you'll probably need a breaker bar or you can put a piece of pipe onto your ratchet for some extra leverage, 18 and 21mm wrenches, a ball joint fork, hammer, pliers and a small screwdriver.
I've got my vehicle up on the jack or up on the lift here and I'm going to really show you a quickly what a bad ball joint looks like. The ball joint connects the steering knuckle to the control arm and this next clip will show you what it looks like when the ball joint is bad and there's play in it. You're gonna want to pay attention to this joint right here. This is the steering knuckle and this is the control arm. When I shake back and forth, you watch, you'll see this steering knuckle move independently of this control arm and that's what should not happen.
I start out by removing the front wheel. If you don't have the benefit of air tools like I have, you'll want to loosen the lug nuts while your vehicle is on the ground then raise and securely support your vehicle and take the lug nuts off the rest of the way and remove the wheel.
Possibly the most difficult part of this repair is actually just getting the cotter pin out of this bolt. You've got to bend it up right there and I'm just going to use pliers, grab hold of it and I'm going to break the end of the cotter pin right off, just by twisting back and forth. Now I'm just using the pliers and the screwdriver and prying out the other end. Usually the cotter pin is pretty rusted and pretty tough shape. If you can't get it off, I was able to actually on the other side, when I did the other side of this vehicle, you can just put your wrench right on that bolt and turn it and that will sheer the cotter pin off, especially if the cotter pin's a little bit rusty. Otherwise, using the pliers, screwdriver and maybe even a line-up tool or an impact tool to drive that cotter pin out is what you'll need to do. Now you're going to want to loosen up this nut so take an 18mm wrench, put it on there. Now I'm going to take my 17mm wrench and I'm going to hook it on here for some extra leverage and as soon as it starts moving, I take my box end off and just use the opened end. I'll speed up here as I take that bolt or that nut the rest of the way off. You want to take it, basically take it off until it turns easily with your fingers. You do want to leave it on with a few threads so that when you separate the control arm from the steering knuckle, nothing violent happens. The bolt or nut will still hold it together.
With that nut still on there, I'm going to take a ball joint fork, put it right in here. Now the ball joint is loose, the control arm is separate from the steering knuckle but we're not going to take them all the way apart yet. Now on this front bolt, use a 21mm socket and a breaker bar. Getting underneath is always the best way. If the nut starts turning, watch the bolt on the other side, make sure it doesn't turn. I still got my breaker bar on here, I put a ratchet on the other end. I'll speed it up here as I just loosen that up and again I don't take it all the way apart, loosen it all the way up and then you can actually either take the nut off and put it back on by hand or just leave it a few threads on there. Just so it stays together for now.
Now in the back here, this is held in, there are two 18mm nuts on top and 15mm bolts on the bottom. I'm going to take my breaker bar and just make sure the nuts are breaking loose first. I use a breaker bar or you'll want use some kind of tool with leverage, you can also use a piece of pipe on a ratchet, that works well too. Then I bring the ratchet in with the 15mm socket and just turn from the bottom. One other note, you can see horizontally there's a little bit of rust colored nut there on the back of the bushing. If you like you can loosen that up, that just helps the control arm to fall down and be a little more free once you go to take everything apart. In this case, I am removing the bolts all the way. With the ball joint still together and that other bolt in the front, your control arm is not going to go anywhere.
The next step is to remove the nut from the ball joint all the way. Get an 18mm wrench to help me out with that. I've got my ball joint nut off, and my two bolts back here, so let's pull this nut off the rest of the way. Pull this bolt out. Now, separate this from my suspension there, pull that out there and pull the control arm on out like so.
Here's a new control arm from 1A Auto, comes with a ball joint, which fixes the immediate problem. Also comes with all new bushings, here and new bushing here with the mount. If your ball joint is worn out, chances are these bushings are starting to get old too, so replacing the whole assembly makes sense. We'll take that off, take that little shipping protector off. You want to put this up in first. Put the corner in, pull it, make sure it's lined up fairly well, bring this down and in, pretty much just like that. It will stay in place. Take our long bolt, make sure you get things lined up here. Put it through. There are two bolts for back here and they go up through pretty easy. Then this bolt here, same thing. They go in pretty easy.
Now do the ball joint. Push the ball joint up and in and start the nut on. We're going to put our nut on this end and we want to get this seeded but we don't want to tighten this up until we put weight on the suspension. I'm going to fast forward here as like I said, I'm just tightening this nut up to get it seeded. I don't want to tighten it up all the way yet, I just want to have it better in place, ready to tighten once I have weight on this suspension. Then the two bolts that hold the mount in the rear, you can actually at this point, you could torque these, you can torque these to 65 foot pounds. I just tighten them up here a little bit and wait until later to torque them. Same thing for this nut here, you don't want to tighten it all the way up right now. We just want to get it seeded so it's close. Okay, now here I've put a jack underneath right where the ball joint is, I'm going to lift that up a little but and then just finger-tighten the nut on the ball joint more. Okay, not the best recording angle here, but use your 18mm wrench again and for the ball joint you basically want to pull it as tight as you can with a small or not a small but a 18mm combination wrench. Generally the ball joint nut should be torqued to about 55 foot pounds but it's really hard to get a torque wrench onto this spot so pulling it as tight as you can with a wrench and then pulling it to a point where you can get the cotter pin through and lock the nut in place is the best procedure.
Here, I'm just pulling the ball joint just a little bit tighter so it's a nice clear path through to get the cotter pin in. I put the cotter pin in, pull it through and then bend it so it won't come out. We've got it supported with a jack, we've got the weight off the lift, you can tell because we can move that around a little bit. We're going to tighten this bolt to 85 foot pounds. For this big nut right here, I can't get a torque wrench on it so I'm going to take this big adjustable wrench and basically just pull it as tight as I can. I'm just going to fast forward here as like I said before, tighten up those two bolts anywhere between 65 and 75 foot pounds.
Now we can put the front wheel and tire back on and I'll just thread the lug nuts on by hand a few turns first, make sure they're going on correctly and then just preliminarily tighten them with my impact wrench. Torque your lug nuts to 100 foot pounds. Any time you've done extensive work to the front end of your car just hit the brakes, pump them up, make sure you didn't, that pedal's nice and firm. Move your wheel back and forth. Feel for any clunks, listen outside the car. Make sure everything seems pretty tight and then test drive it, go easy at first. Make a couple of stops in the driveway, turn in the driveway, and then do a more prolonged test drive.
We hope this helps you out. Brought to you by www.1AAuto.com, your source for quality replacement parts and the best service on the Internet. Please feel free to call us toll-free, 888-844-3393. We're the company that's here for you on the Internet and in person.
Shop Products


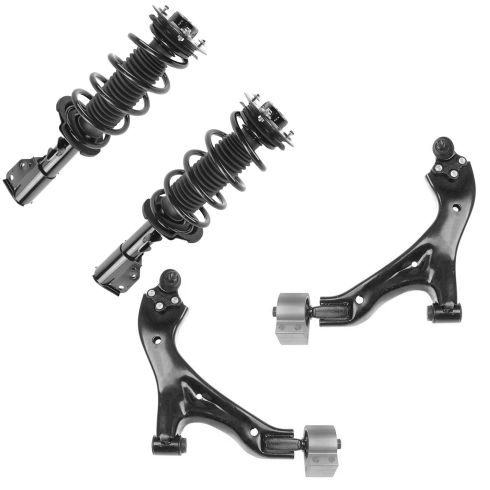
2008-09 Chevrolet Equinox Pontiac Torrent Front 4 Piece Suspension Kit TRQ PSA56468
- (2) Front Lower Control Arms with Ball Joints
- (2) Front Strut & Spring Assemblies
- 4 Piece

How to Replace Lower Control Arm 2007-14 Toyota FJ Cruiser
Watch this video to learn how to replace the lower control arm on your 07-14 Toyota FJ Cruiser! 1A Auto shows you how to DIY!

