
How to Replace Lower Control Arm 2007-14 Chevy Suburban
Created on: 2019-06-26
Check out this video to learn how to replace the front lower control arm on your 07-14 Chevy Suburban. 1A Auto shows you how!
-
step 1 :Removing the Wheel
- Pry off the center cap
- Loosen the 7/8 in lug nuts with the vehicle on the ground
- Raise and support the vehicle
- Remove the lug nuts
- Remove the wheel
-
step 2 :Removing the Front Strut
- Remove the wiring harness retainer from the strut stud
- Remove the three 15 mm upper strut mount nuts
- Remove the two 18 mm nuts from the two 15 mm bolts at the lower strut mount, and remove the two bolts
- Pry down on the lower control arm to free the strut and remove it
-
step 3 :Removing the Axle
- Mark the inner axle joint to return it to the same orientation during reinstallation
- Remove the 15 mm bolts securing the axle joint
- Slide the axle off and down
- Remove the 36 mm axle nut
- Remove the axle washer
- Tap the axle out with a hammer
-
step 4 :Removing the Brakes
- Remove the two 18 mm brake caliper bracket bolts
- Remove the brake caliper and bracket together, and hang it out of the way with no tension on the hose
- Remove the T30 brake rotor screw
- Remove the brake rotor
-
step 5 :Removing the Knuckle
- Remove the 21 mm tie rod ball joint nut
- Remove the tie rod ball joint from the knuckle
- Loosen the 18 mm upper control arm ball joint nut
- Loosen the upper control arm ball joint from the knuckle by hammering on the knuckle
- Loosen the 24 mm lower control arm ball joint nut
- Loosen the lower control arm from the knuckle with a pickle fork, or by hammering on the knuckle
- Remove the upper and lower control arm nuts and remove the knuckle
-
step 6 :Removing the Lower Control Arm
- Remove the 15 mm nut from the 15 mm bolt of the sway bar link
- Remove the 15 mm sway bar link bolt
- Remove the sway bar link
- Support the lower control arm, taking note of its position
- Remove the 15/16 in nut from the 18 mm bolt on the rear lower control arm joint
- Remove the 24mm nut from the 18 mm bolt on the front lower control arm joint
- Remove the lower control arm support
- Tap out the front and rear joint bolts
- Remove the lower control arm
-
step 7 :Installing the Lower Control Arm
- Install the lower control arm into position
- Insert the two 18 mm bolts, with the longer one in the rear joint
- Support the lower control arm at the same position
- Tighten the 15/16 or 24 mm nuts onto the bolts
- Torque both nuts to 59 ft-lb
- Reinstall the sway bar link
- Insert the 15 mm bolt through the sway bar link, and tighten the 15 mm nut onto it
- Torque the sway bar link 15 mm nut to 17 ft-lb
- Install and tighten the 7 mm grease fitting into the lower control arm ball joint
-
step 8 :Installing the Knuckle
- Remove the lower control arm support
- Install the lower control arm ball joint into the knuckle
- Start the 24 mm lower control arm ball joint nut
- Install the upper control arm ball joint into the knuckle
- Start the 18 mm nut onto the upper control arm ball joint
- Tighten then torque the 24 mm lower ball joint nut to 92 ft-lb
- Tighten then torque the 18 mm upper ball joint to 37 ft-lb
- Install the tie rod ball joint into the knuckle
- Tighten and torque the 21 mm tie rod ball joint to 44 ft-lb
-
step 9 :Installing the Brakes
- Install the brake rotor on the hub with the rotor screw holes aligned
- Tighten the T30 rotor screw
- Replace the brake caliper
- Secure the brake caliper bracket with the two 18 mm bolts
- Torque the 18 mm brake caliper bracket bolts to 148 ft-lb
-
step 10 :Installing the Strut
- Before installing the axle, now is the best time to add grease to the lower control arm ball joint
- Attach a grease gun to the fitting, and fill it until the boot starts to move
- Insert the top strut studs through the mounting holes and start one of the nuts to hold it in place
- Position the lower strut mount
- Insert the lower strut mount bolts, and install the nuts
- Tighten the 18 mm nuts onto the 18 mm bolts
- Torque the 18 mm nuts to 37 ft-lb
- Install the top 15 mm strut mount nuts
- Torque the top 15 mm nuts to 37 ft-lb
-
step 11 :Installing the Axle
- Insert the outer axle into the wheel hub
- Align the inner axle with the markings made when removing it
- Install the 15 mm bolts and tighten them in a crossing pattern
- Torque the 15 mm axle bolts to 58 ft-lb in a crossing pattern
- Install the axle washer and 36 mm axle nut
- Tighten the 36 mm axle nut
- Torque the 36 mm axle nut to 177 ft-lb
-
step 12 :Installing the Wheel
- Slide the wheel onto the wheel studs
- Tighten the lug nuts
- Lower the vehicle with minimal weight on the wheel
- Torque the lug nuts to 140 ft-lb in a crossing pattern
- Lower the vehicle completely
Tools needed
-
24mm Socket
Socket Extensions
Torque Wrench
Hammer
15mm Socket
Pry Bar
7mm Wrench
18mm Wrench
Jack Stands
18mm Socket
Grease Gun
21mm Socket
24mm Wrench
Flat Blade Screwdriver
7/8 Inch Socket
7mm Socket
T30 Socket
15/16 Inch Socket
Floor Jack
36mm Socket
Marker / Writing Utensil
I'm Mike from 1AAuto. We've been selling auto parts for over 30 years.
What's up guys? I'm Andy from 1AAuto. In this video, I'm going to show you how to install a lower control arm in this 2009 Chevy Suburban. If you need this part or other parts for your vehicle, click the link in the description and head over to 1AAuto.com.
You're going to want to keep in mind whenever you're doing any kind of suspension repair, whether you're replacing components or removing and reinstalling components, you're going to change your steering angles and you're going to want to go to a local shop and have your alignment performed.
First thing, I'm going to take this center cap off. Just use a straight blade screwdriver. Get behind this little tab right here. There's another one right here. Slide it off. Now, we're going to loosen up the lug nuts. I'm going to take a 7/8 socket and a breaker bar. You can also use a 22mm socket. Loosen these up.
Now I'm going to raise and support the vehicle. I'm using a two post lift. If you're doing this at your house, you can use a jack and jack stands. I'll take the lug nuts off. Just make sure they're all loose first. Yep. They're good. I'll take the last lug nut off, grab the tire, pull it off.
We're going to disconnect the upper strap mount nuts on this vehicle. There is a wiring harness with a retainer right here. Just pull up on that and there's the three nuts up top. If your vehicle happens to have this little connector here, you can push on this and pop it off. This vehicle has deleted this option so it's not connected. I'll take a 15mm socket, a swivel, extension, and a ratchet. Loosen up these nuts.
All right. These lower shock or lower strop faults are pretty rusty, so I'm just going to use a little rust penetrant. I'm going to take a 18mm wrench, put it on top on the nut, and then a 15mm socket and ratchet on the bottom bolt. I'm going to loosen them up. Take those out then I'll take the other one out. It's easier to crack the nut free instead of trying to loosen up on the bolt loose. Once it's loose then we can loosen the bolt. Pull that bolt out.
I'm going to take a pry bar. I'm just going to pry down on the lower control arm. Moves the strap inward so that it's off of this little seat right there. Do that and then lower this down. Then I can slide the top out, pull it straight out from the top.
I'm going to remove the front axle. Before I take these bolts out, I am going to mark the housing where it's located so that when I put it back together, it's in the exact same place. I don't know that it necessarily is going to cause any issues, I just like to put it back together the way it came apart. I'm going to use a 15mm socket and a ratchet. We'll loosen this up. When I'm loosening this, it's spinning, so what I'm going to do is take a pry bar from the outside. I'm just going to hold it between the lugs, keep it from spinning. Loosen it up. I'll loosen the other ones as well. I'm going to take all these bolts out. There's six of them. Once those bolts are out, we'll take the axle and just slide it forward, slip it down.
I'm going to loosen up this axle nut. I'm going to kick a pry bar. Just put it between the lugs right there. We'll take the axle nut socket, a 36mm, and a breaker bar. We're going to loosen this up. Be careful when doing this. The axle nut is very tight. All right. Break that loose. I'll take my pry bar, and a ratchet, and socket and I'll just loosen it up. Take this nut off. There's a little washer under here, or a big washer. Take that off as well.
Next we're going to take a hammer. If this is on really tight when you tap it, then you can put the nut back on so that you don't ruin the threads. This axle is not that tight, so I'm going to hold the axle with my other hand. Gently tap it so that I can remove the axle, just like that. Then just pull it out of the way.
Now, I'm going to remove the brake caliper. I'm going to remove it with the bracket and leave the pads all in. I'm just going to take these two caliper bolts out, the caliper bracket bolts out. They're an 18mm, so I'll use an 18mm socket and a breaker bar. I'll loosen the top one as well. Once it's loose, I can switch to a ratchet. Loosen up the top bolts, I can support the caliper. Just make sure it's not going to fall on me. That's good. I'm going to grab a straight blade screwdriver. Just go in between here. I'm just going to compress the piston a little bit going in between the rotor and the caliper. Once that's compressed a little, go underneath here, pry it up, slide the caliper out.
With the caliper slid out, we can take this hangar. We actually sell these 1AAuto.com. We can hang the caliper up. Find some place to hook it onto and hook it onto the caliper hose bracket right there and make sure the brake caliper hose is not too tight, there's no tension on the hose itself.
I'm going to take the rotor off. I don't necessarily have to take the rotor off, but this knuckle with the rotor on is very heavy, it's very bulky to move around, so it just makes it easier. Take a T30. remove this screw right here. Just to loosen it up. You can always use an impact driver if you have to get this out. Sometimes they're loose enough. Take that off. Then if this rotor was frozen on there, you can take a hammer and hit in these locations avoiding the studs. You don't want to hit the studs.
I'm going to loosen up this tie rod nut. I just want to spray a little rust penetrant on here. It's pretty rusty. I don't necessarily have to take this tire rod off, it's just at this point you're already taken so much stuff off. Once you disconnect the lower ball joint and the upper ball joint, you could just let this knuckle hang, but it puts a lot of stress on the steering rack and stuff. It's just easy just to take the whole knuckle off, so that's what I'm going to do. Take a 21mm socket and a breaker bar. Loosen this up.
All right. The stud of the tie rod started spinning. It doesn't normally happen but it can, so I'm going to use a 21mm wrench, and I'm going to use a 10mm socket and a ratchet, and then I'm just going to loosen up this way. The ratchet is just going to hold the stud from spinning. Woops. Once that gets loose enough, I can just do it by hand. We can slide that out of the way and I can loosen up this nut and the top nut.
I'm going to loosen the upper ball joint. I'll just take an 18mm socket and ratchet. I'm just going to twist the knuckle to this side. I'm going to loosen it up. All right, I'll just take that to the point where it's almost off. I'm not going to take the nut off completely. I'm going to leave a couple of threads on there.
Okay, now I need to separate the knuckle from the upper control arm. If I'm not going to replace upper control arm, I want to be careful of this upper ball joint, the dust boot on there. If I use a pickle fork, it's probably going to rip the boot. You can use different styles of tools that will push up on the lower ball joint or you can take a hammer. Carefully, you don't want to break anything, but if you tap right here, you can sometimes get it to break free just like that. But there is other styles of tools or using the pickle fork works as well.
With that upper control arm loose, I'm just going to leave that nut on there for now so that it's easier to work on this lower ball joint. I'm going to take this 24mm socket and I'll loosen up this nut. Just spray a little rust penetrant on there. It's a little bit rusty.
Now, I'm just going to leave a couple of threads on there cause I don't want to break the knuckle free from the lower control arm. Now for the lower control arm, I could just tap right there but we don't want to break anything, so I'm just going to use the pickle fork because we're replacing the lower control arm. Just slide this in here. Give it a tap. Once it's in there good. I can tap it real hard.
Now that broke free. Now, that's the reason why I left those nuts on so that this didn't go flying when that actually broke free. Take the lower nut off first and I'll take the upper nut while I'm supporting the knuckle. Then slide the knuckle right out of the way.
Now we're going to loosen up this sway bar link. I'm going to just spray some rust penetrant on here. It's pretty rusty. I'm going to take a 15mm wrench and then stick it on the bottom of the sway bar link and then a 15mm socket and ratchet to the top, and I'm going to loosen this up.
We'll take this nut off and take this bushing off. All right, now I'm going to pull this bolt straight through. A lot of times, these get rusted and get frozen into the actual link, so it's pretty common that when you're doing this job you're going to have to replace the links. Slide that out. Take a pry bar, just pry up on the link and pull the link out. Now I'm going to support this lower arm. Before we take it off, I'm going to keep in mind where the arm is located when we take it off, because when we put the new arm on, we want to torque that in the same position.
All right, now I want to loosen up these two bolts and nuts on this part of the lower control arm and right here. On this side, I'm going to use a 15/16 wrench and an 18mm wrench on the inside. Just loosen it up. You can also use a 24mm wrench on this nut. Then right here because I can fit it, I'm going to use a 24mm socket, and a breaker bar and an 18mm wrench on this side, just to loosen it up. Now once it's loose a little bit, I'll just switch to a ratchet. Use a 18mm socket and ratchet on the bolt side. Take that nut off and there's also a little washer. Takes that off as well. We'll do the same on this side. Just hold it with my socket breaker bar, use the ratchet on the other side. Take that nut off and the washer.
All right at this point, the bolts are loosened up so I can remove this support. Slide the control arm down. Take a hammer and just tap it out. Then do the same for the backside. Just grab the bolts, slide it out. Grab the lower control arm and just pull it up.
Here's our old control arm. Here's our new control arm from 1AAuto.com. As you can see, the shape of the arm is the same. It comes with new bushings. It comes with new ball joints. You're going to take this nut off, it comes with a new nut. This cover, this is just for shipping purposes. Flip it over. The other side is the same. It has the same shock mounting area. This one, the new one actually comes with a grease fitting, so it's greasable, which makes it last longer because you can add grease to it. Get yours 1AAuto.com and you'll be ready to rock and roll.
All right before we install the new arm, we are going to take this nut off here. Take this cover off. This is just for shipping purposes, you don't need that. All right, now we're going to install the arm. Just hold it up into position. You might have to wiggle it back and forth a little bit. You can also use a pry bar to help pry it into position. Get underneath here. Get the holes lined up. Now you have these two bolts. The longer one goes on the back. That one started. Now get the front one started. Take a hammer, tap it in.
Once those are in position, we can take our support we had earlier. Support the lower arm, the same as the other one was, just like that. I'll take the washer and the nut, get that one started. Same on this side. Now I'll take my 15/16 wrench and 18mm socket and ratchet. Tighten these down. Do the same on the front.
Now I'm going to torque these rear bolts. One of the reasons why we have this control arm supported the same way as the old one is because you want the angle of this arm to be the same as ride height. What you're supposed to do is actually put this all back together, and then with the vehicle on the ground with all the weight on the vehicle, then torque to these, but it's very hard to get a torque wrench under the vehicle while you're doing this, so I'm going to do this now. Take a 24mm socket and the torque wrench. I'm going to torque these to 59 foot pounds.
I'm going to install the sway bar link. You can take a pry bar, get underneath the sway bar, pry it up. Get the link lined up. Take the bolt, slide it in to position with the bushing. Install that. Install the nut. Take my 15mm socket, and a ratchet, and a 15mm wrench and hold it down below. Just tighten this up. Now, I'm going to take a torque wrench and I'm going to torque this to 17 foot pounds. Right there.
I'm going to take the grease fitting that the lower control arm comes with and then get it started right here in the upper part of the ball joint. Then I'll take a 7mm wrench and just snug it up, not too tight, just a little bit. You could also use a 7mm socket and ratchet. Now, I'm going to remove this support for the lower control arm.
Now we're going to take the knuckle, get that lined up with the lower ball joint. Take the new nut, get that started. There we go. Then, I'm going to line this up with the upper control arm. Push it down on the arm. If you have to use a pry bar, pry down and then take the nut, get that one started. Then I'll take the tie rod, line that in position and put that nut on.
All right, I'm going to start by tightening the lower ball joint. I'm going to use a 24mm socket and a ratchet. Just making sure that the stud of the ball joint is not spinning. If the stud was spinning, you can put a wrench on the nut and there's a little key way for an Allen. You can hold it from spinning. Nice and snug. Now I'm going to use a torque wrench and torque that nut to 92 foot pounds.
Use an 18mm socket and ratchet. I'll tighten up the upper. At this point, the whole stud is spinning of the ball joint, so I'm going to take a pry bar and just pry the upper control arm down and try to tighten it that way. It seems like it's going pretty good. I was able to tighten that up. If you still can't tighten it up, you can use a wrench and then there's an Allen key on the bottom you can use. Now I'm going to take a torque wrench and 18mm socket. I'm going to torque this nut to 37 foot pounds. I'm just going to hold the knuckle while I'm doing it. That's good.
Now, we're going to tighten this outer tie rod nut to the 21mm socket and a ratchet. If this stud starts spinning, you can also take a pry bar, slide it under here, and push down on the tie rod and try to get the stud from spinning. If it's still spinning, you can use a wrench. Yeah, it's still spinning. If this stud keeps spinning, you can take a 21mm wrench and then a 10mm socket and ratchet. Just tighten it up this way. All right. Then I'm going to use the 21mm socket and a torque wrench and I'm going to torque this to 44 foot pounds.
Next, we're going to install the rotor. Get this lined up. Remember where the screw was? You've got to get that lined up with where the hole is in the hub. I'll take this screws, get that started. Take a T30 Torx bit and a ratchet. Just get this tightened down. Just snug, it doesn't have to be too tight.
Then, I'm going to take the caliper, take it off the hanger and slide this over the rotor. Might have to spread the pads out a little bit when you're doing this. Just like that. Take the two 18mm bolts. They normally come with thread locker. You can re-install thread locker if you choose to. I'll take a 18mm socket and a ratchet. Just get those snug. Next, I'm going to take a torque wrench with the 18mm socket. I'm going to torque those two bolts to 148 foot pounds.
At this point, it would be easier to grease these ball joints right now, so just take a grease gun, push it on the grease fitting, give it a few pumps. What I do is I watched the boot to expand a little bit, then I know that most of the grease has gotten to the bottom part. You don't want to add too much grease, because then you'll pop the boot. That looks pretty good.
Now, we're going to install the strut. Just slide this in and then slide it up. You can align the studs up up top. I grabbed a nut and I'm just going to get one of the nuts started. I'm going to use a pry bar, pry in on the spring side. This actually is a little easier if you have the sway bar link out. Get that in position and pry it back into place, just like that. All right, now I can take these strut bolts, get these lined up. If they don't line up with the holes, you can take a screwdriver. You can get this to line up first and get the bolt through, put the nut on top. Same with this side. I'm going to take a 18mm wrench and a 15mm socket and ratchet, tighten these bolts up. Now I'm going to torque these to 37 foot pounds.
We'll take the other nuts and get those started up top. I'll take a 15mm socket and a ratchet and just snug these up, then I'm going to torque them. Now I'm going to get a torque wrench and torque these to 37 foot pounds.
We're going to push this wire retainer onto one of those studs. Then if you have this connector, you're going to connect that to the top of the strut. Now, we're going to send the axle back into position. Slide it up from underneath. Slide it into the the wheel bearing. Might have to twist that a little bit. Now, we're going to take this flange, just spend it out a little bit. Slide that in position. I'll try to line this up with how I took it out, the marks that I made. Take these bolts, get these started. Now I'm going to start to tighten these up. I'm going to use a 15mm socket and ratchet. What I'm going to do is just snug this side up then I'm going to spin the axle and tighten the opposite side. Snug that one up. Then go around the rest of the axle and tighten these up. I'm going to use a pry bar to hold the axle from spinning. Just put it on the lugs upfront.
I'm going to tighten these down to 58 foot pounds. I'm going to do this the same way. I just talked torqued one down. I'm going to spin it to the complete opposite side. Torque this one down so it gets tightened down evenly. Now, I'll just go around and tighten them all down. That's good. I'll take the washer, put that on the axle, and then the nut, the axle nut on. Then I'll take a 36mm socket and ratchet and snug this down.
Now I can lower this vehicle down and put the pry bar on the ground. I'm just going to do it by hand and hold it. Just be careful. I'm going to torque this to 177 foot pounds.
Now I'll take the tire, put the tire back on. Put the lug nuts back on. All right, now I'm going to use a torque wrench, a 7/8 socket, you could also use a 22mm socket, and I'm going to torque these lug nuts to 140 foot pounds. We're going to do this in a cross pattern that will tighten the wheel down evenly. Just go around again, double check.
Then we're going to install the center cap. On the back side of the center cap, it shows where the valve stem is, so you're going to line that up with where the valve stem goes and push it back on.
Thanks for watching. Visit us 1AAuto.com for quality auto parts, fast and free shipping, and the best customer service in the industry.
Shop Products
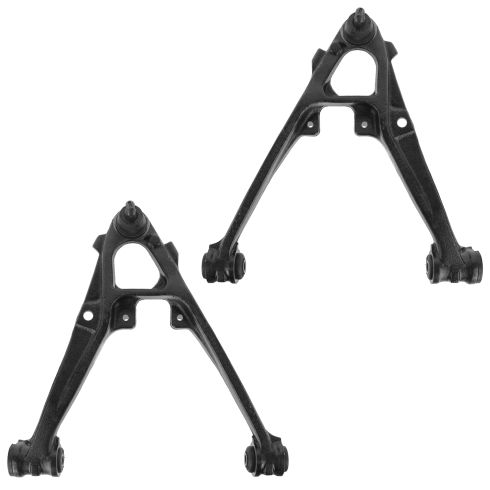
Chevrolet GMC Cadillac Front Driver & Passenger Side Lower 2 Piece Control Arm with Ball Joint Set TRQ PSA62570
- 2 Piece
- (1) Front Driver Side Lower Control Arm with Ball Joint
- (1) Front Passenger Side Lower Control Arm with Ball Joint

How to Replace Upper Control Arm 1998-2011 Ford Ranger
Check out this video and our experts will show how to replace the upper control arm with ball joint yourself

