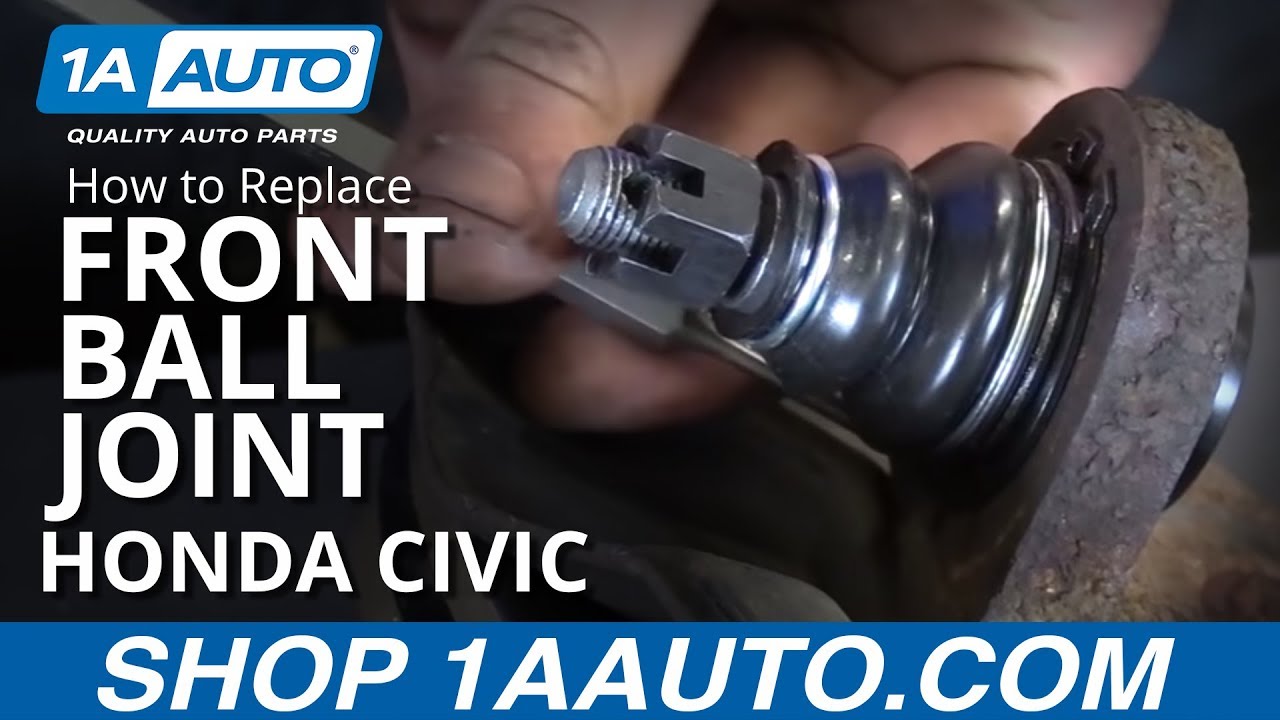
How to Replace Front Ball Joint 2001-05 Honda Civic
Created on: 2016-05-25
Watch this video to learn how to replace the lower front ball joints on your 01-05 Honda Civic.
-
step 1 :Removing the Wheel
- Loosen the 19mm lug nuts with the vehicle on the ground
- Raise the vehicle with a floor jack
- Secure the vehicle on jack stands
- Remove the lug nuts
- Pull off the wheel
-
step 2 :Removing the Hub Nut
- Insert a tapered punch into the punched slit between the retainer and nut
- Tap the punch to separate the nut
- Remove the 32mm nut axle nut with a pry bar and breaker bar
-
step 3 :Removing the Caliper
- Remove the 17mm bolts from the caliper bracket
- Remove the caliper and caliper brackets assembly from the rotor
- Hand the caliper with a wire tie or bungee
-
step 4 :Separating the Ball Joint
- Bend the cotter pin tab out with needle nose pliers
- Pry the cotter pin out
- Remove the 17mm castle nut on the bottom of the ball joint
- Tap up with a hammer to release the ball joint
- Use a pickle fork to separate the ball joint if needed
-
step 5 :Removing the Spindle
- Remove the 22mm bolts from the bottom of the strut
- Unbolt the wheel speed sensor with a 10mm socket and ratchet
- Remove the sensor with a pair of pliers
- Tap the center of the CV axle
- Pull the axle out of the spindle
-
step 6 :Removing the Ball Joint
- Insert the cup of the press over the cup of the ball joint
- Press the jig onto the ball
- Press the lower cup onto the jib
- Install the press onto the tools
- Using a 22mm socket with a breaker bar, tighten down on the press
- Remove the ball joint
-
step 7 :Installing the Ball Joint
- Insert the ball joint into the spindle
- Insert the larger cup onto the bottom of the ball joint
- Insert the small cup onto the bottom of the larger cup
- Install the press onto the top of the ball joint and the lower cups
- Tighten the press until the ball joint bottoms out
- Insert the snap ring onto the base of the ball joint with needle nose or snap ring pliers
- Remove the 19mm castle nut from the ball joints
-
step 8 :Installing the Spindle
- Insert the lower ball joint into the control arm
- Line up and press the CV Axle into the hub
- Insert the 22mm bolts (head facing front of car) into the bottom of the strut
- Torque the strut bolts to 116 foot-pounds with a 19mm wrench on the bolt side
-
step 9 :Installing the Hub Nut
- Insert the hub nut into place
- Torque the 32mm hub nut to 134 foot-pounds with a breaker bar to keep the hub still
- Dent the outer ring on the axle nut into the keeper groove with a hammer and pick
- Tighten the 10mm bolt to the wheel speed sensor
-
step 10 :Installing the Hub Nut
- Insert the hub nut into place
- Torque the 32mm hub nut to 134 foot-pounds with a breaker bar to keep the hub still
- Dent the outer ring on the axle nut into the keeper groove with a hammer and pick
- Tighten the 10mm bolt to the wheel speed sensor
-
step 11 :Installing the Ball Joint
- Align the castle nut with the windows on the control arm
- Torque the castle nut to 43-50 foot-pounds
- Insert the cotter pin into nut
- Bend the cotter pin underneath
-
step 12 :Reinstalling the Brake Caliper
- Insert the brake rotor into place
- Tighten the Number 2 Phillips screw to the brake rotor
- Spread the pads and insert the caliper into place
- Tighten the 17mm caliper bolts
- Torque the caliper bolts to 80 foot-pounds
-
step 13 :Reattaching the Wheel
- Slide the wheel into place
- Start the lug nuts by hand
- Tighten the 19mm lug nuts preliminarily
- Lower the vehicle to the ground
- Tighten the lug nuts to 80 foot-pounds in a crossing or star pattern
Tools needed
-
Socket Extensions
Torque Wrench
Hammer
Ball Joint Press
Pry Bar
17mm Socket
Jack Stands
19mm Wrench
19mm Socket
Pick
Pickle Fork
32mm Socket
Flat Blade Screwdriver
Phillips Head Screwdriver
Snap Ring Pliers
10mm Socket
Ratchet
Floor Jack
Needle nose pliers
1/2 Inch Breaker Bar
Brought to you by 1AAuto.com, your source for quality replacement parts and the best service on the Internet.
Hi, I'm Mike from 1A Auto. I hope this how-to video helps you out, and next time you need parts for your vehicle, think of 1AAuto.com. Thanks.
In this video, we're going to show you how to lower front ball joints on this 2003 Honda Civic purchased aim for 2001 to 2005 Civics. We show you on the driver side, but the passenger side is the same procedure.
You'll need new lower front ball joints from 1AAuto.com, 7 to 22 millimeter sockets with wrenches, ratchets and extensions, 32 millimeter socket and air tools, breaker bar or tire iron, pry bar, torque wrench, small hammer and/or mallet, needle nose pliers, flat head and Phillips screwdrivers, jack and jack stands, and a ball joint press.
Remove the front wheel held on by four 19 millimeter lug nuts. If you have a different style hubcap, you'll need to remove that, but just use a breaker bar or your tire iron and loosen the lug nuts while the tire is on the ground. Now, raise and support the vehicle. Now, remove the lug nuts the rest of the way and the wheel and tire.
Using a tapered punch, remove the band from the axle nut. Using the pry bar on the wheel studs to prevent the hub from turning, use a 32mm socket and breaker bar to loosen the axle nut. Using a 17mm socket and ratchet remove the caliper bracket bolts. Remove the caliper and caliper bracket assembly, hang it out of the way using a bungee cord, mechanics' wire. You can use a zip tie, anything you have to keep it up and out of the way somewhere where it's safe. We're just going to hang ours up on a strut with a bungee cord. You'll be able to access this just fine on the jack and jack stand.
Going to undo this cotter pin at the bottom of the ball joint, and just bend this tab out, pry the pin out with a pair of needle nose and undo the nut on the bottom of the ball joint. Using the 17mm socket and a breaker bar, going to unbolt the bottom of the ball joint. Before the nut comes all the way off, use a hammer, tap up. If that won't release the ball joint, tap on the sides. If hitting the nut on the bottom of the ball joint or the sides of the control arm don't free it, you can always use a ball joint separator or pickle fork. Using the 22mm socket, remove the bolts from the strut. Remove the bolts themselves.
Using the 10mm socket and ratchet, unbolt the wheel speed center from the spindle. Remove the sensor. You may need to use a pair of pliers to work the sensor. Tap the center of the CV axle to free it from the hub. Remove the spindle from the vehicle.
Install the cup of the press over this ring on the top side of the ball joint. You want to ensure that it fits in there with enough room so that the ball joint can be pressed up into this cup. This jig sits onto the stud of the ball joint. This cup keeps us from damaging the ends of our threads. Install your press onto these tools. Keep it centered as best you can. You can use the 22 millimeter socket on the breaker bar to tighten down on the press. Push our ball joint out.
This can also be done with an impact gun if your particular tool allows for it to speed things up. Back off your press. Remove your old ball joint. If you have excessive play in your ball joints or clunks over bumps, this lower ball joint could be at fault. If that's the case, this new part from 1A Auto is going to fix you up right.
Take your new ball joint, and send it through from the spindle down. Going to install the cup, larger than the ball joint, over the bottom. Put the top of our ball joint press onto the top of our new ball joint. Install our flat cup over the bottom. Get everything nice and straight. Press it in with our impact gun and a 22 millimeter socket. Bring it in until the ball joint bottoms out in the spindle. Small pair of needle nose pliers that will fit into the holes on the snap ring or a proper pair of snap ring pliers, install the snap ring onto the base of your ball joint. Make sure it sits down all the way and into the grooves. With a punch and hammer, just to make sure that everything is seated down in there properly. Remember to remove the nut from your ball joint, in our case a 19 millimeter, before we install it into the vehicle.
To install the lower ball joint into the hole with a control arm, make sure the ball joint is seated in to the control arm and that your CV axle is lined up. Line up the bolts for the top of your strut. Install the bolts through your strut into your spindle. These are going to go from the front of the car with the nut toward the back. Torque the strut bolts to 116 foot-pounds with a 19 millimeter socket on the bolt side and a 22 millimeter wrench on the nut.
Using a 32mm axle nut socket, install your axle nut. Use the pry bar to stop your hub from rotating and torque your axle nut to 134 foot-pounds. Using a punch or chisel, dent the outer ring of the axle nut into the keeper groove on the axle. Reinstall the wheel speed sensor into the hub. If you have to you can give it a couple of taps in with a rubber mallet, reinstall the 10mm bolt. The cast nut from the bottom of the ball joint has windows that need to align with this hole so we can install the cotter pin after it's tight. The torque spec is 43 to 51 foot-pounds, as you may have to tighten it up a little to get the windows to align. 43 is pretty close, send your cotter pin through the slot, take the longer side, bend it underneath, take the shorter size, trim it down.
Reinstall your brake rotor. Be sure to install the beveled hole of your rotor, over the screw hole in the hub. Reinstall your screw with a number 2 Phillips. Remove your caliper from wherever you hung it. Spread your pads in the carrier, reinstall the assembly onto the rotor in the back.
Tighten up your 17mm caliper bolts. Torque your caliper bolts to 80 foot-pounds. Put your wheel back in place. Start your lug nuts, we'll tighten them preliminarily and torque them when the vehicle's back down on the ground. Tighten your lug nuts 80 foot-pounds and just cross in the pattern.
Thanks for tuning in. We hope this video helped you out. Next time you need parts for your car, please visit 1AAuto.com. Also check out our other helpful how-to and diagnosis videos.
Shop Products


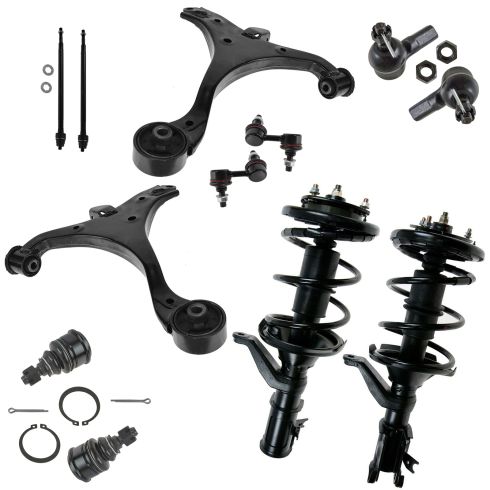
Honda Civic Front 12 Piece Steering & Suspension Kit TRQ PSA59537
- (2) Front Lower Ball Joints
- (2) Front Lower Control Arms
- (2) Front Outer Tie Rods
- (2) Front Sway Bar Links
- (2) Front Strut & Spring Assemblies
- (2) Front Inner Tie Rods
- 12 Piece

How to Replace Upper Ball Joint 1995-2002 Ford Crown Victoria
Watch this video to learn how to replace the upper ball joint on your 95-02 Ford Crown Victoria.

