
How to Replace Ignition Coil 2002-08 Nissan Maxima
Created on: 2013-04-29
Find out what parts need to be removed to access and replace the ignition coils with the help of this how-to video.
-
step 1 :Removing the Front Ignition Coils
- Remove the four T30 Torx bolts from the engine cover
- Remove the 10mm bolt from the ignition coil
- Disconnect the ignition coil wiring lead
- Pull out the ignition coil by hand
-
step 2 :Installing the New Front Ignition Coils
- Push the new coil into place
- Connect the ignition coil wiring lead
- Insert the 10mm bolt into the ignition coil
- Repeat Steps 1 and 2 for the other two front ignition coils
-
step 3 :Accessing the Rear Ignition Coils
- Use a flat blade screwdriver to loosen the intake hose clamp screw
- Disconnect the green wiring connector
- Loosen the clamp on the middle intake line with the slip joint pliers
- Disconnect the hose
- Remove the two 10mm bolts from the front intake plenum brackets
- Remove the two 12mm bolts from the rear intake plenum bracket
- Loosen the clamp on the back vacuum line with the slip joint pliers
- Remove the two 12mm nuts and three 12mm bolts from the front of the intake plenum
- Disconnect the blue wiring harness
- Pry the wires out of its clip with a flat blade screwdriver
- Disconnect the wiring harnesses behind the plenum
- Pry the wires out of its clip with a flat blade screwdriver
- Pull the plenum up and out of the way
-
step 4 :Replacing the Rear Ignition Coils
- Replace these coils using the steps outlined in Steps 1 and 2
-
step 5 :Reinstalling the Intake Plenum
- Make sure nothing gets caught underneath the intake plenum
- Push the plenum into place
- Reconnect the intake hose
- Start the two 12mm nuts and three 12mm bolts into the plenum by hand
- Insert the two 12mm bolts into the rear plenum bracket
- Tighten the two 12mm nuts and the three 12mm bolts to between 25-30 foot-pounds of torque
- Reconnect the rear wiring harness
- Insert the 10mm bolts into the front plenum brackets
- Connect the wiring harnesses on the side of the plenum
- Connect the vacuum hoses
- Check that there are no loose connections
- Put the engine cover back on
- Insert the four T30 Torx screws into the engine cover
Tools needed
-
Socket Extensions
T30 Driver
10mm Wrench
10mm Socket
Slip-Joint Pliers
Ratchet
Brought to you by 1AAuto.com, your source for quality replacement parts and the best service on the Internet.
Hi, I'm Mike from 1A Auto. I hope this how-to video helps you out, and next time you need parts for your vehicle, think of 1AAuto.com. Thanks.
In this video we're going to show you how to replace the ignition coils on this 2003 Nissan Maxima. We go through the simple part of replacing the coil in the first part of the video. The front three coils are very easy to replace. All you need to replace them is a T30 torx driver and a 10mm socket with a ratchet or 10mm wrench. Then we detail how to take the upper intake plenum off, which allows you to get to the rear three coils. This requires a few more tools: pliers, and a 12mm socket and ratchet in addition to your 10mm.
Start with the T30 torx driver and remove the four bolts that hold the top engine cover. OK, so the coils on this side of the engine are really easy to see. With a 10mm socket, remove the bolt and here's a connector here. They have a tab on the top. Push the top tab with that finger. Disconnect. Finish taking this bolt out. Then the coils come right out. The new coil from 1A Auto is just like the original. It's going to go right in there. Just the same. Put it down in. Just push it straight down, reconnect the lead, bolt back in. Then you can see the two in the front here are just as easy as that one.
You may be saying "Well, how about the rear ones?" The rear ones are pretty easy but you do have to take this intake plenum off. I'm going to show you that real quick. We're going to start up top here. With a flat blade screwdriver, loosen up the clamp that holds the intake hose on. Make sure that's nice and loose. Make sure you can pull this off the intake and then we're going to disconnect this green connector here. Just push on the little tab that's on the front here and take that off. Then we're going to disconnect this middle line here. Pull that clamp off and then use my pliers. Grab onto the hose, make sure the hose twists a little bit. Pull that off. Take a 10mm socket. We're going to take off this bolt here. Let that bracket go to the side. We're going to take off this bolt here. Put these up here. It allows that to come off. Now we're going to use a 12mm socket. I can't really show them to you because they're back in here but if you just take your hand and reach back in here, you'll feel two bolts and they're going in this way. You need to remove those two bolts. That's a bracket holding up the back of the plenum.
As I'm looking back here I can see that there's another vacuum line. I'm just going to use my pliers. There's a clamp, squeeze the clamp, take the clamp off using pliers. Get the hose to twist, pull it off. Then take my extension, and there are two 12 mm nuts on each end. Then there are three 12mm bolts to remove. Disconnect this lead. Take the screwdriver and pry out the clip that holds the harness. Just take the screwdriver and again pry clip off that holds the harness. You should be able to push on the two teeth beside.
So right here on the backside you can see I disconnected this here. There's also two connectors, little tabs. Disconnect them then squeeze this clip as well and disconnect this line. Pull these two vacuum lines up out of their clip, or vice versa. Disconnect that connection. Pull up. Now you can lift it up and push it out of the way enough. I'll show you here. You can lift it up and out of the way enough that you can now get to the coils. You may want to just have somebody help you out, lift it out of the way for that middle one. That's probably the most difficult one. I'm just going to fast forward as I put the plenum back on. It's pretty much a reversal procedure.
Make sure that there's nothing, no wires or anything between the upper intake plenum and the lower intake before you put it down. Get it down into place. Make sure that you get the intake hose over the opening of the plenum on the driver's side. Make sure you get it down in place. Just check underneath, make sure there's nothing between the plenum and the engine intake. I can see it go down on this side here, down there. Pull the intake tube up. Replace that. Get that intake tube on; it goes down nice and easy. Once it's in place, take and put the two nuts and the three bolts that hold the upper intake to the lower intake. I put those in place then I actually put the two bolts that hold the rear of the intake to the bracket, put those in place and tighten them up. After I've tightened those rear ones up then I tighten the plenum down. You want to tighten it down to about 25 to 30 foot pounds. Then just carefully, I basically just try to go methodically from the passenger side rear. Reconnect those two connections back there, and there are two vacuum lines. Then come around to the front and bolt on the two brackets. Make sure the connections are reconnected. Then around to the throttle body and air intake side. Bolt everything back together. Make sure all the electrical connections are connected and all the vacuum connections are connected.
Basically what I do is after I'm done I just look very carefully around. You basically look for any clean or shiny spot. Basically when you take connectors apart, you'll notice that they're dirty but then when you take them apart, the part that had fit together was nice and clean so it's a good idea to look around. Just look for any clean spots or shiny spots that might indicate that there's something that hasn't been reconnected. Once you have it all reconnected then you can put your intake cover back on.
We hope this helps you out. Brought to you by www.1AAuto.com, your source for quality replacement parts and the best service on the Internet. Please feel free to call us toll-free, 888-844-3393. We're the company that's here for you on the Internet and in person.
Shop Products


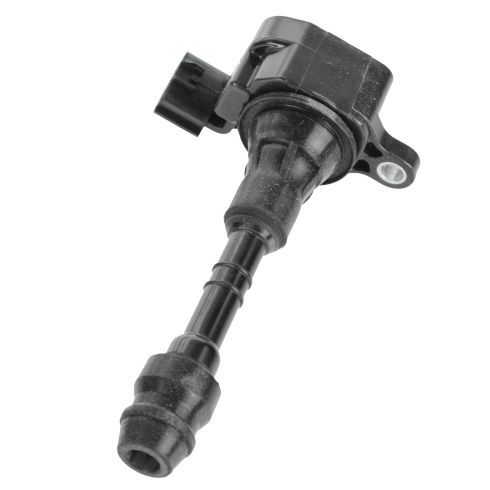
Nissan Infiniti Suzuki Ignition Coil TRQ ICA61680
- No
- Male
- No
- No
- 3
- Female
- Blade
- 30000 VDC
- Direct Replacement
- Black

How to Replace Ignition Coil 2004-06 Chevy Colorado
Check out this video on how to replace an ignition coil on your 04-06 Chevy Colorado.

