
How to Replace Hood Release Cable 2000-06 GMC Yukon
Created on: 2020-04-23
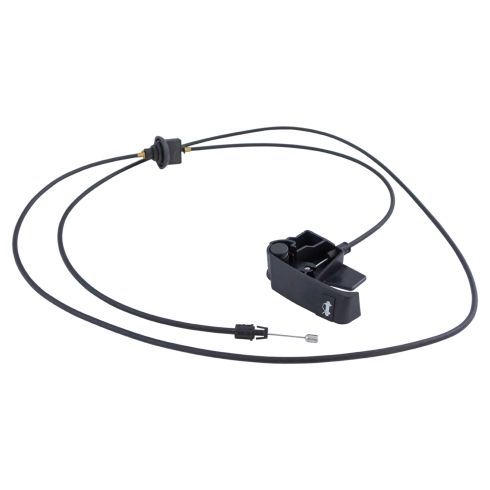
Watch this video to learn how to install a new hood release cable in your 2000-06 GMC Yukon.
Tools needed
-
Soapy Water
13mm Socket
8mm Wrench
7mm Socket
10mm Socket
Ratchet
Needle nose pliers
Trim Tool Set
Marker / Writing Utensil
All right. Disconnect the battery. Use a 8-millimeter wrench. Disconnect the negative side. And set that aside. Take this cover off, you're gonna take these trim clips out. Just use a trim tool. Get underneath the center part. Slide those all out, just like that. And then pull this cover off. Now before I take these bolts out for the latch, I just want to mark it. Just use a marker because you want to put this back exactly where it was when you go to put it back in. I'm gonna use a 10-millimeter socket to take these bolts out. And then you take the latch. And take this, the cable on the ball that's on the end of that and just slide that to the side. And use some needle-nose pliers. And just slide that off.
I'll just take the cable out of here. You could use a pick tool or a screwdriver. And just slide the cable out. So the cable goes into the firewall and there's a retainer right here, just slide it out of the retainer. And there's a grommet on the firewall. You can push on that grommet just to push it through. And we'll just push that in. Here we go. And we'll just leave that like that for now. Right now pull this panel up. Just use some trim tools to get underneath here. Slide it out. You should be able to slide this out. And just slide it out. And get behind this panel, slide this out. And it has those two clips, slide it in there. Take this fuse box cover off. Just unscrew this cap right here. And then there's some clips on the side. You're going to slide that out of the way. Actually, it's a junction box, not a fuse box.
Take this nut out right here. It's a 10-millimeter. Take that nut off. And there is a nut right here. This holds the parking brake lever assembly on. We'll have to take that nut off and then once we gain access, we should be able to take the other two nuts off up top. Use a 13-millimeter socket. Pull that off. Grab this fuse junction box and just slide this out of the way. If you want to pull this completely out of the way, just grab the connectors, disconnect the connectors to it. Be careful with the wires. You don't want to pull them, the wires, as I'm pulling the wires.
Oh, and then the connector in the back, there's a 7-millimeter bolt that holds on the back connector, I'm just gonna disconnect that, move that out of the way. I'm gonna take this nut off. And there's one more nut that's closer to the front, front of the parking brake foot lever. I got the last nut, pull that out. I did pull this four-wheel-drive module out of the way. It is just clipped in. It goes right here. And there's a clip right here and a clip on the other side. You just slide that, slide it out of your way.
For the sake of the video, I'm gonna pull this parking brake foot pedal assembly out of the way. You don't normally have to pull it out but just so you can see more. I want to disconnect the cable that goes to the release right here. You just push up on this. Get that little ball retainer out of the way. And then use some needle-nose pliers on this. You can see the hood cable after the lever. The release cable goes back here. It goes up to that rubber grommet that goes through the firewall. Use a 13-millimeter socket. Take the nut off right here. And you should be able to grab the cable and slide it through. And slide it up.
All right, now we want to feed this cable back the way the other one came out. And you go through the firewall. And as you feed it through here, you're gonna have to go out and make sure it goes in the same location that the other one came out. So let's feed it through here. Go past the fuse box. It went through here, so go through that retainer there. And slide this through here. And you can put a little soapy water on the end of this grommet. That'll help push it in a little bit. That should be good. And slide that through. And try to push that into the firewall so it's sealed nice and good. And then attach this bracket right here. Go over the stud. And slide that over the stud.
Get the nut started. And I'll tighten it down. Go in and snug it through with this cable, through here, and reattach it right there and here. And then we'll attach it to the latch just like this. And take the bolts, reattach the latch. So remember to line this up how it came off and tighten those down. Before we put everything back together, just double-check to make sure everything works. Make sure the hood is lined up. It looks good. And pull the release handle, and it works. So the cable is gonna run behind here. So keep that in mind. You don't want to squish the cable or any of the wires.
So just slide this back in position. And take the two nuts that go up top, put those on and tighten them down. All right, so I tightened those two nuts up, up top. You're going to take this four-wheel-drive module if you pulled that out and reinstall that. Just line it up with the bracket and lock it back in place. Take this cable that goes to the release for the parking brake, slide that in position. Actually we'll pop the bottom part of the cable on first right there and lock that in. That looks good. Make sure... That seems to work.
Reattach this wire to the parking brake right there. Now I'm going to take the junction box and put the connector on the back, and just tighten the bolt down, and just snug that up. Not too tight. I just want it snugged. That's good. And put the bracket in position over the studs. Get this nut started over here, and the other nut over here, the smaller one, and then tighten those down. All right, so both of those nuts are tight. Now let's plug the connectors in.
Find the right location for where they were. They should only go in one spot. One goes right there. And just lock them in place. That should be good. I'm gonna put this cover on. Just slide that in position. Put this cap back on. And that's good. And slide this cover back in position. And now that it's all lined up, just push it in position, just like that. And take this cover, slide it in position. And then lock it in place with this cover on. Put the pushpins back in position, re-lock them down. And reconnect the battery. And snug up the terminal. Just wiggle it to make sure it's tight. That's good.
Shop Products

How to Replace Hood Release Cable 2000-06 Chevy Tahoe
This video shows you how to install a new hood release cable on your 2000-06 Chevy Tahoe.

