
How to Replace Headlight 2006-11 Chevy HHR
Created on: 2010-02-28
Check out this 1A Auto tutorial video if you want to learn how to change the headlights on your 06-10 Chevy HHR.
-
step 1 :To replace the bulb
- Use your needle nose pliers and a cloth rag to remove the pins securing the wheel well cover.
- Pull back the wheel well cover to access the headlights.
- If you would like to remove the whole headlight assembly, then continue reading.
- DO NOT TOUCH the bulbs- the oil from your fingers will burn into the light and foul your bulb.
- Disconnect your fog light and marker light.
-
step 2 :Remove bumper cover
- Remove the bolts and pins securing the bumper cover.
- Use your 7 mm socket and ratchet.
- There should be 8 screws and 8 plastic pins.
- Use a screwdriver to unclip the teeth securing the bumper cover.
- Set the bumper cover aside.
-
step 3 :Remove the headlight assembly
- Use your 10 mm socket and ratchet to unbolt the headlight assembly.
- Unplug the harness and set aside.
-
step 4 :Install the new headlight assembly.
- Plug in the harness to the new headlight assembly.
- Bolt the headlight assembly back in.
- Put your bumper back on.
- Reconnect your fog and marker lights.
- Replace all 8 clips and 8 bolts using your 7 mm socket and ratchet.
- Test your lights.
Tools needed
-
Flat Blade Screwdriver
7mm Socket
10mm Socket
Ratchet
Cloth Rags
Needle nose pliers
Brought to you by 1AAuto.com, your source for quality replacement parts, and the best service on the Internet.
Hi, I'm Mike Green. I'm one of the owners of 1A Auto. I want to help you save time and money repairing and maintaining your vehicle. I'm going to use my 20 plus years' experience restoring and repairing cars and trucks like this to show you the correct way to install parts from 1AAuto.com. The right parts installed correctly, that's going to save you time and money. Thank you and enjoy the video.
In this video we're going to show you how to both replace the headlight bulb and replace a headlight on this 2008 HHR, same as 2006 to 2010. To replace the headlight you do have to remove the bumper cover. That might sound like a lot but actually; it's only eight bolts and eight pins. Follow along and you'll see it's not that hard. Tools you'll need are a seven-millimeter socket, 10-millimeter socket, needle nose pliers, flat blade screwdriver, and a rag to protect your paint.
We're going to start by removing these two pins here. Just work your pliers in. I've got an old t-shirt here that's going to kind of wrap around there. I'm press it with the pliers and then pull out. I'm just using a t-shirt to make sure that I don't scratch the paint. Then I'm going to remove this one as well. At this point, we've removed the upper one and the lower one. If you're just looking to remove the headlight bulb and replace it, you can just pull that back like that and right up in here, you basically put your hand up in here, and you can feel the bulb. Okay so now, we've removed those two pins. Then we need to remove ... I'm going to turn the light on here, okay I actually loosened up this bolt. Then there's another pin, you can see that right here. Moving up to the top of the car there are two seven-millimeter there. Then the same thing on the other side, there are two seven millimeters' these two. Then up underneath this seven-millimeter and this pin. I didn't show you that one on the other side. You also need to remove this pin too.
See here, you can see I've got my eight screws out and my eight plastic pins. Unplug the fog light. I'm also going to unplug this marker light. See I've changed my angle here and I'm looking at obviously the front of the headlight. Right in here, if you know where every one of them is, which you will once we're done here. The bumper cover goes up and basically clamps onto some teeth. What you need to do is reach in there push those teeth down and now you can see that hole. Here's another one of those teeth. Once you have those out, I think there might be one more here, then boom. You have two on here. You've got to try and be careful not to scratch your paint.
When you're reaching in there you're pressing that tooth, that tooth and that tooth down. We've taken off all of our retainers, we've un-clipped both sides, and believe it or not, the front of it just pulls right off. We can see when removing that bumper cover is not too terribly difficult. Now it's a matter of two bolts, one here, one here, they're 10 millimeter. Loosen them up with my wrench here. I'm just breaking them down pretty easy. Should be able to just give it a pretty good tug and it come out. Then disconnect your headlight bulb, take out your other bulb and they're free. Then we can just sort of reverse the process and get it back in.
Okay, going to use a little fast motion. All I'm doing here is just re-installing the bulbs in the back and then bolting the light to the car. Your new light. This bottom comes off. Like this is the retainer for the bumper guard and then it kind of clips back on. As far as these bolts, they don't have to be incredibly tightened. Tighten really well that a screwdriver can handle. The light's back in. Now you just got to make sure your bumper cover's pretty well centered. Probably some factory guy out there is laughing at me a little bit because there's probably some somewhat easier way to do this.
It goes on. You've got it close. I feel like I do have it close. Make sure you're up and around this clip. Then put in this side. We've got the bumper cover back on. I'm going to reach in. I'm going to reconnect my fog light and reconnect my marker light. Then I'll put the rest of the pushpins back in. You put the pins in first and then you put the bolts on afterwards. Just a quick note while I'm putting these bolts back in. This one here goes onto a little clip. What can happen is, you'll get it on and it will look like the holes not in the right spot but the clip is actually just slipped. You reach in behind there and slide the clip to where you need it to be, then put the bolt in.
We'll go quickly through. Bolt, pushpin, pushpin, up under here. Pushpin, bolt, make sure it's tight. Pushpin, pushpin, probably need a new one there, pushpin, make sure it's tight. Pushpin, pushpin, and bolt. Make sure it's tight. We're good to go. We'll do a quick light test; make sure all the lights work right. That's how you do it.
We hope this helps you out, brought to you by www.1AAuto.com, your source for quality replacement parts and the best service on the Internet. Toll free 888-844-3393. We're the company for you here on the Internet and in person. Thank you.
Shop Products


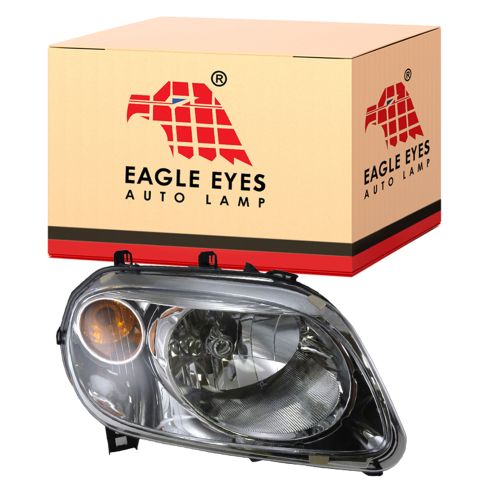
Chevrolet HHR Passenger Side Headlight Assembly Eagle Eyes GM388-B001R
- Features and Benefits
- H13 High / Low Beam

How to Replace Headlight 2002-06 GMC Envoy XL
Learn how to change the headlights or headlight bulbs on your 02-09 GMC Envoy by watching this 1A Auto video

