How to Replace Front Wheel Hub Bearing 2005-10 Pontiac G6 Saturn Aura
Created on: 2013-07-25
Watch this video to find out how to replace the wheel bearing on your Pontiac G6. 1A Auto will guide you step by step.
-
step 1 :Removing the Wheel
- Loosen the lug nut covers with a 19mm socket
- Pull off the center cap by hand
- Loosen the lug nuts with the vehicle on the ground
- Raise the vehicle with a floor jack
- Secure the vehicle on jack stands
- Remove the lug nuts
- Pull off the wheel
- Have an assistant press the brakes as you remove the 35mm axle nut
-
step 2 :Removing the Brake Pads
- Turn the rotor by hand or turn the steering wheel to turn the rotor
- Remove the two 14mm bolts from the brake caliper
- Pull the caliper aside
- Pry the brake pads off with a flat blade screwdriver
-
step 3 :Removing the Brake Rotor
- Remove the two 15mm bolts from the brake caliper bracket
- Pull off the brake caliper bracket
- Pull the rotor off
-
step 4 :Removing the Wheel Hub
- Thread on the hub nut by hand
- Strike the hub nut with a hammer to loosen the axle from the hub
- Remove the three 13mm bolts from the wheel hub
- Strike the wheel hub with a hammer to loosen it
-
step 5 :Installing the New Wheel Hub
- Put the new wheel hub into place while holding the backing plate
- Insert the three 13mm bolts into the wheel hub
- Fasten the hub nut onto the axle
-
step 6 :Reinstalling the Brake Rotor
- Slide the rotor on
- Thread on one lug nut to hold the rotor in place
- Put the bracket back into place
- Check that the caliper bracket slides move smoothly
- Apply grease to the slides if necessary
- Start the two 15mm bolts by hand
- Tighten the 15mm bolts to 35 foot-pounds of torque
-
step 7 :Installing the New Brake Pads
- Apply brake grease to the brake pads
- Install the brake pads into the bracket
- Put the caliper on
- Thread the 14mm bolts by hand
- Tighten the 14mm bolts to 35 foot-pounds
-
step 8 :Reattaching the Wheel
- Slide the wheel into place
- Start the lug nuts by hand
- Tighten the lug nuts preliminarily
- Lower the vehicle to the ground
- Tighten the lug nuts to 100 foot-pounds in a crossing or star pattern
- Tighten the hub nut to 159 foot-pounds
- Reattach the center cap
- Tighten the lug nut covers with a 19mm socket
-
step 9 :Testing the Brakes
- Pump your brakes repeatedly until they feel firm
- Test your brakes at 5 miles per hour and then 10 miles per hour
- Road test the vehicle
Tools needed
-
35mm Socket
13mm Socket
A Piece of Pipe (for leverage)
Torque Wrench
14mm Socket
Hammer
15mm Socket
Jack Stands
19mm Socket
Bearing Grease
Flat Blade Screwdriver
White Grease
Ratchet
Floor Jack
Assistant
Brought to you by 1AAuto.com, your source for quality replacement parts and the best service on the Internet.
Hi, I'm Don from 1A Auto. I hope this how-to video helps you out, and next time you need parts for your vehicle, think of 1AAuto.com. Thanks.
In this video we're going to show you how to replace the front wheel hub on a 2007 Pontiac G6. It's fundamentally the same operation for a 2005 through 2010, and it is the same operation for left to right side. In order to do this procedure you're going to need a jack and jack stands; 35, 19, 15, 14, 13 millimeter sockets; socket wrench and extension; a hammer; screwdriver; and a breaker bar with the pipe for extra leverage if you don't have air tools.
Use a 19 millimeter socket by hand, to remove the plastic lug nut covers. Forward while I take those off. Now, remove the wheel and tire. If you don't have air tools start with the wheel on the ground, loosen the lug nuts, then raise and secure the vehicle, and remove the wheel and tire.
You want to remove the axle nut. I'm using an impact wrench, and what you can do is, if you don't have an impact wrench, have somebody hold the brakes and use a breaker bar and a 35 millimeter socket and probably even a pipe for extra leverage to loosen it up.
By hand turn the hub assembly so that you can gain better access behind it. Use a 14 millimeter socket socket wrench and remove the two bolts that hold the caliper to the caliper bracket. I'll fast forward through removing those two 14 millimeter bolts. Pull the caliper up and off of the caliper bracket and put it up into the side. Take a screwdriver and pry the pad away from the rotor. Do that for both the inner and outer pad.
Using a 15 millimeter socket and socket wrench remove the two bolts that hold the caliper guide to the spindle assembly. I'm going to fast forward as I take out those two 15 millimeter bolts. Pull the caliper bracket up and out. Remove the brake rotor.
Make sure your axle is free from your hub. Put the hub nut on, give it a couple of wraps, watch closely the relationship of the axle to the hub and you should see it move, and then you know it's free. On the inside of the hub and spindle assembly you're going to find three bolts. Locate those too, one on the top and then two on the bottom. Use a 13 millimeters socket, socket wrench, and extension, if you need to, and remove the three bolts. I'm going to fast forward as I remove the front and top one. Then, go ahead and remove the one on the back side. Here I'm using a hammer, where I'm going to tap at the back edge of the wheel hub. Once I've got that, I'll be able to pull it out. Make sure while you're doing that that you maybe give it a little tap or two to the end of that of your axle so that that goes through, but be careful not to damage any of the threads on it. Then once you got that out go ahead and pull it out and take off your backing plate.
I've got the old part, and the new part from 1A Auto and it's a direct replacement fit. You see we put the new hub in place with the backing plate behind it and started the bolts in by hand. Now I'm going to finish tightening those bolts with my socket and socket wrench. Again, I will go ahead and fast forward through that. Now, you're going to want to reinstall the nut on the end of the axle. I'm going to go ahead and use an air gun with this and I'll fast forward.
Our brakes were fine so we're going to reinstall them. But if yours needed to be replaced go ahead and put your new rotor on. Then you can use a lug nut to keep it pressed against the hub while you finish up the brake work. I'm going to reposition the wheel so that I can get access to the back of it. Before I go ahead and put that caliper bracket back on I want to make sure that slides are well greased, so I pull them out with the boot, check to make sure that this grease on them. If there isn't, I will do that. Then, go ahead and push that boot back on to the caliper bracket. I'm going to do that for both of those just to make sure everything is good. Then I'm going to go ahead and put that caliper bracket back with the 15 millimeter bolts. I'm going to fast forward as I reinstall those two 15 millimeter bolts. I'm going to torque the two 15 millimeter bolts to approximately 65 foot-pounds.
Take your pads and lube up with a little brake grease the ends that will get in contact with those calipers slide brackets, and then go ahead and slide them into place. Now, go ahead and take your caliper and slide it over the brake pads and onto the caliper bracket, lining it up with the two slides top and bottom. Reinstall the bolts that hold the caliper and the caliper bracket. I'm going to go ahead and fast forward through that. Torque the two caliper bolts to roughly 35 foot-pounds.
Reinstall the wheel. Put the lug nuts on by hand first, just to make sure you don't cross thread them. Then tighten them preliminarily. I'm going to torque the five lug nuts to roughly 100 foot-pounds and I'm going to do it in a star pattern. Torque that axle nut, the 35 millimeter axle nut, to 159 foot-pounds. Now reinstall your hubcap. I'm going to do that with that 19 millimeter socket. I'm just going to screw them in by hand. Also, you want to make sure that you line up the valve stem with the notch in the hub cap for the valve stem. I'll go ahead and fast forward through that.
Last but not least, whenever you have your brakes apart, make sure you pump the pedal. Make sure it's nice and firm before road testing.
We hope this video helps you out. Brought to you by www.1AAuto.com, your source for quality replacement parts and the best service on the Internet. Please feel free to call us toll-free, 888-844-3393. We're the company that's here for you on the Internet and in person.
Shop Products


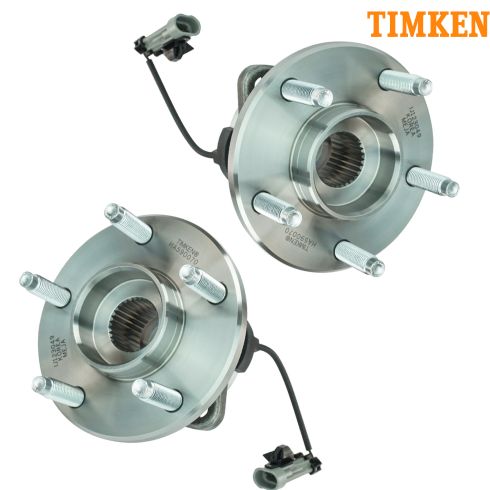
Chevrolet Pontiac Saturn Front Driver & Passenger Side 2 Piece Wheel Bearing & Hub Assembly Set Timken TKSHS00404
- 2 Piece
- (1) Front Driver Side Wheel Bearing & Hub Assembly
- (1) Front Passenger Side Wheel Bearing & Hub Assembly

How to Replace Wheel Bearing Hub Assembly 1999-2005 Pontiac Grand Am
Watch this video to learn how to replace the wheel bearing & hub assembly in this 99-05 Pontiac Grand Am.

