
How to Replace Front Struts 2007-10 Hyundai Elantra
Created on: 2019-06-13
Check out this video showing you how to replace the front struts with shocks on your 07-10 Hyundai Elantra. 1A Auto shows you how step by step!
-
step 1 :Removing the Wheel
- Raise the vehicle with minimal weight on the tire
- Loosen the five 21 mm lug nuts
- Raise and support the vehicle
- Remove the five lug nuts
- Remove the hubcap
- Remove the wheel
-
step 2 :Removing the Front Strut
- Spray the sway bar link nut, strut mounting nuts, and ABS and brake line bracket bolts with rust penetrant
- Remove the 17 mm sway bar link nut
- Remove the sway bar link from the strut
- Remove the two 12 mm nuts securing the ABS and brake line brackets to the strut
- Mark the lower strut through bolts so that they can be returned to their original orientation
- Remove the 19 mm nuts from the 17 mm through bolts
- Hammer the through bolts out if necessary
- Support the wheel knuckle so that it doesn't drop down
- Remove the three 14 mm nuts securing the strut top
- Remove the strut
-
step 3 :Installing the Front Strut
- Install the strut top studs through the mounting holes
- Replace the 14 mm strut top mounting nuts
- Slot the wheel knuckle into the lower strut mount
- Install the two 19 mm through bolts
- Tighten the 19 mm nuts on the 17 mm bolts
- Torque the 19 mm nuts to 116 ft-lb
- Tighten the 12 mm bolts to secure the ABS and brake line brackets to the strut
- Insert the sway bar link stud through the strut mount
- Replace the 17 mm sway bar link nut
- After replacing the wheel and lowering the vehicle, torque the top 14 mm nuts to 43 ft-lb
-
step 4 :Installing the Wheel
- Slide the wheel onto the wheel studs
- Replace the hubcap
- Replace and tighten the 21 mm lug nuts by hand
- Lower the vehicle with minimal weight on the wheel
- Torque the lug nuts to 80 ft-lb in a star pattern
- Lower the vehicle completely
Tools needed
-
21mm Socket
12mm Socket
Hammer
Socket Extensions
Torque Wrench
14mm Socket
17mm Wrench
17mm Socket
19mm Socket
Ratchet
1/2 Inch Breaker Bar
Hey friends, it's Len here at 1A Auto. Today I'm working on a 2007 Hyundai Elantra. I'm going to be showing you how to do some front struts. Going to be a very simple job. I want to be the guy who shows you how to do it. If you need these parts, or any other parts, you could always check us out at 1aauto.com. Thanks.
So right up here, on top of the strut mount or strut cap here, we have three nuts with studs that come up from the strut itself. Okay? That's right here. So I just want to point those out. Now what we're going to do is we're going to raise the vehicle and we're going to support it safely and then we're going to take off the wheel and we'll be able to access the rest of it from underneath.
Okay. So we're going to take off our five lug nuts here with a 21 millimeter socket. There we are. Now we're going to continue taking off the other four. This one here. Take off our last lug nut. Hubcap.
I'm going to use some Penetrant Spray. Going to spray right here, right here, this little bolt right there, and then the other big bolt here. And then there's one right back here which is just a bracket. So pretty much everything that I want to take off of the vehicle to do the strut I'm going to spray with Penetrant. We'll get that one, this one, this one, this one, that one. So now we're going to remove this right here. This is a 17 millimeter nut, but to hold this stud right here we're going to use some locking pliers. You can use whatever you happen to have. I'm just going to go from the backside, try not to crimp down the boot if you're replacing the sway bar link, which is always a good idea. You don't necessarily have to worry about the boot so much. If you're not, well, be careful for the boot, okay?
So I'm just going to try to grab on to this as tight as I can. See if that will work. So I've got my locking pliers on here. I'm going to go with my 17 on my half-inch gun. I'm going to just try to blast this off real quick. There we are. See if I can get the nut off. There it is. It's nice and warm. I'm going to put it down real quick. Get this out of the strut. Perfect. Let's move along.
12 millimeter right here. 12 millimeter right here. Three-eighths gun. Blast it off. Grab the next one. It's off nice and easy. There's our two bolts.
So now it's time to take off these nuts right here. There's one right here, one down lower. 19 millimeter and we're going to use a 17 millimeter wrench on the other side to hold the bolts. Okay? It's always a good idea to mark the bolts where they are so I'm just going to grab a crayon real quick. I should have one right here. I'm going to come around. I'm just going to mark, just a little mark on the bolt and on to the strut just so I can have kind of a guesstimate of which direction the bolts were just in case one of these is a cam adjustment. Just like that. Cool.
All right so now let's go ahead and take these nuts off. 17, 19. Here we go. Safety glasses. These are stuck in there pretty good. So we're going to take a little bit of Penetrant, I'm going to spray it in there real quick and then I'll show you how to get those bolts out. I'm just going to go ahead and use one of the nuts that we just removed from those bolts. I'm going to start it on one of them, you can pick whichever one you want to start with. Doesn't matter to me. I'm going to get it so it's just barely lined up flat with the bolt. We've got out ABS wire out the way. We want to make sure we don't bang that. I'm going to use my big fabulous hammer, just going to try to give this a couple bonks. Make sure out ABS wire stays out of the way. See if it's coming free. It is. Love it. Let's go some more. Perfect.
We'll take this nut off of here, we'll put it on this one and we're going to do the same thing. So let's just try to get this stuff out of the way the best we can here. We're going to go about doing the same process as we just did. Just pretty much giving it a couple love taps, right? A couple bonks. Just going to take this and you can use whatever you've got, wire ties or whatever. Essentially all you want to do is make sur that when you're hitting this with the hammer you're not going to bonk any of these. You don't want to mess up your brake hose or your ABS wire. Hammer time. Boo-ya. Get the nut off of here. We'll finish driving those bolts out.
So let's go ahead and drive these bolts the rest of the way out, okay? I'm going to use my big fabulous hammer. That's one. Two. We're just going to go ahead and separate these, just like that. Let's get this back off of here. Cool beans. Okay. Now we're just going to support this so it can't go very far. Use whatever you've got, whatever you've got and you can use essentially. But basically what we need to do is just make this so it can't come very far down because you don't want to separate your axle joints, right? It's going to cost you more money and who wants to spend more money that they don't have to? So let's figure out how to do that real quick and we'll move along.
All right. So we've got this so it's supported, it's not going to fall off, come falling down, pull on the axle or anything. Let's bring the vehicle back down and we'll remove those three upper strut nuts and this should be ready to come on out. So here we go. We're going to take off these 14 millimeter nuts. I'm going to use my 14 millimeter socket, three-eighths airgun. You can use whatever you've got, but they're 14s. I'm going to leave this one on a little bit. I'll fully remove that one. Put it down on the floor so I can find it later. Take this one off so I can show you it.
Now I'm going to come under the vehicle with one arm, I'm going to hold up the strut. Take off this nut and put it aside with the other one that I do know where is. And now I'm just going to lower the strut out. And there we go. Easy peasy.
So here we go friends. A quick product comparison for you. We have our original strut out of our 2007 Hyundai Elantra that we're working on and we have our brand new quality 1A Auto part here. I just want to show you the strut assembly comes fully assembled, obviously. It's got the spring. It's got your strut mount up here. Comes with the mounting nuts, that's always good because they're locking nuts. You want to make sure you've got those. It's got everything you need in here. Got your little jounce bumper, you know your dust boot and everything. It literally has everything that you're going to need. So, this is a quality part. I don't see any reason why it wouldn't be great to put into the vehicle. So let's just go ahead and do it. So if you need this, or any other part, you can always check us out at 1aauto.com.
So you'll notice up inside your strut mount up here, or the area where your strut mounts into, you've got a long area between here and here and it's much shorter between here and here, and there and there. Right? So you got a long area and two short areas. So you want to make sure that you get your strut lined up right. This right here can spin, it's supposed to, so that's good. We've got our long area here. Short. Short. There we go. So let's try it.
Just going to come in from underneath. Should be pretty easy here. See if I can get it. I spun it. I didn't get ... Cool. Got our brand new nuts. See if I can get this one on here. Awesome. So as you can tell our struts and knuckle mounting bolts are pretty rusted. I'm just going to go ahead and clean these up real quick and then we'll go ahead and put them in. So I've got our bolts nice and cleaned up. I'm just going to use a little bit of Never-Seez up along the top up here. This is just going to help get these bolts out if I ever need to do it again. Or anybody needs to do it again. I don't need to get it on the threads. You can use a little bit of threadlocker around the threads if you'd like. That's up to you, it's your prerogative.
Now what we're going to do is we're going to take off our little anchoring doodad here. Put that down for now. I'm going to try to get this lined up. See if I can get it here. Almost. These come in from the rear to the front. If I can get this in. There's one. Here we go, get that in. Slide in here. Like I said, you could use a little bit of threadlocker if you want to, or not if you don't. There's a torque specification for these. I'll let you know that in one second.
So here we go. I've got my 17, I'm going to hold it on the bolt side. Back here is a 19 millimeter. The torque specification for this is only 116 foot pounds. Okay? So if you're going to use a half-inch airgun, you know you can bottom it out and everything, but I wouldn't worry so much about really reefing on it. We're going to try to torque it down, okay? Now we'll just go ahead and torque them real quick. So I'm going to use my 17 here. I'm going to go ahead and torque down these nuts to 116 foot pounds. Just double check it.
Got our bolts. Both the same. Okay. 12 millimeter. There we are. Nice and tight. Do our sway bar link. That in there. Locking pliers. 17 millimeter. I'm just going to tighten this up. There we are. Get our pliers off of here. We got everything nice and tight down here, now we're just going to get the wheel on here and then we're going to bring the vehicle down so the vehicle's weight is on here. And then we'll go ahead and torque down the strut mount.
Time to get the wheel back up on here. Just going to go ahead and lift it up. Center cover. Hubcap. Whatever you want to call it. We're just going to bottom these out with our 21 millimeter socket and our long ratchet. Once they're all bottomed out we'll bring it down on the ground and torque them up. So now we're going to go ahead and torque these down with our 21 millimeter to 80 foot pounds. We're going to do a star pattern. Okay? One here, here, here, here, here. I'm just go around.
Okay, so here we go. We're going to just go ahead and bottom these out right now. I'm using a 15 millimeter socket. Going to torque them down after so you don't have to go too crazy. All right let's torque them. You're going to go 43 foot pounds with our 15 millimeter socket. Okay. You could just double check them all again. Get on there. There we are. We did not touch this nut. That's already preset. Got out little cover. Bonk it on there. Bonk, bonk. There we are.
Thanks for watching. Visit 1aauto.com for quality auto parts shipped to your door. The place for DIY auto repair. And if you enjoy this video, please click the subscribe button.
Shop Products
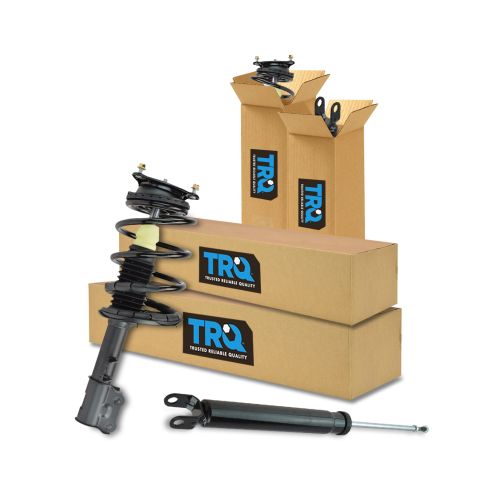
2007-10 Hyundai Elantra Front & Rear 4 Piece Complete Strut Assembly & Shock Absorber Kit TRQ SKA61005
- 4 Piece
- (2) Front Strut & Spring Assemblies
- (2) Rear Shock Absorbers

How to Replace Front Strut Assembly 2007-13 Chevy Suburban
If the front strut assembly is worn or failing and needs to be replaced, check out this how-to video and follow the steps to DIY

