
How to Replace Front Differential Shift Cable 1991-2004 GMC Sonoma
Created on: 2012-02-28
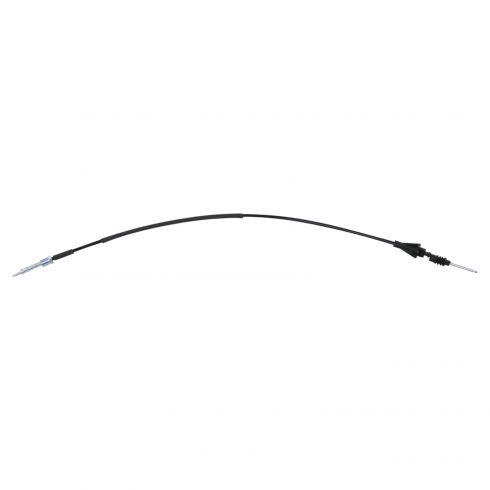
Check out this video to learn how to replace a broken, disengaged, defective or frayed front differential shift cable in a 91-04 GMC Sonoma.
-
step 1 :Removing the Battery
- Disconnect the negative battery cable with an 8mm wrench
- Disconnect the positive battery cable with an 8mm wrench
- Remove the 13mm battery mounting bolt
- Remove the battery mount
- Lift the battery up and out
- Remove the 13mm bolts that connect the battery tray to the radiator support
- Pull out the battery tray
-
step 2 :Removing the Front Axle Cable
- Spray the bottom end of the cable with penetrating oil
- Unhook the top end of the cable by flipping up the wire hook
- Disconnect the cable
- Remove the two 13mm bolts holding the bracket to the wheel well panel
- Clamp the cable with a pair of pliers and force it through
- Remove the 13mm bolt from the clip holding the axle cable
- Remove the front axle cable with a tube wrench or 16mm wrench
- Remove the three 15mm bolts from the axle cable housing
- Push down the clip and remove the axle cable
-
step 3 :Installing the Front Axle Cable
- Place the clamp on the axle cable
- Insert the cable into place
- Make sure the cable is pushed in and down
- Insert the axle cable into the axle cable housing twisting it in
- Insert the axle cable housing pushing the cable in
- Insert and tighten the three 13mm bolts to 25 ft/lbs
- Tighten the 16mm fitting on the cable
- Insert and tighten the 13mm bolts into the wheel well panel
- Insert the cable actuator
- Push the actuator into the bracket and pry up the ears with a flat blade screwdriver
-
step 4 :Reattaching the Battery
- Pull the clips up on the headlight with pliers
- Remove the headlight
- Retrieve the battery tray clip with an extendable magnet
- Insert the headlight into place
- Re-clip the headlight
- Push in the battery tray clip
- Put the tray clip into place
- Put the battery tray into place, front first
- Then slide the rear bolt hole over the bolt
- Insert the two bolts into the radiator support
- Putt the battery on the tray
- Put the battery mount in place
- Tighten the 13mm battery mounting bolt
- Reconnect the positive battery cable
- Reconnect the negative battery cable
Tools needed
-
13mm Socket
Socket Extensions
Flat Blade Screwdriver
Torque Wrench
16mm Wrench
15mm Socket
Rust Penetrant
8mm Wrench
Ratchet
Magnet - Extendable
Needle nose pliers
Brought to you by 1AAuto.com, your source for quality replacement parts and the best service on the Internet.
Hi, I'm Mike from 1A Auto. I hope this how-to video helps you out, and next time you need parts for your vehicle, think of 1AAuto.com. Thanks.
In this video, we're going to show you how to replace the four wheel drive, the front axle actuating cable. A lot of times these will corrode and rust and bind up and it'll cause your front axle not to engage correctly. The tools you'll need for this job are an 8mm wrench or a socket and ratchets, a 13mm and 15mm socket with ratchet and extension, some penetrating oil, 16mm wrench, some pliers, and a small flat blade screwdriver.
Okay, take an 8mm wrench or socket and ratchet and disconnect your negative battery cable and your positive battery cable. Speed up here as I do that. I disconnect them and I pull the cable right over here. I'll use a 13mm socket with a ratchet extension and remove this bolt and this clamp. Speed up again as I remove that battery mounting bolt and the mount itself, and this is right here and get your battery right out. Okay, you'll want to remove your battery tray. You'll want to remove two bolts into the radiation support, one there and then one right here. Those are 13 mm. Speed up again as I remove those two bolts. Okay, now pull the back of the tray up and off that bolt. It came right out.
Now, right here is the top end of your cable. You should be able to take this and squeeze it and that should move pretty easily. Okay, sometimes these cables will get frozen up and they won't move if you don't use them very often. The other end of our cable comes down here. I'm going to use some penetrating oil to coat that up real good and let that sit while I take the top apart. To unhook the cable, all you want to do is pull up on this little clip. It's like a wire clip. Pull it up and out. Then you can see that the cable will come right out. Here in your passenger's wheel wall I've turned the wheel all the way to the left. There's two bolts that hold that bracket. We'll remove those.
We'll obviously speed it up again as we just removed those two bolts and we're just removing that bracket. It makes it a lot easier to get the cable out of it. Now I can bring this right up. I'll need a pair of pliers and squeeze these teeth right here. Force the cable through. Right down here, so you can see the cable goes through a little clip. It's a 13 mm bolt. I'm going to remove that. Fast forward here as I use a socket, ratchet and a large extension to remove that bolt. If you have a tube wrench that's the best tool for the job, otherwise a 16 mm and a little bit of force, and you should be able to break that free. Then you want to just kind of pull this off until it's going easily.
With a 15 mm socket, I'm going to cheat here a little bit. Using an air ratchet, remove these three bolts. As usual we'll speed up here as we just remove those bolts. Now you pull this out. Kind of reach, you'll be able to feel the lock right here, pull it down with your fingernail and then it comes apart. Now we can take the cable out. There's your cable out of the vehicle. Then we try and pull this and push it. It's pretty free, but it is a little difficult. That's what happens with these a lot. They bind up and they just get corroded inside.
I'll take my new cable and I put my little clamp on it. Let's do it right down here. Put the clamp through there. There's this one post you have to pull up out of the way. Put that clamp in place. Bolts are all in. Make sure that your cable is basically pushed down in like that, under here, taking it through and pretty much get it kind of finger tight in there.
At this end make sure your cable goes in there. I'll speed it up here as we start the bolts in. I always start all three of them first. Then I kind of get them snug and then tighten them up afterwards. They only need to be tightened to about 25 foot-pounds. They do not need to be extremely tight. Make sure you tighten up the 16mm fitting on the cable. Here I'm fast forwarding through.
I'm holding the actuator and bracket in my other hand that you can't see and then just threading the bolts in from the wheel well side and then tightening them up nice and snug. Again, they don't have to be extremely tight. Now take this, see it still pulls out, push it in so it locks in place. Now you pull on that axle actuator. Make sure we have our clip in place for this actuator here. Put the cable through in there. Make sure the cable goes in there. Actually push it in, so that they're moving as one. Push the cable into the bracket here. Use a small screwdriver. Pry up those ears. Make sure it's locked in place.
Before you go and put your battery tray in, what happens a lot is the clip gets knocked off of here. You pull the clip up on your headlight, pull your headlight out and usually that clip falls right down in here. Here I'm using a little extendable magnet to fish the clip out. Now put our light back in place. This clip goes right back on here like that.
Now I'm going to put the battery tray in. You want to put the front down in first, then the back down over the bolt. Put the two bolts into the radiator support and then you'll put the battery back down in. Put the mount in and then the nut and you should be all finished. Then reconnect your battery. You want to connect the positive cable first and then the negative cable and you should be all set to go.
We hope this video helps you out. Brought to you by www.1AAuto.com, your source for quality replacement parts and the best service on the Internet. Please feel free to call us toll-free, 888-844-3393. We're the company that's here for you on the Internet and in person.
Shop Products

How to Replace Transfer Case Shift Motor 1998-2012 Ford Ranger
This video shows you how to replace the transfer case shift motor on your 98-12 Ford Ranger with 4 wheel drive.

