
How to Replace Door Lock Actuator 1998-2001 Lincoln Town Car
Created on: 2011-05-11
How to repair, replace, fix, change or install a broken or snapped rear power door lock actuator on 1998-2004 Lincoln Town Car models.
-
step 1 :Removing the Door Panel
- Pry up the switch panel with a flat blade screwdriver
- Disconnect the window switch harness
- Remove the two T20 screws from the door pull
- Remove the door pull
- Remove the Phillips head screws in the door pull slots
- Remove the Phillips head screw from the bottom of the door panel
- Twist off the lock knob
- Pry out the door panel with a door panel clip tool or putty knife
- Disconnect the courtesy light harness
- Carefully peel off the water shield
-
step 2 :Removing the Door Lock Actuator
- Hit in the rivet with a hammer and punch
- Drill the rivet with a 5/16 or 3/8 drill bit
- Disconnect the actuator wiring harness with a flat blade screwdriver
- Remove the actuator and brake the plastic bracket off
- Remove the lock rod with the actuator
-
step 3 :Preparing the New Lock Actuator
- Pry off the vise with a flat blade screwdriver
- Remove the rubber boot
- Place the rubber boot on
- Clip the vise in until it clicks
- Install the new lock rod
-
step 4 :Installing the New Lock Actuator
- Remove the two upper lock screws with a Phillips bit from the lock latch
- Loosen the bottom lock screw with a Phillips bit
- Push the lock latch in and tilt it into the door
- Place the lock rod into the yellow clip on the lock latch
- Tighten and bolt the three Phillips head into the lock latch
- Snap the rod into the actuator and lock rod in the door
- Place the 10mm nut and bolt into the actuator and the side of the door
- Tighten the 10mm bolt
- Connect the actuator wiring harness
- Test the lock
-
step 5 :Reinstalling the Door Panel
- Put the water shield into place
- Connect the courtesy light harness
- Lift the door panel into place
- Push in the door panel clips
- Insert the Phillips head screw from the bottom of the door panel
- Insert the Phillips head screws in the door pull slots
- Connect the door pull
- Insert the two T20 screws from the door pull
- Connect the window switch harness
- Push in the switch panel
- Twist on the lock knob
Tools needed
-
Hammer
Putty Knife
10mm Wrench
5/16 Inch Drill Bit
Flat Blade Screwdriver
T20 Driver
Phillips Head Screwdriver
Phillips Bit in a Ratchet
Center Punch
Drill
3/8 Inch Drill Bit
10mm Socket
Ratchet
Brought to you by 1AAuto.com, your source for quality replacement parts and the best service on the Internet.
Hi, I'm Mike Green. I'm one of the owners of 1A Auto. I want to help you save time and money repairing or maintaining your vehicle. I'm going to use my 20-plus years experience restoring and repairing cars and trucks like this to show you the correct way to install parts from 1AAuto.com. The right parts installed correctly: that's going to save you time and money. Thank you and enjoy the video.
In this video, we're going to show you how to remove and replace a rear door lock actuator on this 2000 Lincoln Town Car. It's the same as any '99 to '04 Town Car. Tools you'll need: a flat blade screwdriver, T20 Torx driver, and Phillips screwdriver. Those tools could vary depending on who has taken your door panel apart and what they've used to put it back together. You also need a putty knife or door panel clip tool, hammer and punch, a drill with a 5/16 or 3/8 drill bit, and a 10mm wrench with a socket and ratchet. And again, that could be changed depending on what nut and bolt size you use to re-secure it.
Use a regular screwdriver and pry up on the front of this panel here. That should come up and forward. Mine's been broken. Underneath, there is a little tab that you press to disconnect. Now you need a T20 Torx bit, and there are screws up underneath here. The screws in this were T20, although your car could vary. It could have Phillips head screws in it. Then this pulls out. Then there are Phillips head screws in behind here, and a Phillips head screw in behind here. Then right in here, you'll see a little slot in the door panel carpet, and there should be a Phillips head screw right in there. It might be easy just to remove your lock knob. Use just a household putty knife. Put it in behind here, go until it can't go, and pop that. Out comes that frog.
That's interesting, must have been some passenger's toy. Do the same thing right here in the front. There are some more clips in the middle. The door panel comes off, and there is a little harness here that you just pry up and disconnect. Then there's your panel. You can see here, this car's already had some work done to it. Somebody's already cut the water shield down, which is fine.
Your door lock actuator is riveted on right here. Here's the rivet. You want a punch and a hammer. Punch right in the center of the rivet. Now, I've got a drill with a 5/16 drill bit. I'm going to slowly drill in. I'm going to fast-forward here. You want to drill in fairly slowly. Just light pressure, and just chip away at the rivet until it comes out. You can see the head of the rivet came off. I reach in here and pull the actuator off. Here's our connector. Pry with a screwdriver between the gray part of the connector and the actuator. Pull the connector off.
Now, looking in, you can see there's your actuator. There's a plastic part. You basically just want to break that right off. There's your actuator out. Then you need to reach up in here. I just bent the rod and pulled it out. With the original in our vise here, just take a screwdriver and pull that off. Pull this rubber boot off. You can see at which location it was on. Take our new one. Little bit different shape, but it's going to serve the same purpose.
Put it in a vise. If you want, you can put the rubber boot on. It's not necessary. Tighten it up a little bit more. Basically, you just want to, I've got it onto that right there. Just pull it. Pry it with my screwdriver a little bit. There it is. I'm going to just pry this piece of rivet out. Here's the old rod. I've got a few different rods for my new one, because it can fit a few different vehicles. Just choose the one that most closely resembles the length.
To reinstall, you're going to want to remove your two upper lock screws. One's already out. I'll remove this one. You're probably going to want a bit like this. It's a Phillips bit on a ratchet handle, because it usually takes some torque to get these loose. I'm just going to loosen up the bottom one and take the top one all the way out. You want to remove the top two totally, then you're going to want to push your latch mechanism in and tilt it pretty much like that. It's going to be pretty difficult to film here. Okay, I really was not able to film this, but that arrow right there is pointing to the clip, or the hole where you're trying to put the lock rod into, so you want to tilt the lock mechanism towards the outside of the door so that you're able to get the lock rod in there.
Going to reach back, and I have to position this in there, put it into the hole, and then twist it in. When I tilt my lock mechanism like this, it makes it a lot easier to do that. What I'm going to do is follow this upper rod. If you follow this upper rod right in, you can then feel the location where it's supposed to go. Whoops. Okay, you want to put it in like this and tilt it around. Follow it. Let's see here. Find the hole where it goes. When you find the hole you can move it up and down and you know that you have the right hole because it locks and unlocks the door. Put it in and tilt it. Now, just to show you, there's the new rod right there. Now, I'm going to bolt this back in. We'll fast-forward through bolting that back in and tightening up that lock mechanism.
My new actuator is going to go in like that. Here's just another rod. Obviously, the other one's already in the door. I'm just going to put it in there, and the rod's going to go in that hole and it's going to snap together. I'm going to put it in there and find my rod. I can actually see everything right down through this hole. Get it into place and it snaps together. Now I have a 12mm long bolt and a lock nut. Bring my actuator up and put that bolt in. That's the bolt through the door. Put the lock nut on with a 10mm socket and ratchet and my 10mm wrench. Take a second to kind of find it. Tighten it up nice and firm.
Last, but not least, take our lead and put it right in there. Now we'll run a quick test here. It appears that everything's working great. Just for the sake of keeping the video somewhat short, I'm going to fast-forward through putting the door panel back together. If you wanted to see this in regular speed, just check out our other videos for the Lincoln Town Car rear door panel removal and installation.
We hope this video helps you out. Brought to you by www.1AAuto.com, your source for quality replacement parts and the best service on the Internet. Please feel free to call us toll-free, 888-844-3393. We're the company that's here for you on the Internet and in person.

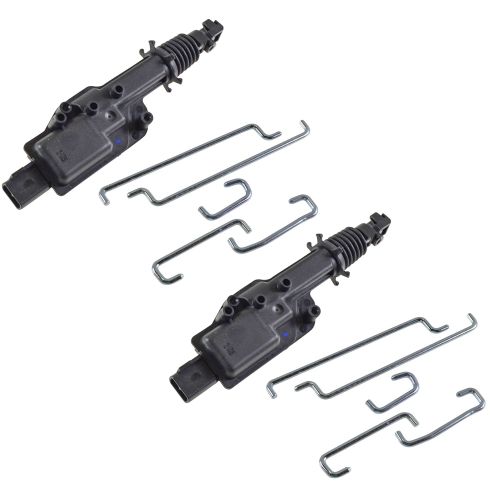
Ford Lincoln Mercury Door Lock Actuator 2 Piece Set DIY Solutions BSS00194
- 2 Piece Set

How to Replace Door Lock Actuator 1997-2005 Chevy Venture
This video will show you how to replace the door lock actuator on your 97-05 Chevy Venture or Pontiac Montana. You can do it yourself and 1A Auto shows how

