
How To Replace Door Lock Actuator 2004-08 Ford F-150
Created on: 2010-05-07
Check out this video on how to replace the door lock actuator on your 04-08 Ford F-150. If your power lock stopped working, this is one potential fix.
-
step 1 :Remove the door panel
- For more detailed instructions, see the 2006 Ford F150 door panel video
-
step 2 :Remove the door lock actuator
- Carefully peel back the water shield
- Remove the two plugs covering two 10 mm bolts in the side of the door
- Remove the bolts with your socket and ratchet
- Use your socket and ratchet to remove the nuts securing the door handle.
- Pull out the door handle, twisting it out and off the lock rod.
- Remove the T27 screws on the side of the door to uninstall the door lock actuator.
- Unbolt the window track to get it out of the way and unclip the door lock actuator cable.
- Pry off the rivet securing the lock rod and pull the actuator out.
- Unplug the wiring harness and unclip the door lock actuator from the assembly.
-
step 3 :Install the new door lock actuator
- Clip the new actuator to the door lock assembly and plug in the wiring harness.
- Thread the door lock mechanism back into the door and clip the lock rods in.
- Clip in the cable and the wiring harness.
- Bolt everything back in with your T27 Torx driver
- Bolt the door handle back in and plug in the little rubber seals in the side of the door.
- Replace the water shield and reinstall the door panel.
- For more detailed instructions on door panel re-installation, see our other videos.
Tools needed
-
Socket Extensions
Flat Blade Screwdriver
T27 Torx Driver
Putty Knife
5mm Socket
6mm Socket
8mm Socket
7mm Socket
9mm Socket
10mm Socket
Ratchet
Cloth Rags
Brought to you by 1AAuto.com, your source for quality replacement parts and the best service on the internet. Hi, I'm Mike Green. I'm one of the owners of 1AAuto. I want to help you save time and money repairing and maintaining your vehicle. I'm going to use my 20+ years experience restoring and repairing cars and trucks like this to show you the correct way to install parts from 1AAuto.com. The right parts installed correctly, that's going to save you time and money. Thank you and enjoy the video.
In this video, we'll be showing you how to remove and replace the door-lock actuator in this 2006 F-150, same as any '04 to '06 F-150. Tools you'll need are various metric sockets, and you can use some standard socket substitutions, a small flat-blade screwdriver, putty knife, and a rag to protect your paint, and a T-27 Torx driver. Okay, we're going to kind of fast-forward through removing the door panel. You can probably pick up enough here to get the job done, but we do have this in regular speed on our other videos. So just bear with this. You can follow along. Bear with it for probably another 20, 25 seconds and get to the actuator.
Okay, to access the inside of the door panel, what you want to do is carefully remove your plastic. Okay. It's just stuck on by a bunch of sticky stuff, and just pull it carefully. You don't want to rip this at all because you want to be able to install it just the way it was. Okay, so I removed the plastic, and then I laid it out all nice and flat because we don't want it getting all stuck to itself. Okay, to access your exterior door handle, there's two bolts right here that are covered by little plugs. I've removed one. Okay. What I recommend, to do as little damage as possible to these plugs, is work the screwdriver underneath, then into the door, okay, and then pop it, so that you can remove that 10-millimeter screw.
Okay. Now I apologize. I didn't get a good shot of these two more 10-millimeter bolts holding the front of the door handle on. Normally, I'd take a shot of them, but I kind of hit the wrong button. So you remove those 10-millimeter nuts and go from there. Then you can reach right up in there and take the nuts off the rest of the way. You don't drop them. Okay. So now once your door handle is unbolted, and notice I don't have the door closed here, you pull out the front of it and you slide it forward a little bit and then you twist it. Okay. You're also kind of pushing down on it very carefully, okay, and it actually comes right out. Three T-27 torque screws, I'm going to remove those.
To get the lock mechanism out, first you're going to want to take off this window guide right here. It's a little 10-millimeter screw. Okay. Now you're going to remove this clip. I just stick my finger back in there, push down on the clip, and the top side comes out. Okay. Then I push up and that comes out, and it's just a little arrow clip. Okay, and then you want to push this clip out. I'm going to use a screwdriver. You can kind of push on it and push the ribs through. And then this is your lock bar. It comes down. What you actually want to do is pull your lock mechanism up clear of the window right next to it, and then right out.
Okay. To replace your door-lock actuator, okay, you unplug the harness there. Okay, and then it's actually just kind of clipped on, so you put your screwdriver right in here. Okay, and then pull the actuator, until you get it to move a little bit, right up out. Okay. So I reinstall the actuator. Let's see. Just make sure you have your lock rod pointing up so that this doesn't get in the way of where the pin goes. And it just kind of slides back on there into place. Make sure that the pin goes into the mechanism and it clicks in, and then make sure you securely attach your harness.
To reinstall, put the rods in put everything through. Make sure this is up and through, and make sure your door-handle rod is up. Clip that into place. Have one of your T-27 screws ready. Get things into place. Start one of these screws to hold it. Okay, again, make sure this lock-rod is clipped in correctly. Okay, put the cable back, and re-clip your harness here Okay, then tighten them up. Okay, and then to put it back in, here's your rod here. Pull on it. Bring it up, and you can actually go this way. Get that in underneath. Okay. Lift it back. Push it back and then in. Then I'll do a quick test. Okay. And then I'll just bolt it back in. Okay, and after you've bolted the door handle back in, tighten it up. Just make sure you put your little plugs back in.
Okay, so now we're ready to put the water shield back on. Okay. What we want to do is there are a few reference points here, and we want to make sure we line up those reference points and basically stick it to the same spot. Okay. From here on out, we're going to be in fast motion. Actually, we're going to kind of cut it off just to stay within the YouTube 10 minutes, but it's basically putting the water shield back on and then the door panel. If you want to see this, putting the door panel on in regular motion and the complete thing, just check out our other YouTube videos. But if you've taken it apart, you can probably get it back together. We hope this helps you out. Brought to you by www.1AAuto.com, your choice for quality replacement parts and the best service on the internet. Please feel free to call us toll-free, 888-844-3393. We're the company that serves you on the internet and in person.
Shop Products


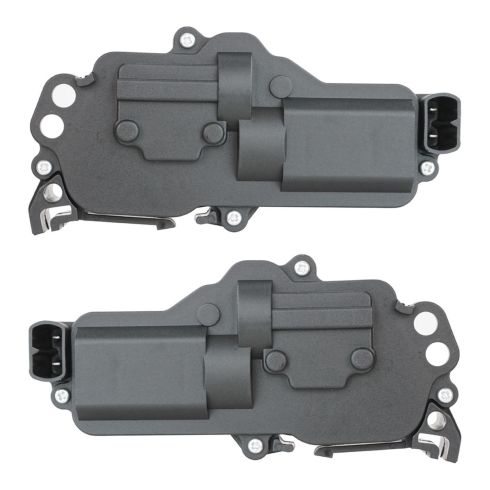
Ford Lincoln Mercury Door Lock Actuator 2 Piece Set Dorman OE Solutions DMDRK00006
- 2 Piece Set

How to Replace Door Lock Actuator 1998-2001 Lincoln Town Car
How to repair, replace, fix, change or install a broken or snapped rear power door lock actuator on 1998-2004 Lincoln Town Car models.

