
How to Replace Brake Drums 2009-13 Chevy Silverado 1500 Truck
Created on: 2013-10-03
Learn how to change drum brakes. The experts at 1A Auto show you how to replace worn or rusty rear brakes on your 07-13 Chevy Silverado or GMC Sierra.
-
step 1 :Removing the Wheel
- Pry off the center cap with a flat blade screwdriver
- Loosen the lug nuts with the vehicle on the ground
- Raise the vehicle with a floor jack
- Secure the vehicle on jack stands
- Remove the lug nuts
- Pull off the wheel
-
step 2 :Removing the Brake Drum
- Pry off the locking rings with needle nose pliers or a flat blade screwdriver
- Tighten an M10 bolt into the drum to pull it off
- Pull off the drum
-
step 3 :Inspecting the Brakes
- Check the thickness of the brake shoes
- Check for gouges on the drum
-
step 4 :Removing the Brake Shoes
- Remove the brake shoe springs with the vise grip pliers
- Hold the front retaining pin in place by hand
- Twist off the front retaining spring with the vise grip pliers
- Remove the brake adjuster
- Hold the rear retaining pin in place by hand
- Twist off the rear retaining spring with the vise grip pliers
- Remove the rear brake shoe
- Pry the emergency brake cable out of the front brake shoe
-
step 5 :Installing the New Brake Shoes
- Pry the emergency brake cable into the front brake shoe slot with vise grip pliers
- Clean the backing plate friction points with a wire brush
- Apply white grease to the friction points
- Lift the front brake shoe into place
- Thread the retaining pin into the brake shoe
- Twist on the retaining spring with vise grip pliers
- Put the rear brake shoe into place
- Thread the retaining pin into the brake shoe
- Twist on the retaining spring with vise grip pliers
- Put the adjuster into place
- Push the brake shoes together by hand
- Put the adjuster clip into place
- Hook the springs on with the vise grip pliers
-
step 6 :Installing the New Brake Drum
- Try to slide the brake drum on
- If necessary turn the adjuster wheel with a flat blade screwdriver
- The brake rotor should slide on with some resistance
-
step 7 :Reattaching the Wheel
- Slide the wheel into place
- Start the lug nuts by hand
- Tighten the lug nuts preliminarily
- Lower the vehicle to the ground
- Tighten the lug nuts to 100 foot-pounds in a crossing or star pattern
- Reattach the center cap
-
step 8 :Testing the Brakes
- Pump your brakes repeatedly until they feel firm
- Test your brakes at 5 miles per hour and then 10 miles per hour
- Road test the vehicle
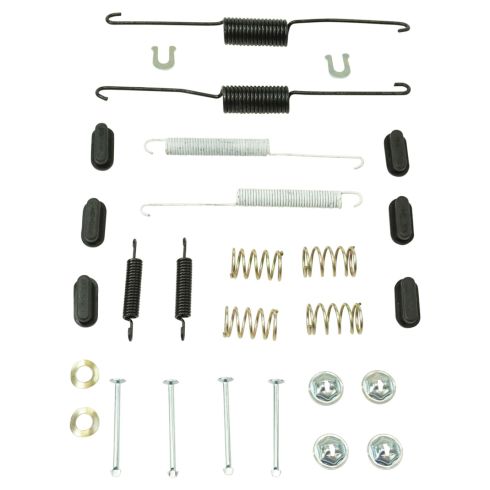
Tools needed
-
Flat Blade Screwdriver
Torque Wrench
Jack Stands
White Grease
Lug Wrench
Ratchet
Wire Brush
Floor Jack
Needle nose pliers
M10 x 7cm bolts
22mm Socket
Brought to you by 1AAuto.com, your source for quality replacement parts and the best service on the Internet.
Hi, I'm Mike from 1A Auto. I hope this how-to video helps you out, and next time you need parts for your vehicle, think of 1AAuto.com. Thanks.
In this video, we're going to show you how to replace the rear drum brakes on this 2011 Chevy Silverado 1500. It's the same process on the Sierra 1500 from the same year. We show you how to do this on the passenger side, but you're going to want to do it on the driver's side as well. It's pretty much the same process.
The tools you'll need for this is a jack and jack stands, 22 millimeter socket and ratchet, flat blade screw driver, two vise grip pliers, wire brush, white grease and a torque wrench.
Start out by carefully removing the center cap with a flat blade screw driver. If you don't have the benefit of air tools, start with the vehicle on the ground. Loosen the lug nuts. Then raise, support and secure the vehicle. Then remove the lug nuts, wheel and tire.
With the wheel off, there's one or two of these locking rings. Use pliers or a flat blade screw driver. Twist them. Usually you can break them off and pull them off. If you want, you can try and get them off all the way and then reuse them. If the drum doesn't come off, you can use a long bolt, M10 in size. You can see that there are two holes. Just put the bolt into the drum and tighten it up. It will help you pull the drum right off.
With the drum off, you can check the condition of the shoes. See our rear one's in pretty good shape. Same with our front ones: in pretty good shape. Also, check the condition of the drum itself. Just run your finger on it. Make sure that there are no deep grooves or anything like that.
There are brake tools specifically for this purpose but we're just using a pair of vise grips. Remove the spring. We're going to remove this spring in here. Also, that bracket's going to come out at the same time. Then there's a spring down below to remove. Basically, you just pull the springs forward or backward and pull them out. Using the vise grip pliers, you want to twist these retaining springs. You want to hold the pin on the back of the brakes. Then you can just pull that pin right out. You can pull that brake shoe back and pull your adjuster out of there. Set that aside. Now you want to do it on this side. Put your finger on the back of that pin, twist the retaining spring out, remove the pin, and remove the brake shoe.
To remove this brake shoe, you need to get the e-brake out of there. Using a large flat blade screw driver, just pry that out of that slot.
To reinstall, you don't need two people here, but it definitely helps to have two people. With one of the vise grip pliers, you want to pull out the center of that spring. With the other set, you want to grip further up so that the spring can't come back down. Then you just want to pry that into the slot on that brake shoe.
Around here, you can see these friction points. You want to take a wire brush and clean each of these up. Just apply a little bit of white grease to each one. Now you want to lift your brake shoe up into place. You want to push that pin through the back. Then twist on that retaining spring. We'll fast forward as he does the same thing on the other side.
Now you want to take that adjuster and put that back into place. Push those two brake shoes together to secure it. Take that little adjuster clip and put that back into place. Now you want to feed the spring down behind that brake shoe. You can see it coming out the other side there. You want to hook it on. Using the vise grip pliers, you want to pull the other end of the spring. Clip it on to the other brake shoe. With this spring, do the same thing but up here on these little brackets on the brake shoes. Your lower spring just clips into these two holes. Now, when you go to put the drum back on, if you realize it doesn't fit, as you can see here, it just doesn't fit. What you want to do is take a flat blade screw driver and hold that adjuster clip back. Use that to turn that adjuster right there. That will bring your brake shoes in. After adjusting it, you want it to still have a little bit of resistance as you push that drum on. As you can see, it fits perfectly.
We'll fast forward as he puts the wheel back on, and puts those lug nuts back in to place. Then you want to lower the vehicle and tighten them the rest of the way. You want to torque those lug nuts to 100 foot pounds in a crossing pattern. Put the cap back on and repeat for the other side. After you've done the brake work, get in. Test your pedal and make sure it's nice and firm. Do some slow stops from 5 and 10 miles an hour before road testing your vehicle.
We hope this helps you out. Brought to you by www.1AAuto.com, your source for quality replacement parts and the best service on the Internet. Please feel free to call us toll-free, 888-844-3393. We're the company that's here for you on the Internet and in person.
Shop Products


How To Replace Rear Brake Drum Backing Plate 1992-99 GMC K1500
Watch this video to learn how to install a new drum brake backing plate on your 1988 to 2002 GMC Sierra K1500.

