
How To Replace Headlight and Bulb Ford 1992-96 F150 F250 F350
Created on: 2012-12-11
Watch this video to learn how to replace a cloudy or cracked headlight or change a burnt out bulb. The experts at 1A Auto teach you how to replace the headlights on your 92-96 Ford F150, F250 or F350.
-
Note: DO NOT TOUCH the bulbs- the oil from your fingers will burn into the light and foul your bulb. Clean with rubbing alcohol and a soft cloth if the bulbs do get touched.
step 1 :To replace just the headlight bulbs
- Pop the hood and secure it.
- Reach behind the headlight assembly.
- Remove and replace the bulb.
-
step 2 :Remove the parking light assembly
- Use a 10mm deep socket to remove the bolt and the three nuts securing the parking light assembly
- Remove the two Phillips screws at the top of the headlight trim panel
- Pull the parking light out.
- Unplug the wiring harness and bulbs.
-
step 3 :Remove the headlight assembly
- Use a pair of needle nose pliers or a bent tipped awl to unclip the three clips securing the headlight assembly
- pull out and unplug the wiring harness and bulbs
-
step 4 :Aim headlights
- Adjust the adjustor bolts to match the old headlight assembly for a preliminary aim.
-
step 5 :install the headlight assembly
- Plug in the bulbs and harness
- Seat the headlight assembly and clip it in
-
step 6 :Reassemble the parking light assembly
- You put the trim back in place with the parking and marker lights.
- Make sure you reconnect the two side marker lights first, and then you can reconnect the larger parking light from the back, and then put the trim into place.
- Start the two nuts on the back side and tighten them up.
- Finish up by reinstalling the two screws on the top of the trim.
Tools needed
-
Socket Extensions
Phillips Head Screwdriver
Bent Tipped Awl
8mm Socket
Ratchet
Needle nose pliers
Brought to you by 1AAuto.com, your source for quality replacement parts and the best service on the internet. Hi, I'm Mike from 1A Auto. I hope this how-to video helps you out. Next time you need parts for your vehicle, think of 1AAuto.com. Thanks.
In this video we're going to show you how to service the headlights on this 1996 Ford F150. In the beginning part of the video, we'll show you just how to change the bulb, and then we'll get into how you change the whole assembly if yours are faded, clouded or broken. If you're just going to change a bulb, you really don't need any tools. If you're changing the whole headlight assemblies, you'll need a Phillips screwdriver, a 10 millimeter deep socket with a ratchet, some pliers and a bent-tip awl.
If you're just going to change a headlight, they're right back here. You can release this ring and pull the light out, kind of tip it up and out. If you move the ring back usually and there's a couple of teeth, just pull up with your thumb and disconnect the light. Be careful not to touch the filament at all. If oils from your hand get on there, it can basically melt the glass and cause the bulb to burn out quicker.
Probably the easiest is just take the headlight with this little tab pointing up, put it back into the socket. Then take your ring and put it in first. Turn it clockwise to lock it, then bring your harness up and connect it. If you want to replace your whole headlight assembly because it's been broken, I just undid the parking light down below. A 10 millimeter deep socket, and you can see that there's kind of a hole right there in the radiator support, put it in there. There's a bolt there and then there's also another nut over on that side. Those two nuts hold the lower parking light in, so you'll want to remove the two nuts in there. Quick footage, fast forwarding through removing those two nuts.
If you like you can remove the battery just by disconnecting it and then removing the bolt that holds it in place. That will make it a little easier to get to those bolts. On the other side you would need to remove the windshield washer reservoir. Remove the two Phillips screws at the top of the headlight trim panel. Here one of the 10 millimeter nuts didn't come out very easily, so I'm just reaching back in there loosening it up the rest of the way. Pull that out and then there's a socket right here. Turn it counterclockwise. One down here, turn that one counterclockwise as well.
Now there are three clips that hold the headlight in. You can see one there. You take this weather strip, pull it back. You see one right there and then there is a final one, it's actually right down here. You can use either needle-nose pliers or a bent-tip aw, reach right in. First grab hold, see if you can get the clip to move around a little bit. Take the awl and then pull it up and out. Take this one, pull it straight up and out. This one's a little more difficult to get in underneath it, kind of from the side. Pull it up, it just kind of going flying, but it came out. Now your light comes right out. You can undo the ring and pull the headlight right out.
I just picked up my clip. I have my three clips there. Here's our old headlight, new headlight from 1A Auto. You can see how much more bright and clear it is. The first thing you can do is just take your adjusters. These are your adjusters here; there are three of them. Take a small socket or a small wrench, you hold on to this part and you either turn it clockwise or counterclockwise on each one. This one, you turn this adjuster right up here. You just can kind of set it so that distances, you can see the distance from here to here and here to here and then also down here. The distances on your new light are basically the same as your old light. That's just kind of a good preliminary aim.
Just take this bulb, put the light in place, and reconnect the harness. Each one of these goes back into a hole. This adjuster goes in behind. It should pop right up out of here. Put all the adjusters in. Usually the easiest one is this here. You want to push the light in and slide the clip down on the back side. Make sure you push the headlight in with the clip down in place on there. Push the headlight in and push the clip down on it. The same thing for this one right back here, and that's in place.
At this point without the trim on, you want to do some final adjustments to your headlight. You basically just either use a small wrench or a Phillips screwdriver to turn the adjusters. Basically you want your lights always pointing straight ahead, so park the vehicle 20 feet away from a wall on a flat surface. Measure the height of your headlight bulb. With the low beams on, you want the headlight beam concentrated 1 inch below the height of the headlight bulb. That's from 20 feet away on a wall. Then the high beam, you want it concentrated at the same height as the headlight bulb.
I'm going to speed up here as we reassemble. You put the trim back in place with the parking and marker lights. Make sure you reconnect the two side marker lights first, and then you can reconnect the larger parking light from the back, and then put the trim into place. Start the two nuts on the back side and tighten them up. Finish up by reinstalling the two screws on the top of the trim.
We hope this helps you out. Brought to you by www.1AAuto.com, your source for quality replacement parts and the best service on the internet. Please feel free to call us toll free, 888-844-3393. We're the company that's here for you on the internet and in person.
Shop Products


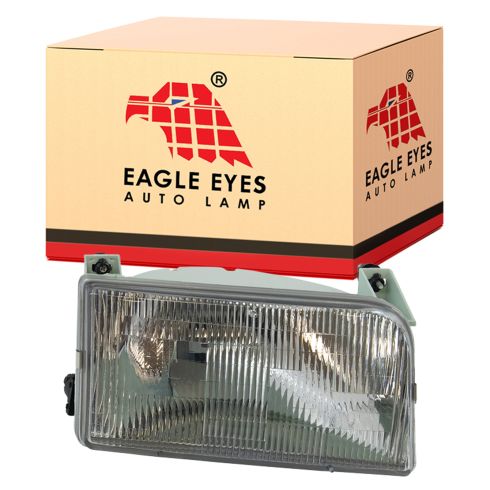
Ford Bronco F150 F250 F250 HD F350 Passenger Side Headlight Assembly Eagle Eyes FR088-B001R
- Features and Benefits
- 9007 High / Low Beam

How to Replace Headlights Bulbs 2006-08 Dodge Ram
Watch this video to learn how to replace a cloudy or cracked headlight or change a burnt out bulb. The experts at 1A Auto teach you how to replace the headlights on your 06-08 Dodge Ram.

