
How to Replace Front Wheel Hub Assembly on any Car Truck or SUV
Created on: 2016-12-07
Learn how to replace your own front wheel hubs. In this video, the expert mechanics at 1A Auto will show you how to replace a hub that's vibrating, groaning or loose.
-
step 1 :Removing the Wheel
- Loosen the lug nuts with the vehicle on the ground
- Remove the cotter pin from the axle nut if it has one
- Loosen the axle nut
- Raise the vehicle with a floor jack
- Secure the vehicle on jack stands
- Remove the lug nuts
- Pull off the wheel
-
step 2 :Removing the Brake Pads
- Remove the bolts from the caliper bracket
- Pull the caliper off
- Put the caliper aside
- Pry the brake pads off with a flat blade screwdriver
-
step 3 :Removing the Brake Rotor
- Remove the two bolts from the caliper bracket
- Pull off the brake caliper bracket
- Remove a screw from the rotor if it has one
- Strike the drum surface of the rotor with a hammer to loosen the rotor
- Pull the rotor off
- Clean the hub surface with a wire brush
-
step 4 :Removing the Hub Assembly
- Remove the axle bolt
- Place a punch in the axle hole and hammer it to release the hub from the splines
- Remove the bolts from the back of the hub
- Remove the wheel hub and bearing
-
step 5 :Installing the Hub Assembly
- Insert the wheel hub into the spindle
- Tighten the hub bolts
- Reinstall the axle nut
-
step 6 :Installing the Brake Rotor
- Apply grease to the hub surface
- Put the rotor onto the hub backwards
- Spray the rear of the hub with brake cleaner
- Pull off the brake rotor
- Slide the brake rotor on
- Spray the front of the rotor with brake cleaner
- Put the caliper bracket into place
- Insert the two into the caliper bracket
- Torque the two bolts
-
step 7 :Installing the Brake Pads
- Put the brake pads into the caliper bracket
- Apply grease to the back of the brake pads
- Push back the caliper piston with grove lock pliers
- Put the brake caliper into place
- Insert the two bolts into the caliper
- Torque the two bolts
-
step 8 :Reattaching the Wheel
- Slide the wheel into place
- Start the lug nuts by hand
- Tighten the lug nuts preliminarily
- Lower the vehicle to the ground
- Torque the lug nuts in a crossing or star pattern
- Torque the axle nut
Tools needed
-
Large C-Clamp
Hammer
Socket Extensions
Flat Blade Screwdriver
Torque Wrench
Anti-Seize Grease
Chisel
Ratchet
1/2 Inch Breaker Bar
Complete Metric Socket Set
Hi, I'm Mike from 1AAuto. We've been selling auto parts for over 30 years! We're dedicated to delivering quality auto parts, expert customer service, and fast and free shipping, all backed by our 100% satisfaction guarantee. So visit us at 1AAuto.com, your trusted source for quality auto parts.
In this video, we're going to give you a general overview of how to replace a bolt-in style wheel bearing and hub assembly. While this vehicle may not be identical to yours, the steps and procedures will be very similar, if not the same, on a wide variety of aches and models. The only major differences will be the exact hardware used and their torque specifications. This information can be found on a wide variety of online resources to make sure your specific vehicle gets fixed right.
If you like this video, please click subscribe. We have a ton more general overview repairs, as well as specific installations for your make and model. If you need wheel bearings for your car, we have a wide selection available from 1AAuto.com. You can follow the link down in the description. Thanks for watching.
If your vehicle has a center cap or a full hubcap covering the lug nuts, hubcaps can be removed by grabbing and pulling, where center caps usually need a screwdriver or a small pry bar. Pop them off the wheel. Before removing your wheel and tire or jacking up the vehicle, loosen your axle nut or bolt in the center of the wheel with a breaker bar and the appropriate socket. Occasionally, the axle nut will have a cotter pin and lock cap in it. All you have to do is straighten out the tabs on the cotter pin, remove the cotter pin and the lock cap so you can access your axle nut.
When you go to put it back on, simply line up that lock cap so the holes line up with the hole in the axle. Install a new cotter pin through the opening, bend the legs over. Remove your lug nuts from the vehicle with the appropriate socket and a breaker bar. Make sure the tire is still on the ground at this point to prevent it from spinning when you go to remove the nuts. Just crack them loose one turn. This'll keep the wheel from falling off, but allow us to easily remove it once the pressure is off the car. If you have a wheel lock key, insert it into a lock lug if you have one. Loosen that up the same way.
Raise and support your vehicle. We're using a lift in the shop, but if you're doing this at home, it can easily be done with a jack and jack stands. If you're not sure on where to lift your vehicle, you can check a variety of online resources or the owner's manual in your vehicle if you still have one. Since we've already cracked our lug nuts loose, you should be able to just spin them off by hand once the vehicle's raised and supported. Make sure when removing the last lug you keep a hand on the wheel and tire, then remove them and set it off to the side.
Remove the two bolts on the back of the caliper. These are usually a regular hex bolt, but occasionally they're an Allen key with a little rubber cap you'll have to pop off to access them. You may need a screwdriver or a small pry bar to free the caliper from the pads. Then, using a zip tie, a bungee cord, or some mechanics wire, go ahead and secure the caliper up and out of the way so it doesn't get damaged while we finish our repair. Remove the pads. You may have to pop them out with a flat blade screwdriver if they're stuck in there. Remove the two bolts on the back of the spindle, securing the caliper bracket. Make sure that both are cracked loose before removing either one fully. Once the bolt is out, remove the caliper bracket from the spindle.
Some rotors may have a Phillips-head or torque screw securing the rotor to the hub. Remove that if necessary, and if your rotor is frozen to the hub from rust and corrosion, tap it on the face of the rotor. You can hit the outer edge if you're not reusing the rotor. If you are, tap between the studs, free up the rust, and remove the rotor from the hub. Finish removing your axle nut by hand or axle bolt on some vehicles. Once this has been removed, there's usually a small hole in the center here. We'll place a punch in that hole. Just tap the axle to release it from the splines inside of the hub. Normally there are a few bolts, in this case three, securing the hub onto the spindle. These bolts can be accessed from the back with either a socket and ratchet or a wrench if it's tight. Place a drain bucket or some cardboard or paper towels underneath the hub, and spray the backside of the bolts with some penetrating oil. Give that a little bit to soak in. Double check that your axle is released from the hub.
Using a chisel, we're going to wedge between the hub and the spindle. Once it starts coming out, we'll keep tapping that axle to make sure it's releasing from the splines. On this particular vehicle, we can now access the ABS sensor, which we'll have to remove before our hub can finish coming out. We could have removed this dust shield to access our ABS sensor more easily. However, the bolts are very corroded, and we didn't want to risk breaking anything, so we'll remove the bolt securing our sensor into the hub. This is usually just one bolt. Be very careful with these. If we're replacing our hub, it's not as big of a deal if this bolt breaks. We can always replace it with another one. However, we do want to be careful not to break our sensor while removing it. I find the easiest way to remove these sensors is to grab them with a pair of pliers, simply twist them back and forth while carefully pulling out. Once it's released, we'll hold it out of the way and remove our hub from the vehicle.
Reinstall the hub onto the axle. If you had an ABS sensor, reinstall that into the hub as well, along with the bolt. Tighten that bolt down. Now, I find it's easiest to realign the hub by sending the bolts through partway. Then, without fully installing the hub, you can just get a couple of threads started on each one by hand. Once you have them all started and lined up, you can tighten down all of your bolts.
Reinstall your axle nut or axle bolt, and get it on as tight as you can by hand.
Reinstall your rotor and rotor screw if necessary. If your vehicle doesn't have a rotor screw, to make it easier, press your rotor in flat, and using some washers or an old axle nut works perfect. Install a lug nut by hand as tight as you can into that axle nut. This'll keep the rotor upright while we reinstall the rest of our parts, making it that much easier. Reinstall the caliper bracket and the two bolts that secure it. Start both bolts by hand, then tighten them down with the appropriate socket and ratchet. Install your brake pads and apply a thin coat of grease to the backside of them. Release your caliper from whatever you used to secure it out of the way.
Using a large pair of groovelock pliers, carefully compress each piston one side at a time, going nice and slow so you don't push the other piston out in the process. You may have to go back and forth a couple of times if you have dual piston calipers like these. Once it's fully compressed, slide it back over the pads, push the pins in to allow the caliper back into place, reinstall your hardware. Once they're in by hand, go ahead and tighten them down with the appropriate socket and ratchet.
If you've used the axle nut and lug nut trick to secure your rotor, go ahead and remove that now.
Reinstall your wheel and tire. Reinstall your lug nuts as tight as you can by hand. Now you're all set to lower your vehicle. Tighten your lug nuts and then torque them to spec in a cross pattern. If you don't know what this torque spec is, you may be able to find it in your owner's manual or in a variety of online resources.
Once you've got your wheel and tire back on the ground and all your lug nuts are tight, torque your axle nut, which you can use the same resources to locate. Once you're done, simply pop on your center cap or hubcap. Make sure you pump your brakes until you get a nice firm pedal back to allow that compressed caliper to seat before moving the vehicle.
Thanks for watching. Visit us at 1AAuto.com for quality auto parts, fast and free shipping, and the best customer service in the industry.
Shop Products


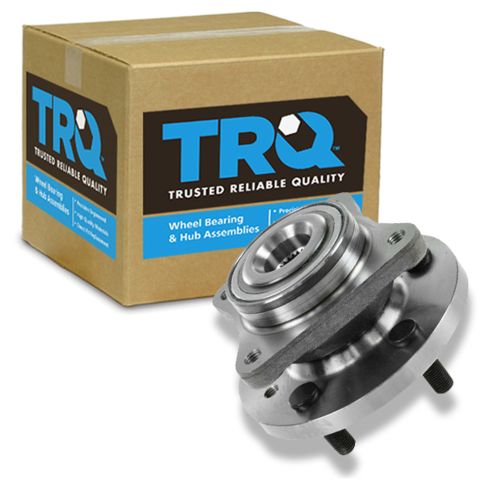
Land Rover Front Wheel Bearing & Hub Assembly TRQ BHA54036
- 73 mm
- 3.11 in
- 29
- 4
- 2.86 in
- 6.24 in
- 159 mm
- 79 mm
- 5
- No
- Yes
- Square/Modified
- No
- 120 mm
- 4.72 in
- M14x1.5
- Taper
- Gen 3

How To Replace Rear Wheel Bearing and Seal 1992-99 GMC K1500
If you hear a grinding or groaning noise while your vehicle is rolling, it might have a worn out wheel bearing. A worn bearing can allow the wheel to wobble, creating a host of other issues. To save yourself from more headaches down the road, replace your bearing right away. For solid rear axles, you'll need to replace the axle seal too. How to install a new TRQ wheel bearing and axle seal on your 1988-2002 GMC K1500.

