How to Replace Engine Starter 1997-2004 Ford Ranger
Created on: 2017-01-10
Check out this video to learn how to replace the starter motor in your 97-04 Ford Ranger. 1A Auto will show you the steps.
-
step 1 :Disconnecting the Battery
- Loosen the negative battery clamp with an 8mm socket and ratchet
- Disconnect the battery cable
- Put the battery cable aside
-
step 2 :Removing the Starter
- Remove the 13mm nut from the starter ground
- Pull off the ground strap
- Allow the ground strap to hang aside
- Pull the red cap off the starter studs
- Remove the 13mm bolt from the starter solenoid
- Remove the 10mm nut from the starter signal
- Pull the starter signal and power starter wire off their studs
- Now remove the 13mm bolts from the starter
- Pull out the starter
-
step 3 :Installing the Starter
- Push the starter into place
- Connect the starter power wire
- Fasten the 13mm nut on the starter power wire
- Connect starter signal wire
- Fasten the 10mm nut onto the starter signal wire
- Push the red cap onto the studs
- Insert the two 13mm bolts for the starter
- Connect the starter ground wire to the stud
- Fasten the 13mm nut onto the ground
-
step 4 :Connecting the Battery
- Put the battery cable onto the terminal
- Tighten the battery terminal clamp with an 8mm socket and ratchet
Tools needed
-
1/4 Inch Ratchet
8mm Socket
Ratchet
10mm Socket
Socket Extensions
13mm Socket
Hi, I'm Mike from 1A Auto. We've been selling auto parts for over 30 years. We're dedicated to delivering quality auto parts, expert customer service, fast and free shipping, all backed by our 100% satisfaction guarantee. Visit us at 1AAuto.com, your trusted source for quality auto parts.
In this video we're going to be working with our 2001 Ford Ranger 4.0 liter V6. We're going to show you how to remove and replace your engine's starter. If you like this video, please click subscribe. We have a ton more information on this truck as well as many other makes and models, and if you ever need parts for your vehicle, you can follow the link down in the description over to 1AAuto.com. Here are the items you'll need for this repair.
We're going to use an 8 millimeter socket and ratchet to loosen the terminal on the battery, or you can use a wrench. Loosen the clamp, wiggle it off of the terminal, tuck it somewhere down to the side where it won't accidentally come back and complete the circuit.
Your starter is located on the driver's side of the engine, bolting in from the engine side into the bell housing on the transmission. If you have a four-wheel drive vehicle, it will be located just above the front differential. The starter is held in with this nut securing the ground to this studded bolt, which we'll also remove. The 13-millimeter bolt at the top of the starter here, as well as under this red cap, which we'll have to pop off. There is a 13-millimeter for the main power supply to the starter solenoid, and a 10-millimeter nut securing the signal wire onto the solenoid as well.
Using a 13 millimeter socket and ratchet, remove the nut. You may have to hold the other head of the bolt here with the 13 millimeter wrench, but usually you can get these to come off without twisting. We're using a 1/4" drive here because this is a pretty tight space, but you may need to use a larger ratchet to break the bolts loose, and then finish removing them with this. Once the nut is off, we'll remove our ground strap, and allow that to hang off to the side.
This red cap simply pops off. Be sure to remember which way it comes off, you can see it's in an L-shape here. This will only go back on that one way. The 13 millimeter nut is located all the way at the top of the starter solenoid. You just kind of have to feel around for it. Once you've located the 13 millimeter nut, remove it with the socket and ratchet. The 10 millimeter nut for the starter signal, is located at the 3-o'clock position to the nut you just removed, remove that with a 10-millimeter socket and ratchet. We'll then reach up and pull both the signal and main starter power off their studs.
Now remove the 13 millimeter bolts at the top and bottom of the starter. Remove the top 13 millimeter bolt. In my experience, the starter only comes out one way. You'll have to pull back, and drop the bottom of the starter through this opening around the differential first, and then pull back to release the flange from the opening. Remove your starter.
Push the starter back up into the truck. You might have to try a couple of angles to get this to go back in correctly. Make sure you don't kink any wires in there, especially the ground.
Now we'll reinstall the wires onto their proper terminals. The largest one going on the top terminal, and being secured with a 13 millimeter nut, and the signal wire will be secured on the side there with a 10-millimeter. The reason I like to do this before tightening the starter in is it gives us a little more room to work and we can make some minor adjustments to help tighten that up. We'll tighten that down before we move on to the next wire, to make sure they don't interfere with each other.
Unfortunately, this is just in a really tight spot. You're just going to have to go slow. We're using a 1/4", 13 millimeter socket and ratchet here, that's about all you can fit in there. You may use a small extension. Once you've got the 13 millimeter tightened down, install your signal wire and the 10 millimeter nut, tighten that down with a 10 millimeter socket and ratchet as well.
Reinstall that cover that goes over all of the studs. We'll then install the 13-millimeter bolt at the top. Get that started, then it's very important that this bolt with the stud past the nut there goes in at the bottom, because that's where our ground strap will go. Again, with these are in such a tight spot, go ahead and get those down as far as you can by hand before trying to tighten them up with your 13 millimeter socket and ratchet. There's pretty much no way you're going to get a torque wrench in here, so just get them down as tight as you can. I'm using the 1/4" ratchet, so it's unlikely that we'll break the bolts tightening it down with this.
Reinstall your ground wire over the stud on that bottom bolt and the 13 millimeter nut that secures it. Then we'll finish tightening that up as well.
Tighten the clamp back up. We're going to use an 8-millimeter socket and ratchet, or you can use a wrench. Make sure your connection is tight. You're good to go.
Thanks for watching. Visit us at 1AAuto.com for quality auto parts, fast and free shipping, and the best customer service in the industry.
Shop Products
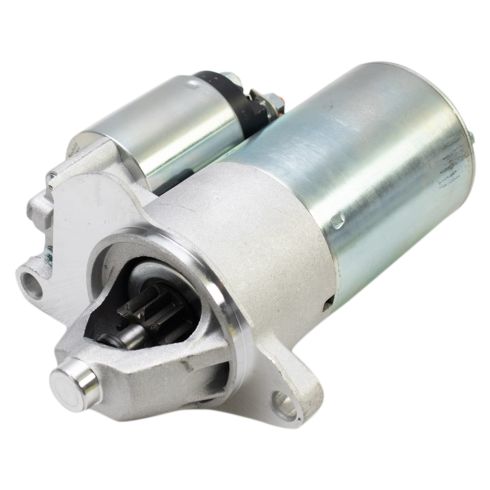
Ford Mazda Mercury Starter TRQ STA03025
- 10
- 12 VDC
- 1.4 KW
- Permanent Magnet Gear Reduction
- FORD
- 4.36:1
- Clockwise (Right)
- No
- No
- Aluminum
- Yes
- No

How to Replace Starter 2007-09 Toyota FJ Cruiser
Watch this video to learn how to replace the starter on your 07-09 Toyota FJ Cruiser. 1A Auto makes it easy with detailed step by step instructions!

