
How to Install Rear Mud Flaps 2001-14 Chevrolet Suburban
Created on: 2018-05-18
How to install rear mud flaps on 09 Chevy Suburban.
-
step 1 :Removing the Wheel
- Pry off the center cap with a flat blade screwdriver
- Loosen the lug nuts with the vehicle on the ground with a 22mm socket and breaker bar
- Raise the vehicle with a floor jack
- Secure the vehicle on jack stands
- Remove the lug nuts
- Pull off the wheel
-
step 2 :Removing the Rear Mud Flaps
- Line up the mud flap in the wheel well
- Press the flap to the bolts in the wheel well to mark the mud flap
- Drill a hole in the mud flap with a 3/16 drill bit
- Pry the clip out of the wheel well
- Loosen the 7mm bolt in the wheel well
-
step 3 :Installing the Rear Mud Flaps
- Insert the mud flap into place
- Loosely tighten the 7mm bolt to the flap
- Place the tire on
- Line up the mud flap with the tire
- Remove the mud flap and 7mm bolt
- Drill a third hole into the wheel well and bumper with a 3/16 drill bit
- Mark the holes on the mud flap with a marker
- Drill holes into the flap with a 3/16 drill bit
- Insert the j-clips to the bumper cover
- Insert the 7mm bolts and Phillips screws to the mud flap
-
step 4 :Reattaching the Wheel
- Slide the wheel into place
- Start the lug nuts by hand
- Tighten the lug nuts preliminarily
- Lower the vehicle to the ground
- Tighten the lug nuts to 140 foot-pounds in a crossing or star pattern
- Reattach the center cap
Tools needed
-
Socket Extensions
Phillips Head Screwdriver
7mm Socket
Drill
Ratchet
3/16 Inch Drill Bit
Trim Tool Set
1/2 Inch Breaker Bar
22mm Socket
Hi, I’m Mike from 1A Auto. We’ve been selling auto parts for over 30 years!
In this video, we're going to show you how to install rear mudflaps for a 2009 Chevy Suburban. If you need this part or other parts for your car or truck, click the link in the description and head over to 1AAuto.com.
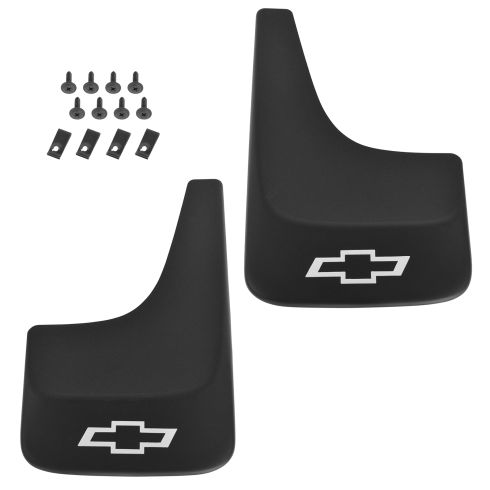
We're going to install these mudflaps on this vehicle. It's kind of a universal fit. You could put these on the front. You could put them on the rear. You can put them up high or put them down load.
You want to line them up where you want them to go first. Take a look and see. Maybe get back further behind the vehicle and look and see where they look good. To make it easier, we're going to pull off the rear tires. You can probably do it with the tires on it if you have some small right-angled tools. It'll be a lot easier if we take the tires off.
Pop this center cap off with a flat blade screwdriver. Take a 22mm socket and a breaker bar. Break the lug nuts free. We're going to raise and support the vehicle. Pull the tire off. We're going to have to pull this pushpin out, and we're going to have to pull this bolt out. Before we do that though, we made our marks for how we wanted to line up our mudflap. We want to line that up like that.
Take it, and we're just going to push on the mudflap that's lined up. And it's going to make a mark where that bolt is. I'm going to drill a little hole where that mark is. You could put a little bit of paint, touch-up paint or even Wite-Out on there, and do the same. Line it up and push. Yep, the mark's right there.
Now, we're doing this because it's a universal fit—there's no indications of where your bolts would go. This makes it easier. Right where that mark is, we're going to take a 3/16 drill bit, just going to drill right there. We're going to pull this clip out. Just going to use a trim tool. We sell these at 1AAuto.com.
Pull that out. We're going to use a 7mm socket and a ratchet. Take this bolt out. We're going to reuse that bolt that we just took out. Slide it back in there. Using a 7mm socket and ratchet, tighten that down. To make sure this is lined up, we put the tire back on, because we don't want to install it and have it extremely crooked. At this point, we can line it up. To line it up with the tire, to make sure it looks good.
We're going to drill a hole in between these two holes, because we want three fasteners to hold this down. We want it about an inch in. That's about right. We're going to make our hole a little bigger. We're going to use a 5/16 drill bit, drill the hole a little bigger. Make sure that's lined up with the other one. Can pull this up. We're going to take a felt tip pen. Just make a mark up here in this hole, and make a mark in this hole. There's my mark right there. I'll drill a hole, 3/16 drill bit. Other mark is right here.
Before I install the driver's side completely, because our holes are already marked, I'm going to mimic that on the passenger side. We'll make a mark with the top and the bottom one. The middle one, you're going to have to redo what we just did. At least the top one'll be there. We'll line it up with the other one. Then you can take a pick or a screwdriver or even a felt tip pen if you can get it in there, just make a little make. You can do it right here as well. Then it gives you the gist of where it is. You can drill those two holes, and then make the third one on the vehicle. There's these J nuts, J clips that go on.
We're going to pull back on this inner fender well. We're going to slide these over here. Then one over here as well. There was one already there from the original, so we don't have to install them there. Then we'll take our 7mm bolt, install that. Then we're going to install these Phillips head screws that also come with the kit. Tighten this down with our 7mm socket and ratchet. It's just plastic, so just snug is good. Going to tighten up these Phillips screw bits.
Reinstall our tire. Put the lug nuts back on. All right, good. We're going to torque our wheel in a star pattern to 140 foot pounds. You want to do it in a star pattern so that the wheel gets snug to the rotor without it being warped. All right, we're going to reinstall the cap. There is an index for the valve stem. If you find that, you know that goes right here. Press it on.
Thanks for watching. Visit us at 1AAuto.com for quality auto parts, fast and free shipping, and the best customer service in the industry.


How to Replace Mud Flap 2005-2010 Chevrolet Cobalt
This video shows you how to install mud flaps on your 2005-2010 Chevrolet Cobalt.

