
How to Install Rear Lower Transverse Toe Link 2006-10 Ford Explorer
Created on: 2017-05-12
How to remove, replace, and install a sway bar end linkon 06, 07, 08, 09, 10 Ford Explorer
-
step 1 :Removing the Wheel
- Loosen the 19mm lug nuts with the vehicle on the ground
- Raise the vehicle with a floor jack
- Secure the vehicle on jack stands
- Remove the lug nuts
- Pull off the wheel
-
step 2 :Removing the Rear Lower Transverse Toe Link
- Mark the location of the transverse toe link bolts
- Spray the transverse link bolts
- Loosen the 24mm nut with a breaker bar
- Loosen the second 24mm nut with a breaker bar
- Place two lug nuts onto the studs to hold the rotor in place
- Support the outside of the suspension (underneath the rotor) with a jack
- Remove the two nuts from the transverse link
- Tap the link out and remove it
-
step 3 :Installing the Rear Lower Transverse Toe Link
- Insert the transverse link into place
- Hand-tighten the two bolts, with the smaller bolt and washer on the back
- Jack up the vehicle suspension to align the bolts if needed
- Preliminarily tighten the back 24mm nut
- Preliminarily tighten the front nut
- Raise the suspension to ride height
- Torque the inner nut to 222 foot-pounds
- Torque the front nut to 259 foot-pounds
- Lower the suspension
-
step 4 :Reattaching the Wheel
- Slide the wheel into place
- Start the lug nuts by hand
- Tighten the lug nuts preliminarily
- Lower the vehicle to the ground
- Tighten the lug nuts to 100 foot-pounds in a crossing or star pattern
Tools needed
-
24mm Socket
Socket Extensions
Torque Wrench
Hammer
Rust Penetrant
Jack Stands
19mm Socket
21mm wrench
24mm Wrench
Paper Towels
Ratchet
Floor Jack
1/2 Inch Breaker Bar
In this video, we're going to show you how to replace the rear lower transverse toe link. We'll be working on our 2006 Ford Explorer. We'll show you on the passenger side. Driver side, same procedure.
Hope you like this video. If you do, click subscribe. You'll have access to a ton of other Explorer videos as well as other makes and models. If you need this part for your vehicle, check the link right in the description for 1AAuto.com.
Here are the items you need for this repair: 19-24mm socket, ratchet, 21mm and 24mm wrenches, breaker bar, rust penetrant, paper towels, marker, torque wrench, jack, jack stands, hammer
With the vehicle on the ground and with a 19-mm socket or your tire iron, loosen up your lug nuts. Raise and support the vehicle. You can use jack and jack stands. We are using a lift. Remove the lug nuts the rest of the way, and remove the wheel and tire.
Your rear lower transverse toe link is right down here, and we're going to spray the two bolts that hold it. Twenty-four millimeter, hold the bolt in, large breaker bar, and loosen. Then switch up and take the nut most of the way off. You may have to finish up by holding the backside with a wrench, 24 mm, and turning the bolt itself.
On the inner bolt, you have a lineup washer. I'm going to wipe that down, and I'm going to mark it with a Sharpie, so when I put it back together, I can line it up the same way. The same thing on the bolt side. Mark the washer. This bolt is a 21mm and a 24mm nut. Loosen it up, but don't remove the nut completely yet. Put a couple of lug nuts on your brake rotor, and then jack up the suspension from here. You can watch until you get some looseness in the arm. Once you remove the bolts and washers, and tap the arm out, and it comes right out.
Old original part from the vehicle, new part from 1AAuto. You can see they're exactly the same. A lot of times the bushings wear out, dry out. Then things start rattling around. Especially going over bumps and things, you'll hear rattles and clunks. Part from 1AAuto, exactly like the original. It's going to bolt right in, and install just like the original.
Put your link back in. The larger 24 mm bolt goes on the outside. Then your bolt with the washer and the alignment mark goes in. My mark is already lined up there. Just the nut on the backside of this one, and the alignment washer, and nut onto this one. Twenty-one millimeter wrench, and you can turn the bolt and hold it so that everything's lined up the way it was before, and then tighten up the nut. We'll just tighten this preliminarily. The wrench, and tighten this one up preliminarily. You want to have the bolts loose enough so everything moves freely and then raise your suspension up into the ride position before you torque them. Torque the inner nut to 222 foot-pounds. Torque this outer bolt to 259 foot-pounds. Lower your suspension back down. Take your lug nuts back off.
Reinstall your wheel and tire. Put the vehicle back on the ground. You want to tighten your lug nuts to 100 foot pounds using a star pattern.
Shop Products

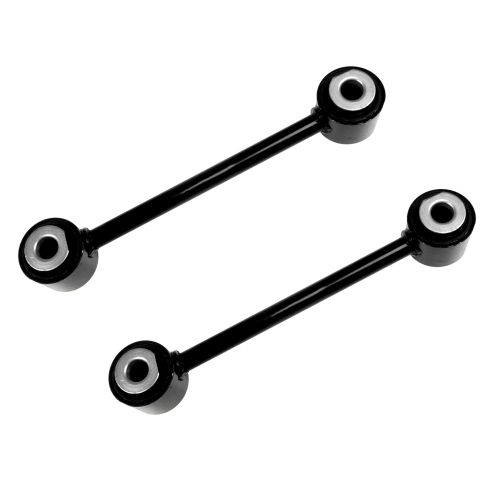
Ford Mercury Rear Lower Transverse Toe Link 2 Piece Set TRQ PSA54709
- 2 Piece Set
- (2) Transverse Toe Links

How to Replace Rear Lower Control Arms 2009-12 Ford Escape
How to repair, install, fix, change or replace failing, rusted, rotted, or damaged control arms with ball joint on 09, 10, 11, 12 Ford Explorer

