Replaces
Part Details
Install Tip: When replacing steering components, have a professional alignment performed afterwards. This ensures proper tracking and even tire wear.
Complete Repair in One Purchase - Stop searching for parts individually and complete your repair with a customized kit or set from DIY Solutions.
High-Quality Parts from Trusted Brands - DIY Solutions' kits and sets are selected from the best automotive brands and include hard-to-find and even obsolete parts you may need for your vehicle.
Guaranteed Fit - DIY Solutions ensures its selected parts are quality-tested to guarantee fit and function.
Item Condition:
New
Attention California Customers:
 WARNING: Cancer and Reproductive Harm - www.P65Warnings.ca.gov.
Lifetime Warranty
This item is backed by our limited lifetime warranty. In the event that this item should fail due to manufacturing defects during intended use, we will replace the part free of charge. This warranty covers the cost of the part only.
FREE Shipping is standard on orders shipped to the lower 48 States (Contiguous United States). Standard shipping charges apply to Hawaii and Alaska.
Shipping is not available to a P.O. Box, APO/FPO/DPO addresses, US Territories, or Canada for this item.
Expedited is available on checkout to the United States, excluding Alaska, Hawaii.
Final shipping costs are available at checkout.


Created on:
Tools used
Okay friends, to get started on this job, the first thing that we need to talk about is safety. You want hand protection and eye protection at all times. With that said, safely raise and support your vehicle so you have your front wheel off the ground. We're gonna remove this center cover and then we're gonna remove the lug nuts as well.
Get your wheel off of here. We need to get this cotter pin off of the outer tie rod end now, and we'll need to get the nut off of there. Use your 21-millimeter socket and remove your nut. I just put this back on there, just a couple threads because now we're gonna use our hammer, and we're gonna hit right along here on the knuckle, being careful not to damage the tie rod. Let's get this off of there. Pull this down.
Next, we need to get the mounting nuts off of the top of the strut area here. There's gonna be three of them. There's gonna be two right here where you can see, and the other one is gonna be located further in. You definitely don't wanna touch this center nut in any way. So I'm just gonna use my 15-millimeter wrench, because it's the easiest thing to get into this space. Put it right up on here, and then, of course, a nice rubber mallet, because I don't want to damage my tool.
I'll get this nice and loose. Do the same to the other two, and then we'll remove the nuts fully. As you can see the inward nut is much easier to get from inside the engine compartment. Let's get this one right off of here. We're gonna leave one of the nuts on here just a few good threads. That way there, there's no chance that this strut can fall out. Moving down the strut, if you were to look, you're gonna see a big old bolt with a nut. Using your 30-millimeter socket, you're going to go right here and remove this nut. And I'm gonna hold the bolt head with some pliers. Now, I'm just gonna drive this bolt out of here.
Next, we're gonna use a nice long pry bar, and we're gonna come right under here. Go ahead and pry and you should see it want to separate. We'll pull it away from the control arm. You can see our safety nut did its job. Remove that nut, and remove your strut unit. The next step is to take off our upper ball joint nut. Take that nut, and just put it back on there a few good threads.
Next, we're gonna use a hammer and hit directly on the knuckle right here. That's gonna shake this free, and you're gonna notice that these two are gonna separate. Pull down on this. Remove the nut. Now as this comes up, your knuckle is gonna wanna fall away. Obviously, you don't want to let it continue to fall, because you could put a tug on your ABS wire or even your brake hose. If you have something as simple as a coat hanger or maybe even one of these bungee cords, it's gonna come in handy.
Next, what we need to do is remove the bolt that comes through from the inside of the strut tower to the outside. I'm gonna hold this nut with a 21-millimeter wrench, and then I'm gonna remove the bolt side. Do the same to the other one real quick, right off of there. Grab onto that upper control arm, and get it right out of here. Now you wanna inspect your bolts. You wanna make sure they're in great condition. If they're rusted, or rotted, or they seem like they're weak in any way, of course, you're gonna wanna replace them. Also, take a peek at your threaded area. If it looks like it's rotted and the bolts or the nut isn't gonna be able to hold on like it should, obviously, try to clean it up, and replace them if need be. These actually look pretty good. I can clean them up a little bit. But, nevertheless, what I'm also gonna do is I'm gonna add a little bit of copper Never-Seez along this area where the bolts are gonna be going through the upper control arm bushings.
Okay, now it's gonna be time to get our upper control arm in here. Let's go ahead and slide it right in. And we remember the bolts go from the inside, and they're gonna go facing out. So go ahead and line up the bolt holes, slide the bolts through, and then, of course, we'll start the nuts, we'll snug them up, and then we'll torque them to manufacturer's specifications.
Now that we have the bolts in there, it's gonna be time to get the nuts on. Something that I want to mention real quick is your nuts are supposed to have a neoprene layer inside there that works as a lock. If you're gonna be reusing your nuts for any reason, maybe you haven't gotten new ones, that's okay. I would just use a tiny bit of thread locker, but we'll call it your prerogative. Let's go ahead and start these.
The next thing we need to do before we go ahead and snug these up is we need to make sure the control arm's sitting so it's pretty much parallel to the ground. So this flat area right here is gonna be parallel. I like to use a nice pry bar. I'll come through this slot right here, and just get it as close as possible. Obviously, if it's a little too high or it's a little too low, it isn't gonna be too big of a deal. But if you tighten it while it's hanging like this, and I try to stretch this, it's gonna cause an issue with the bushings, and eventually wear them out very quickly over time. Let's go ahead and bottom this out. Same to the rearward bolt.
All right, so now we're gonna go ahead and torque these down to 114 foot-pounds. I'd like to note that usually when I'm using a torque wrench, I try to torque the nut side. I'll hold the bolt side and I'll torque the nut side. As you can tell, there isn't very much space here so I'm gonna go the opposite. I'm gonna torque this side. Let's get this untied. And I'm gonna start our upper ball joint nut on here. Just pull this down. Start the nut on there. If you're having a hard time pulling this down, you could just put your pry bar up across here, and then, of course, go into the slot we used earlier. Let's snug this up. Now let's torque this to 85 foot-pounds.
Now it's gonna be time to get the strut up in here. If you were to look, you can see the area that the strut holes are gonna be. So just line that up. Put this right up in here. There we are. Now I'm just gonna start on all three of those nuts real quick. I like to use a little thread locker on those. If it looks like this needs to be twisted a little bit, you can use a long screwdriver or pry bar. Just come right through the bolt hole, and then you can twist it as needed. Once you think it looks pretty good, I'm just gonna take my pry bar, and then I'm gonna push, and lift at the same time. Okay? This is working its way right in there nicely.
Now we need to grab our bolts because we want to have it ready so once we have this lined up, we can go ahead and put it right through. Before we go too much further, we need to make sure we inspect our bolt, clean it, and, of course, make sure the threads are nice and clean and safe. Once we've done that, we'll add a little bit of thread locker, and we'll continue. So I got the bolt cleaned up. You'll notice I put on my thread locker like I said I would, and I also put a little bit of copper Never-Seez on the shanked area here. I wanted to make sure I didn't get any Never-Seez on the threaded area though. With that said, let's get this lined up, and get the bolt in. There we are. Let's get the nut on there. Now we're gonna go ahead and bottom this out, and then we'll torque it down.
So next, we're gonna have to torque this nut to 351 foot-pounds, which just to let you know, is a lot. Most torque wrenches don't necessarily go up that high. A lot of them only go up to 250. Torque it as high as you can. Just keep in mind the torque should be 351. That's torqued. Let's get our tie rod end back in here. Now it's gonna be time to get the nut on here. Just make sure if you've got a locking end, that's facing up. Bottom it out. Torque this to 111 foot-pounds. Torqued. Now, we're just gonna bottom out these strut nuts.
So now we're just gonna torque down these nuts. Something to think about though is before you torque them, you need to either have your wheel on and the wheel on the ground with the weight of the vehicle, or you can use a jack stand, but you need to have the weight of the vehicle forcing down on the strut. Now it's time to get our wheel back up on here. Start on all of our lug nuts, bottom them out, and then we're gonna torque them to 150 foot-pounds.
Next you need to get your vehicle so the tire is just barely on the ground so it can't spin. We're gonna torque the lug nuts, like I said, to 150 foot-pounds in a star pattern. Once you've torqued it, make sure you put back on your center cover, of course.
Tools used
Tools used
Tools used
Tools used
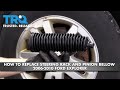
Go ahead and remove your center cover here. Now it's gonna expose your lug nuts, remove all 6 of your 21-millimeter lug nuts. Remove your wheel. Now the next thing we're gonna do is break free our jam nut right here. There we are. Remove your outer tie rod end nut. Now let's go ahead and use our hammer, and we're gonna give our knuckle a couple loving bonks to break this free. Now let's use some locking pliers, come right up on this inner tie rod end stud here, and then we'll remove our outer tie rod end. You wanna make sure you count this on the way out. What I mean by that is here we go around one, two, three, and then so on. All right. So, I got 23, results may vary. Let's go ahead and fully remove that jam nut. Now we need to go ahead and get our power steering bellows boot off of here. Typically, you do that by removing the clamp here, and then on the inside, there's gonna be another clamp. Stick a nice pry bar or screwdriver or whatever you've got. Come right up against that clamp edge, give it a couple loving bonks until it breaks free. Recycle that. Grab your boot, give it a nice little twist to break it free from the power steering rack, and then, of course, from here, we wanna pull this down as well. Inspect your boot, make sure it's still in good condition. If it needs to be replaced, well, now's the time to do it.
Now it's gonna be time to remove your inner tie rod end from the rack. You wanna do that by grabbing onto this area right here. If you've got some nice long pliers, this comes in handy. There it is friends. Now, we're just gonna take a nice rag and we're gonna clean out this internal area. We don't want that out of portion. Try to get inside this area, get out any gunk or debris that might be in there for whatever reason. All right friends. Now it's time to install our brand new inner tie rod end. One thing I'd like to mention is it's always a good idea to use a little bit of thread locker. Go ahead and start this on there, we're gonna bottom it out, and then we'll, of course, snug it down. Okay. Just a little tweak after it's bottomed out, should be all it needs. Now the inner tie rod came with some nice grease. You wanna make sure that you use the majority of it right inside the ball area of the joint. So, go ahead and just put a whole bunch in there, kind of smooth it around a little bit and this is gonna help keep moisture out of there and, of course, keep it lubricated. Let's take a little bit of that grease and we're just gonna come right up along this line right there. You can go on both sides of it and I'll show you why in a minute.
So, now we're gonna go ahead and put our bellows boot back on. I like to use a nice wire tie as a clamp because it works just as well as anything else in all honesty. I'm just gonna go ahead and slide this on here, and then as I get to this point on the inner tie rod end, that's going to be approximately where I have that lubricant. So, it's gonna get into that groove, and that's going to help keep moisture out of there, and it's also gonna help the alignment professional down the line. We'll go ahead and slide the boot onto the rack. Once it's completely on, give it a nice spin, and then tighten up your wire tie. Now let's go ahead and put our outer clamp back on there. Typically, people like to use copper never- seize but if you've got a little bit of your grease still leftover, go ahead and put it right on the threads here and that's gonna help keep the moisture out of there. And then, of course, start on your jam nut. We're gonna get that about halfway, and then we'll get to our outer tie rod end.
Okay, friends. Now it's time to install our brand new outer tie rod end. You wanna make sure you put this in the same amount of turns that you removed the old one. Let's go ahead and put this back into the knuckle. Start our nut on there. Let's snag up the jam nut. Let's go ahead and snag the tie rod nut. And now we'll torque it to 44 foot-pounds. Now, we need to pay attention to our castle nut and make sure it lines up with the hole and the stud. If it doesn't, you need to continue tightening until the next hole does. That was good. Let's go ahead and put our little cotter pin in here. And then, of course, pin it over so there's no way this nut can loosen up. Let's go ahead and get our wheel back up on here. Start on the lug nuts, and then we'll torque them to manufacturer's specifications. All right. Now with the wheel just barely touching the ground, we're going to torque these lug nuts to 140 foot-pounds. The little center cover on there torqued.
Tools used
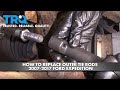
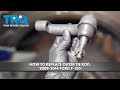
Go ahead and remove your center cover here. That's gonna expose your lug nuts. Remove all 6 of your 21-millimeter lug nuts. Remove your wheel. Now, the next thing we're gonna do is break free our jam nut right here. There we are. Remove your outer tie rod end nut. Now, let's go ahead and use our hammer, and we're gonna give our knuckle a couple of loving bonks to break this free. Now, let's use some locking pliers, come right up on this inner tie rod end stud here, and then we'll remove our outer tie rod ends. You wanna make sure you count this on the way out. What I mean by that is, here we go around one, two, three, and then so on. All right. So I've got 23, results may vary.
Okay, friends. Now, it's time to install our brand new outer tie rod end. You wanna make sure you put this in, the same amount of turns that you removed the old one. Let's go ahead and put this back into the knuckle. Start our nut on there. Let's snug up the jam nut. Let's go ahead and snug the tie rod now. And now we'll torque it to 44-foot pounds. Now we need to pay attention to our castle nut and make sure it lines up with the hole and the stud. If it doesn't, you need to continue tightening until the next hole does. That looks good. Let's go ahead and put our little cotter pin in here. And then of course, peen it over so there's no way this nut can loosen up.
Let's go ahead and get our wheel back up on here. Start on the lug nuts and then we'll torque them to manufacturer specifications. All right. Now, with the wheel just barely touching the ground, we're gonna torque these lug nuts to 140-foot pounds. Your little center cover on there, torqued.
Tools used
Tools used
Okay, friends, one of the first things we need to do to get started on this job is to safely raise and support the truck. After you've done that, remove your center cover here and then remove all 6 of your 21-millimeter lug nuts and get the wheel off. Now that the wheel's off, let's go ahead and get this ABS wire disconnected. I'm just gonna come right along here and then remove this 8-millimeter bolt. Now let's go ahead and remove our anchor bolt for our flex hose for the brakes. The next thing we need to do is remove our two caliper bracket bolts. Like this. I'm just gonna start that in a couple threads. Now we're gonna remove our caliper and we're gonna hang it so it puts no pressure on the flex hose. Let's remove the rotor. Let's go ahead and remove our vacuum lines here. Let's go ahead and remove this little center cover. Now let's remove our axle nut. Now we're just gonna push on this axle stub here. If it doesn't move, just go ahead and put the nut back on a few good threads and then give it a couple loving bonks with a hammer. Now let's go ahead and get this off of here. Let's go ahead and follow that ABS wire and just continue disconnecting it up along the way here. Comes up to this area coming in from the back. You're gonna see you have a little push button. Go ahead and push on that and then separate the two.
Now let's go ahead and get our cotter pin out for our tie rod. Set that aside for recycling. Let's remove the nut. Now we're gonna use a hammer and we're gonna hit right on the knuckle right here to try to break this free. Now let's remove our upper ball joint nut. Now we're just gonna separate these two. So now we're just gonna go ahead and put that nut on just a couple small threads here. That's gonna help prevent this knuckle from falling down when we relieve the lower ball joint. The next thing I wanna do is pull down on the upper control arm and we're gonna put it just like this so it leaves a nice gap between the knuckle and the nut itself so we can move down to the lower ball joint. Let's just leave this on a couple threads. Now the next thing that we need to do is carefully bonk on the knuckle and try to separate the ball joint from it. Let's remove that nut. Hold up on your knuckle. Remove the lower ball joint nut. Bring it down and slide it out and away from the vehicle. Next, let's go ahead and put our axle up on top of our sway bar link so it's out of the way and then we'll continue on to spraying the lower ball joint upper area. Now looking at it from the top, you'll be able to see that there's a snap ring on this. We're gonna go ahead and spread this clip, and then what we're gonna try to do is just peel it right off of that ball joint. Watch your eyes.
Now it's gonna be time to get our lower ball joint out of the lower control arm. To do that, you wanna use a ball joint press to get it out. You could of course also use a hammer in case you don't have access to this. Just give it a couple loving bonks along the top and be careful for when it shoots out the bottom. There it is, friends. Okay, friends. Now it's gonna be time to get ready to start installing our brand new lower ball joint. One of the first things I wanna mention is we're gonna take off this nut right here, and then also, we're gonna remove the boot. You wanna be careful not to tear it in any way. I'm gonna use a nice screwdriver, get in between here, and carefully pry down. We'll remove this and we'll set this stuff aside. Let's go ahead and clean up this area. So we're gonna go ahead and install our ball joint using that ball joint kit with the cup that just barely fits onto the lip right here. We wanna be very careful not to damage any of the center aspect. You're gonna have a short cup that looks like this. That's gonna go just like that. Grab the ball joint press and get it set up. So what we're gonna do here is try to press the ball joint straight up and into the control arm. We only wanna go until it bottoms out. You don't need to go too much further than that but you do wanna make sure that it's going up as straight as possible.
After you have it so it's completely bottomed out, what you're gonna wanna do is give this a couple loving bonks with your hammer. Just be careful. The reason why we did that is to help make sure that it's completely settled in. Remove your ball joint press. Now let's go ahead and put on our snap ring. There we are. Just give those ears a couple bonks. We just wanna kinda spin it in the groove to make sure it's completely situated. Now it's gonna be time to get our boot back on there. You wanna pay special attention to it and just make sure it's not damaged in any way. We're gonna find a cup that fits right over and along the lip right here. We don't need to squish on this area. This fits perfectly. Put it up on here. Double-check to make sure it's completely seated the whole way around. All right. Let's go ahead and clean down this area. All right. Let's go ahead and get this axle back inside the bearing there. We're gonna slide the knuckle up so we can get the ball joint started on the lower aspect here. There we are. Go ahead and give that axle a nice wiggle and it should wanna set right in and then it's gonna be coming out the other side here. Let's snug this up. Now we're gonna torque this to 85 foot-pounds and then we'll continue on to putting on the cotter pin.
Now the next thing you wanna do is line up the slots on the nut to the hole in the stud for the ball joint. If for some reason after you torque it it doesn't line up, continue tightening until the very next slot does. The next thing we need to do is get our axle inside the knuckle as we push the knuckle up. You wanna be very careful not to damage your internal seal. Now I'm just gonna take a pry bar, come in and under here, and then I'm gonna try to put the ball joint through the knuckle. Go ahead and start that nut. Snug it up. Torque it to 85 foot-pounds. What you wanna do next is make sure that you have your slot lined up with the hole on your ball joint stud. If for some reason it isn't, you need to continue tightening until it is. Next, take your cotter pin, go ahead and put it through the slot and the hole, and then, of course, lock it down. Now before we can continue on to putting the brakes together, we wanna make sure that the hub mating surface and the back of the rotor mating surface is nice and clean. After you've done that, apply a little bit of copper Never-Seez. Let's go ahead and get our rotor back on here. I'm gonna start a lug nut on so it holds the rotor for me. Let's get our caliper reattached. We're gonna use some thread locker, of course, on the bolts. Start them both in and then we're gonna torque them to 185 foot-pounds. Let's get our vacuum lines reattached.
Now we're gonna reconnect in our bracket, the ABS wire. Let's snug them up. Let's start re-securing our ABS wire. Make sure you go up and in between the brake line here just like that. This looks good for now. Make my way down here. Get a little push clip. It's gonna go into your hole right there. The rest of it should just line up if we continue on. Making our way up here, let's make sure we reconnect in our ABS wire. Listen for a click, and then, of course, give it a nice tug. After that, you wanna make sure that you secure it back in up here. Make sure everything's nice and secured and it's definitely not rubbing up against anything and there's no way it can get caught. Let's get the outer tie rod end on here. Snug this up. Torque it to 85 foot-pounds. The next thing we wanna do is make sure that our slots line up with the hole and the stud for the tie rod. If for some reason it doesn't, you need to continue tightening until the next one does. Install your locking cotter pin and then lock it down. Let's get the wheel back up on here. Start all of your lug nuts, snug them up, and torque them to 150 foot-pounds. Torqued. Okay, friends, so that's pretty much it aside from making sure you pump up that brake pedal and then get yourself safely down to an alignment shop.
Tools used
Tools used


