Replaces
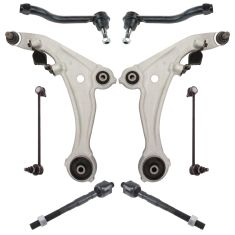
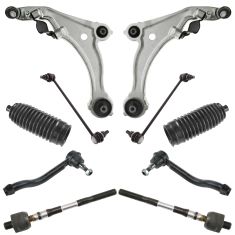
Replaces Nissan Altima Front 12 Piece Steering & Suspension Kit TRQ PSA69918
$429.95
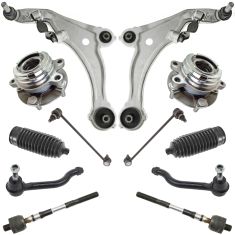
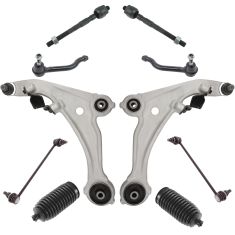
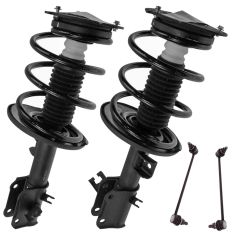
Replaces Nissan Altima Front Driver & Passenger Side 6 Piece Suspension Kit TRQ PSA63658
$399.95
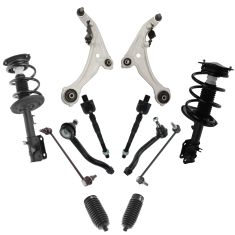
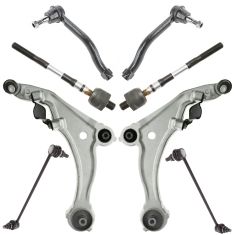
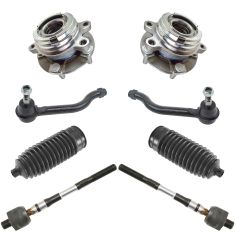
Replaces 2009-14 Nissan Maxima Front 12 Piece Steering, Suspension, & Drivetrain Kit DIY Solutions SUS04030
$333.95
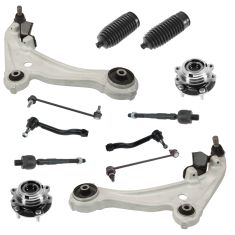
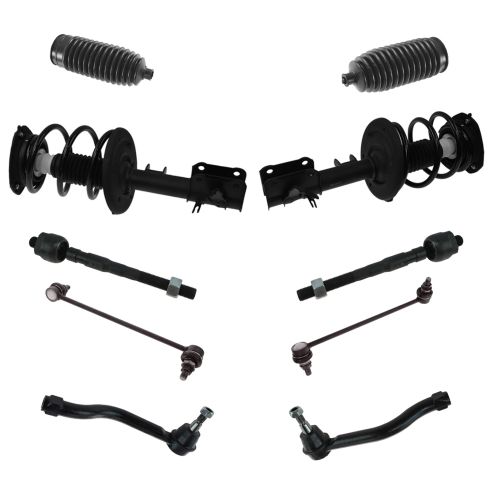
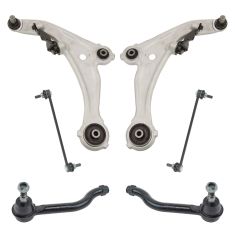
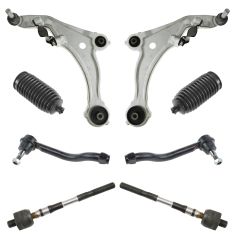
Replaces Nissan Altima Front 12 Piece Steering, Suspension, & Drivetrain Kit TRQ PSA32171
$329.95
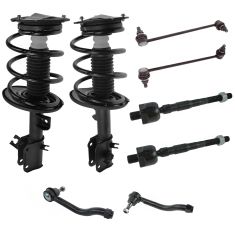
Replaces Nissan Altima Front 8 Piece Steering & Suspension Kit TRQ PSA60014
$279.95
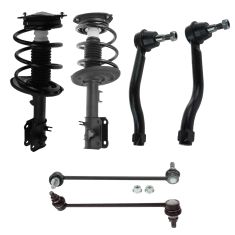
Replaces Nissan Altima Front 6 Piece Steering & Suspension Kit TRQ PSA32027
$269.95
Replaces Nissan Altima Front 8 Piece Steering & Suspension Kit TRQ PSA59435
$254.95
Replaces 2009-14 Nissan Maxima Front 10 Piece Steering & Suspension Kit DIY Solutions SUS04029
$252.95
Replaces Nissan Altima Front 10 Piece Steering & Suspension Kit DIY Solutions SUS04041
$249.95
Replaces 2009-14 Nissan Maxima Front 8 Piece Steering & Suspension Kit TRQ PSA70029
$249.95
Replaces Nissan Altima Front 6 Piece Steering & Suspension Kit TRQ PSA63397
$239.95
Replaces 2009-14 Nissan Maxima Front 8 Piece Steering & Suspension Kit DIY Solutions SUS04027
$233.95
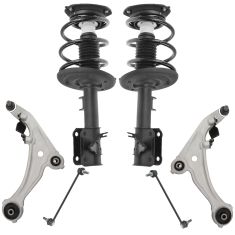
Replaces Nissan Altima Front Driver & Passenger Side 4 Piece Suspension Kit TRQ PSA56484
$219.95
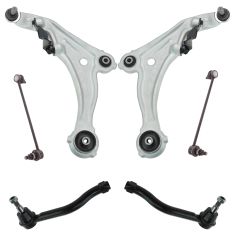
Replaces 2009-14 Nissan Maxima Front 6 Piece Steering & Suspension Kit TRQ PSA63427
$218.95
Replaces 2009-14 Nissan Maxima Front 8 Piece Steering & Drivetrain Kit DIY Solutions SUS04031
$161.95
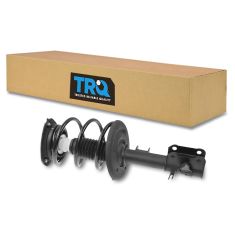
Replaces Nissan Altima Front Driver Side Strut & Spring Assembly TRQ SCA57581
$109.95
Part Details
Install Tip: When replacing steering components, have a professional alignment performed afterwards. This ensures proper tracking and even tire wear.
Complete Repair in One Purchase - Stop searching for parts individually and complete your repair with a customized kit or set from DIY Solutions.
High-Quality Parts from Trusted Brands - DIY Solutions' kits and sets are selected from the best automotive brands and include hard-to-find and even obsolete parts you may need for your vehicle.
Guaranteed Fit - DIY Solutions ensures its selected parts are quality-tested to guarantee fit and function.
Item Condition:
New
Attention California Customers:
 WARNING: This product can expose you to chemicals including Chromium (Hexavalent Compounds), which is known to the State of California to cause cancer, and birth defects or other reproductive harm. For more information, go to www.P65Warnings.ca.gov
Lifetime Warranty
This item is backed by our limited lifetime warranty. In the event that this item should fail due to manufacturing defects during intended use, we will replace the part free of charge. This warranty covers the cost of the part only.
FREE Shipping is standard on orders shipped to the lower 48 States (Contiguous United States). Standard shipping charges apply to Hawaii and Alaska.
Shipping is not available to a P.O. Box, APO/FPO/DPO addresses, US Territories, or Canada for this item.
Expedited is available on checkout to the United States, excluding Alaska, Hawaii.
Final shipping costs are available at checkout.


Created on:
Tools used
Brought to you by 1AAuto.com, your source for quality replacement parts and the best service on the Internet.
Hi, I'm Don from 1A Auto. I hope this how-to video helps you out, and next time you need parts for your vehicle, think of 1AAuto.com. Thanks.
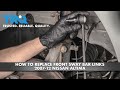
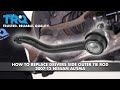
In this video, we're going to show you how to replace the right hand outer tie rod on this 2003 Nissan Maxima. Obviously the left hand is the same procedure. This is the same for any 2000-2003 Maxima as well as the Infiniti I30.You'll need a new tie rod from 1aauto.com, jack and jack stands, 15-21 mm sockets. You'll need a ratchet and probably a breaker bar or a pipe for some extra leverage, pliers, a large hammer, penetrating oil, as well as you will, or we recommend, you get an alignment after you replace a steering component like this.
Let's start off by removing the wheel. You're going to want a 21 mm socket and ratchet or breaker bar or your tire iron and you'll probably want to start with the wheel on the ground, loosen the lug nuts, then raise and secure the vehicle with jack stands, and then remove the wheel and the tire.
At this point we're going to measure the distance between the end of the boot and the center of the top of the tie rod. It's roughly 11 and 3/4 inches. Yours might be different. It's always a good idea to use some penetrating oil on the lock nut. Spray that down and let it soak in. With our adjustable wrench, size up the nut holding on to the end of the tie rod, with a 13 mm open ended wrench holding the inner tie rod and free it up. Move the steering wheel to the right to gain better access. We're going to remove the securing cotter pin through the outer tie rod. We're just going to speed it up here as Don tries to get that cotter pin out. We couldn't get the cotter pin fully out, so we're going to use our 19 mm, 1/2 inch wrench and then try and sheer it. In this case we're going to use a little extra leverage with the bar on the end of our wrench. I'll speed it up here as we work that bolt the rest of the way off. Quick summary: we tried to get the cotter pin out. It just wouldn't come out. It was basically frozen in there so what we did is took the pliers and broke the ends off as much as we could and then just got the socket on there and sheered the cotter pin right off by moving the bolt.
To help release the outer tie rod from the spindle we use a hammer and hit against the spindle until it frees up. Now it's free. Pull the inner tie rod with your 14mm wrench and twist off the outer tie rod. OK, speed up and Don did misspeak a little bit there: he is using a 13 mm wrench to hold that tie rod.
We got the old outer tie rod and the new one and you can see that dimensionally they're very close, so when they go back in the alignment should be relatively close to what it was before we removed it. It's always a good idea to put a little anti-seize on the end of your inner tie rod so that if you ever have to replace it again, it'll come off just as easily as this did. Holding the inner tie rod, twist the new tie rod on. Check our length from the end of the boot to the center of the tie rod and it is 11 and 3/4 inches just like it was when we took it out. Place the other tie rod back into the spindle. It can be a little stiff. Now we'll secure the nut and set our torque wrench to 55 foot pounds and we're going to torque the nut. Now what you do is make sure that the hole in the outer tie rod matches the slot or one of the slots on the nut and if it doesn't, giving it a little bit more torque is acceptable to the point where the cotter pin slides through the outer tie rod. Bend the ends that come through back along the side of the nut. With the 13 mm wrench hold your inner tie rod and lock down on the nut. Fast forward here as we take that lug nut back off, put the wheel and tire on, and just put the lugs on by hand first and then preliminarily tighten them. Set your torque wrench to 100 foot pounds and tighten the lug nuts. Use a star pattern. Kind of draw a star pattern as you tighten them and then just recheck them.
We hope this helps you out. Brought to you by www.1AAuto.com, your source for quality replacement parts and the best service on the Internet. Please feel free to call us toll-free, 888-844-3393. We're the company that's here for you on the Internet and in person.
Tools used
Tools used
Tools used
Tools used
Tools used
Tools used
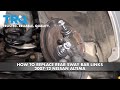
Use a 21-millimeter socket, take the lug nuts off. You can take the hubcap off and the wheel. Take some locking pliers in on the backside of the link. You can attach these to the link so the stud doesn't spin. Use an 18-millimeter socket, take this nut off. And then slide the stud out. If you have to, you can use a pry bar and just slide that out of the strut. Take the wheel speed sensor wire off. Just grab it and slide it off. There's just grommets holding that on. Just set that aside. Take the clip off for the brake hose. Just slide it in there. Pry it out, and take the brake hose off. Slide that out of the way. And take a 21-millimeter wrench and a 21-millimeter socket, take these nuts and bolts out. Be careful, don't rub up against the brake hose. Take the bolts out and separate the strut from the knuckle.
Just slide this out and over a little bit. You don't want to pull on the knuckle too much. You don't wanna pull the CV shaft out or make sure there's no tension on the brake hose. Take these three bolts out. Start with this back one. Use a 13-millimeter wrench because this is in the way a little bit. If you have a socket that fits under there, go for it. But if not, just use a wrench, get it started, and take that bolt out. Now, take a 13-millimeter socket, take these out. Before you take the last one out, you wanna grab the strut assembly. Just grab it under here. Take that bolt out and just slide it down. Now, slide the new strut assembly in place. Make sure you have one of the bolts in your hand. And get one of the bolts started. You can get the other bolts started as well. Now, keep these pretty loose, just only a couple of turns on them. We'll tighten these up later. Now, get the knuckle lined up and slide the bolts in.
Once you get the first bolt, it's a little bit easier. You can always use a screwdriver on the other side. Get that to line up. Put the nuts on, and torque both of these to 103 foot-pounds. And reinstall the brake hose. Make sure it's in there properly. Slide the clip on, just give it a tap. Slide the wheel speed sensor into the bracket, the grommets. Now, line the link up. Slide that in position. Put the nut on. Now, torque this nut to 58 foot-pounds. You can use a 21-millimeter wrench on the back of here to prevent the stud from spinning or whatever size fits for your stud.
Put the wheel up and line the hubcap up. With the valve stem, there's a little notched-out area. And take the lug nuts, get those started. Now, I'm gonna torque the lug nuts down to 83 foot-pounds in a cross pattern to tighten the wheel down evenly. And just go around again, double-check. Now, I'll tighten these down, get them all started, and torque these to 26 foot-pounds. After you're done doing this repair, you wanna make sure you bring the vehicle to an alignment shop and have it aligned. You don't want to have premature tire wear.
Tools used
Tools used