Brake Hoses, Lines, and Fittings
-
-
- Air Deflectors & Valance Panels
- Battery Trays & Related
- Body Panels
- Bumpers & Related - Front & Rear
- Convertible Tops, Soft Tops, & Parts
- Decal & Stripe Kits
- Emblems & Nameplates
- Engine Compartment Trim
- Frame Parts & Bushings
- Fuel Door Parts
- Fuel Tank Filler Neck
- Grille
- Header Panel
- Hood & Hatch Lift Supports
- Hood Latch & Catch Brackets
- Hood Release Cable
- Jack Pads
- Radiator Supports
- Rust Repair Panels
- Splash Shields & Fender Liners
- Tailgate Cables
- Tailgate Hinges & Related
- Weatherstripping
-
- Car Covers
- Exterior Lighting
- Exterior Parts & Accessories
- Exterior Safety & Security
- Exterior Storage
- Fender Flares
- License Plate Brackets & Frames
- Mud Flaps & Splash Guards
- Nerf Bars, Side Steps, Running Boards
- Radio Antenna
- Rain Deflectors
- Roll Bars, Light Bars, & Related
- Roof Rack
- Skid Plates
- Spare Tire Carriers & Related
- Spare Tire Covers
- Tire Care
- Tonneau Covers
- Tow Hooks & D-Shackles
- Towing Accessories
- Trailer Hitch & Components
-
- Accelerator Pedal Pad
- Auto Carpet
- Brake Pedal Pad
- Clutch Pedal Pad
- Console Parts
- Dash Pad Cover
- Dash Vents
- Floor Mats & Liners
- Horns & Horn Parts
- Interior Parts & Accessories
- Mirror - Interior Rear View
- Seat Cover and Sets
- Seat Heater Kits
- Seat Parts and Accessories
- Sun Visors & Related
- Trunk & Cargo Parts
-
- Accelerator Pedals & Sensors
- Alarms, Control Modules, & Remote Start
- Cruise Control Switch & Lever
- Electrical Parts
- Hazard Switch
- Ignition Key Lock Cylinder
- Ignition Switch
- Keyless Entry Remote & Related
- Neutral Safety Switch
- Parking Assist Cameras & Monitors
- Power Mirror Switch
- Power Seat Switches
- Power Window Switch
- Radio, Navigation, Entertainment
- Reverse Light Switch
- Trunk Release & Lock Solenoids
- Turn Signal Switches and Levers
- Windshield Wiper Switch
-
- Idler Arm
- Pitman Arm
- Power Steering Hoses
- Power Steering Oil Cooler
- Power Steering Pressure Sensor
- Power Steering Pump
- Power Steering Pump Cooling Fan
- Power Steering Pump Pulley
- Power Steering Pump Reservoir
- Steering Dampers
- Steering Knuckles and Spindles
- Steering Rack and Gear Boxes
- Steering Shafts & Couplers
- Steering Wheels & Column Parts
- Tie Rods & Adjusting Sleeves
-
-
-
-
-
1168
117
10
10
-
Notify When Available
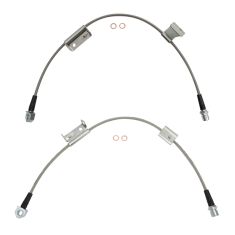
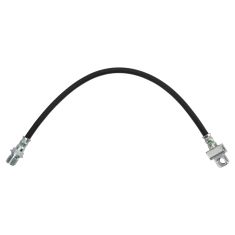
Replaces Chevrolet GMC Cadillac Front Driver & Passenger Side Performance 2 Piece Brake Hose Set TRQ Performance BLA63326
Brand: TRQ Performance - BLA63326$52.95Save 31%List $76.95 Save $24.00
Brand: TRQ Performance - BLA63326$52.95Save 31%List $76.95 Save $24.00 -
Notify When Available
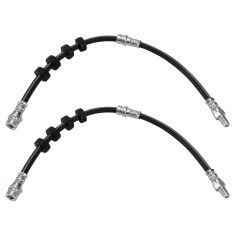
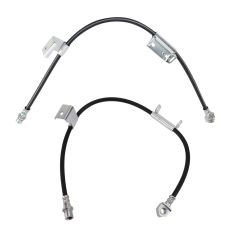
Replaces Ford Mazda Mercury Front Driver & Passenger Side 2 Piece Brake Hose Set TRQ BLA63672
Brand: TRQ - BLA63672$39.95Save 26%List $53.95 Save $14.00
Brand: TRQ - BLA63672$39.95Save 26%List $53.95 Save $14.00 -
Notify When Available
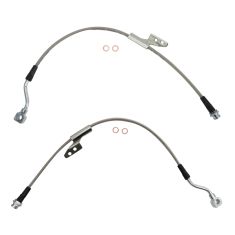
Replaces Chevrolet GMC Front Driver & Passenger Side Performance 2 Piece Brake Hose Set TRQ Performance BLA63343
Brand: TRQ Performance - BLA63343$45.95Save 32%List $67.95 Save $22.00Brand: TRQ Performance - BLA63343$45.95Save 32%List $67.95 Save $22.00 -
Notify When Available
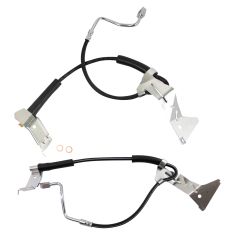
Replaces 2005-07 Ford Front Driver & Passenger Side 2 Piece Brake Hose Set TRQ BLA63837
Brand: TRQ - BLA63837$84.95Save 24%List $111.95 Save $27.00Brand: TRQ - BLA63837$84.95Save 24%List $111.95 Save $27.00 -
Notify When Available
Replaces Ford F150 Front Driver & Passenger Side 2 Piece Brake Hose Set TRQ BLA63815
Brand: TRQ - BLA63815$54.95Save 30%List $77.95 Save $23.00Brand: TRQ - BLA63815$54.95Save 30%List $77.95 Save $23.00 -
Notify When Available
Replaces 2000-01 Dodge Ram 1500 2500 Front Driver & Passenger Side 2 Piece Brake Hose Set TRQ BLA63828
Brand: TRQ - BLA63828$61.95Save 30%List $88.95 Save $27.00Replaces 2000-01 Dodge Ram 1500 2500 Front Driver & Passenger Side 2 Piece Brake Hose Set TRQ BLA63828
Brand: TRQ - BLA63828$61.95Save 30%List $88.95 Save $27.00 -
Notify When Available
Replaces Ford Front Driver & Passenger Side 2 Piece Brake Hose Set TRQ BLA63825
Brand: TRQ - BLA63825$44.95Save 21%List $56.95 Save $12.00Brand: TRQ - BLA63825$44.95Save 21%List $56.95 Save $12.00 -
Notify When Available
VIDEO
Replaces 1999-04 Ford Mustang Front Driver & Passenger Side 2 Piece Brake Hose Set TRQ BLA63800
Brand: TRQ - BLA63800$39.95Save 41%List $67.95 Save $28.00VIDEO
Brand: TRQ - BLA63800$39.95Save 41%List $67.95 Save $28.00 -
Notify When Available
VIDEO
$25.95Save 32%List $37.95 Save $12.00VIDEO
Brand: TRQ - BLA61543$25.95Save 32%List $37.95 Save $12.00 -
Notify When Available
VIDEO
Replaces Chevrolet GMC Cadillac Front Driver & Passenger Side 2 Piece Brake Hose Set TRQ BLA63754
Brand: TRQ - BLA63754$55.95Save 30%List $79.95 Save $24.00VIDEO
Brand: TRQ - BLA63754$55.95Save 30%List $79.95 Save $24.00
loading...
Choose the Make of Your Vehicle

