Replaces
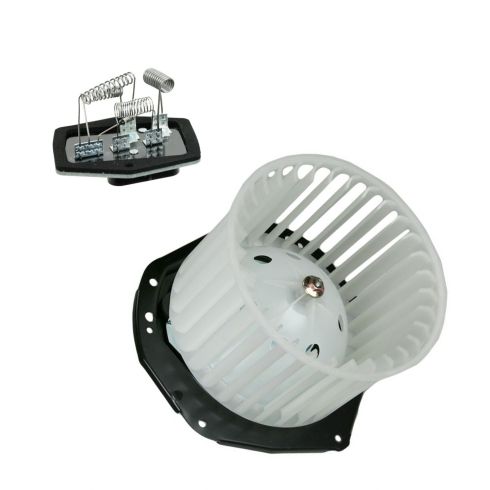
Part Details
Complete Repair in One Purchase - Stop searching for parts individually and complete your repair with a customized kit or set from DIY Solutions.
High-Quality Parts from Trusted Brands - DIY Solutions' kits and sets are selected from the best automotive brands and include hard-to-find and even obsolete parts you may need for your vehicle.
Guaranteed Fit - DIY Solutions ensures its selected parts are quality-tested to guarantee fit and function.
Highest Quality MaterialsMade from highest quality materials that meet or exceed OEM standards
Quality Tested - built to a strict level of product standards.
Item Condition:
New
Attention California Customers:
 WARNING: Cancer and Reproductive Harm - www.P65Warnings.ca.gov.
Lifetime Warranty
This item is backed by our limited lifetime warranty. In the event that this item should fail due to manufacturing defects during intended use, we will replace the part free of charge. This warranty covers the cost of the part only.
Returns: Parts with electrical components cannot be returned once installed.
FREE Shipping is standard on Orders shipped to the lower 48 States (Contiguous United States). Standard shipping charges apply to Hawaii, Alaska and US Territories. Shipping is not available to Canada.
Expedited is available on checkout to the United States, excluding Alaska, Hawaii and US Territories as well as P.O. Boxes and APO/FPO/DPO addresses. Final shipping costs are available at checkout.


Created on:
Tools used
Brought to you by 1AAuto.com, your source for quality replacement parts and the best service on the Internet.
Hi, I'm Don from 1A Auto. I hope this how-to video helps you out, and next time you need parts for your vehicle, think of 1AAuto.com. Thanks.
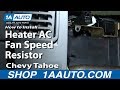
In this video, we're going to show you how to replace the blower motor resistor on this 1996 Chevy Tahoe. The items you'll need for this are a new Blower Motor Resistor from 1AAuto.com, flat blade screwdriver, 7mm socket and ratchet, and a pair of pliers.
Start off by opening your glove box and pushing in the sides and pulling it down, then unhook and pull. Next, you want to remove this two 7mm bolts. I'll just fast forward as Don does this. Now, using a pair of pliers, just push the tabs on the clips at the bottom of these harnesses and push them up and out of that bracket. Now, press the tabs on the top of the harnesses and disconnect them. Now, pull down the bracket and on the top of this relay, just push the tab and pull it free.
Your harness for your blower motor resistor is right here. Just pry back on the tab and pop the harness up and off. Just set that aside, and your resistor is held in with two 7mm bolts. I will just fast forward as Don removes both of those. Once those are removed, you can pull your resistor up and to get it out, you're going to actually have to rotate it upside down. Just keep working it around until it's completely upside down and then pull it forward and then down and out.
Take a new blower motor resistor from 1A Auto and just push it back into place. You want to make sure you don't damage any of the coils and just very carefully lower it back into place. Just again, make sure those coils are okay and that none of them are touching each other. Replace those two 7mm bolts. Now, reconnect your resistor harness. Replace your bracket and reconnect that relay and then take your two harnesses and push both of them back down into the bracket, and replace those two 7mm bolts that hold the bracket into place. Now, reconnect those two harnesses, and then take your glove box, put those hooks back onto those bars. Push the sides in and push the glove box back into place. You're all set.
We hope this helps you out. Brought to you by www.1AAuto.com, your source for quality replacement parts and the best service on the Internet. Please feel free to call us toll-free, 888-844-3393. We're the company that's here for you on the Internet and in person.
Tools used
Tools used
Brought to you by 1AAuto.com, your source for quality replacement parts and the best service on the Internet.
Hi, I'm Don from 1A Auto. I hope this how-to video helps you out, and the next time you need a part for your vehicle, think of 1AAuto.com. Thanks.
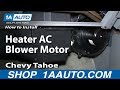
In this video, we're going to show you how to replace the blower motor on this 1996 Chevy Tahoe. The items you'll need include a new blower motor from 1AAuto.com, a flat blade screwdriver, 7mm socket and ratchet, Phillips bit, and pliers. Start off by opening your glove box, pushing in the sides, and pulling it down. Then unhook it and pull.
Next, you want to disconnect these two harnesses right here. So, using a pair of pliers, just push the tabs and pull them free. Next, you want to remove this cover, so pull the back flap up over the tab, and pull the cover down and out. Surrounding your blower motor, there's a series of 7mm bolts. You want to just go ahead and remove these and we'll fast-forward as Don does that.
Next, you want to remove this ground screw using a Phillip's bit. Just reach in there and remove it. Now, pull your blower motor free, and just pull it down and out. On the left is the old blower motor; on the right is the new one from 1A Auto. You can see they're identical, and they're going to fit exactly the same.
Push your new blower motor into place and line it up. Once you have it lined up, replace those 7mm bolts. Now, just replace that ground screw. You can see he starts off by just twisting it in by hand, and then tightens it up with his Phillips bit and ratchet. Now, replace that cover. Once it's pushed into place, reconnect those two harnesses. Now, take your glove box, put these two hooks onto these two bars, push in the sides, push it back into place, and you're all set.
We hope this video helps you out. Brought to you by www.1AAuto.com, your source for quality replacement parts and the best service on the Internet. Please feel free to call us toll-free, 888-844-3393. We're the company that's here for you on the Internet and in person.
Tools used
Tools used