
How to Replace Front Upper Lower Ball Joints 1990-2001 Jeep Cherokee
Created on: 2016-07-27
Check out this video to learn how you can replace the upper and lower ball joints on your 90-01 Jeep Cherokee.
-
step 1 :Removing the Wheel
- Loosen the 19mm lug nuts with the vehicle on the ground
- Straighten the cotter pin on the axle nut with needle nose pliers
- Remove the cap and washer from the axle nut
- Loosen the axle nut with a 36mm socket and breaker bar
- Raise the vehicle with a floor jack
- Secure the vehicle on jack stands
- Remove the lug nuts
- Pull off the wheel
-
step 2 :Removing the Brake Rotor
- Remove 13mm bolts from the brake caliper
- Pull the caliper aside and secure it out of the way with a bungee chord
- Pull the rotor off
-
step 3 :Removing the Hub
- Spray rust penetrant around the contact points of the hub
- Remove the three 13mm 12-point bolts from the hub
- Pry off the washer from the axle (if you have one) with a pick
- Tap the axle in with a hammer to free the splines from the hub
- Tap the hub out of the spindle with a hammer
- Remove the hub and dust shield
-
step 4 :Loosening the Tie Rod
- Remove the cotter pin from the tie rod castle nut with a pair of pliers
- Remove the 19mm castle nut from the tie rod
- Hit the edge of the spindle to release the stud
- Release the tie rode from the spindle
-
step 5 :Removing the Lower and Upper Ball Joint
- Remove the cotter pins from the upper and lower ball joints
- If the cotter pin breaker or gets stuck, punch the pin through with a punch and hammer
- Remove the axle shaft from the housing
- Insert rags or a glove to stop axle fluid from leaking
- Remove the two 22mm castle nuts from the ball joints
- Insert a pick fork between the upper ball joint and the spindle to release the ball joint
- If needed, hit the bottom to release the spindle from the axle
- Remove the upper ball joint with a ball joint press
- Repeat the process for the lower ball joint
-
step 6 :Installing the Lower and Upper Ball Joint
- Remove the boots from the ball joints
- Press the upper ball joint into the spindle with the ball joint press until it bottoms out into the slot on the axle
- Insert the boot to the upper ball joint
- Press the lower ball joint into the spindle with the ball joint press until it bottoms out into the slot on the axle
- Insert the boot to the lower ball joint
- Hand-tighten the lower ball joint castle nut
- Hand-tighten the upper ball joint castle nut
- Tighten the lower ball joint castle nut with a 32mm socket and ratchet
- Tighten the upper ball joint castle nut with a 22mm socket and ratchet
- Torque the upper ball joint nut to 75 foot-pounds
- Torque the upper ball joint nut to 80 foot-pounds
- Install the lower cotter pin with the longer end facing down over the stud
- Cut the shorter leg off
- Install the upper cotter pin with the longer end facing down over the stud
- Cut the shorter leg off
- Tighten the upper ball joint grease fitting with a 7mm wrench
- Add grease to the ball joint until the boot swells without popping off the joint
- Remove the rags blocking the axle fluid
- Insert the axle into the differential
-
step 7 :Reinstalling the Tie Rod
- Insert the tie rod into the spindle
- Tighten the 19mm castle nut
- Torque the tie rod nut to 35 foot-pounds
- Insert the new cotter pin into the tie rod
- Bend the longer leg over the top of the stud
- Cut the shorter leg
-
step 8 :Installing the Hub
- Insert the dust shield into place
- Insert the hub into place
- Tighten the 12-point 13mm bolts
- Torque the hub bolts to 75 foot-pounds
-
step 9 :Installing the Rotor
- Insert the rotor onto the hub
- Press the caliper onto the rotor
- Tighten the two 13mm bolts to the caliper
- Torque the caliper mounting bolts to 20 foot-pounds
-
step 10 :Reattaching the Wheel
- Slide the wheel into place
- Start the lug nuts by hand
- Tighten the lug nuts preliminarily
- Lower the vehicle to the ground
- Tighten the lug nuts to between 110 foot-pounds in a crossing or star pattern
- Torque the axle nut to 175 foot-pounds
- Insert the axle nut cap into place
- Insert a new cotter pin into place
- Turn each end of the cotter pin to opposite sides of the nut
Tools needed
-
13mm Socket
A Piece of Pipe (for leverage)
Socket Extensions
Torque Wrench
Hammer
Ball Joint Press
Rust Penetrant
Pry Bar
7mm Wrench
19mm Socket
Grease Gun
Pick
Pickle Fork
Center Punch
Bungee Cord
Ratchet
Needle nose pliers
36mm Socket
22mm Socket
Brought to you by 1AAuto.com, your source for quality replacement parts and the best service on the Internet.
Hi, I'm Mike from 1A Auto. I hope this how-to video helps you out, and next time you need parts for your vehicle, think of 1AAuto.com. Thanks.
In this video, we're going to show you how to replace the upper and lower ball joints in a 1996 Jeep Cherokee. This video will be useful from 1992 to 2001 and very similar to any other jeep that uses a Dana 30 front axle.
The items you'll need for this repair include a new set of upper and lower ball joints from 1AAuto.com, 13, 19, 22, and 36 millimeter sockets, a ratchet and breaker bar, a 7 millimeter wrench, torque wrench, ball joint press, pry bar, needle nose pliers, a hammer and pickle fork, a pick tool, a small punch, a grease gun, a bungee cord, and your favorite penetrating oil.
Using a 19 millimeter socket and breaker bar, crack the lug nuts loose. Straighten out the cotter pin with a pair of needle nose pliers, and move it from the axle. Remove the cap and washer from the axle nut. Using the 36 millimeter socket and breaker bar, break the axle nut loose. These are usually on pretty tight, so you may need to put some force behind it. Remove the axle nut from the end of the axle shaft.
While we're using a lift to make it easier to show you, this job can also be done at home on a jack and jack stands. With the vehicle raised and supported, you can finish removing the rest of the lug nuts and the wheel. Using a 13 millimeter socket and ratchet, remove the two bolts securing the caliper to the spindle. Remove the caliper and pads from the spindle.
You may need a small pry bar or a large flat screwdriver to remove the caliper. Once the caliper is removed, use a bungee cord, mechanics wire, or zip ties to hang the caliper up and out of the way. Remove the rotor.
We're going to spray some penetrating oil around the contact points of the hub, as well as the exposed portions of the stud. Remove the three 13 millimeter 12-point bolts securing the wheel hub to the spindle. We're going to use a 12-point 13 millimeter socket, a breaker bar, and if you need to, you can use a pipe for a little extra leverage.
We'll break the bolts loose with the breaker bar, and finish removing them with a socket and ratchet. If you have a nut and washer as opposed to a flange nut on your axle, you can use a small pick to pull the washer out so it doesn't fall off when you remove the hub. Tap the axle in to be sure that the splines are free of the hub. Then with a hammer tap the hub out of the spindle. Remove the dust shield as well.
Using a pair of needle nose pliers, remove the cotter pin for the tire rod. With the end brakes off, you can always pull them through in the other direction. Using a 19 millimeter socket and ratchet, remove the castle nut from the tire rod.
Since this is a steel spindle, we can hit the edge of the spindle to release the stud. Remove the cotter pins from the upper and lower ball joints with a pair of needle nose pliers. Our cotter pin broke off flush with the bolt, so we're going to use a small punch and a hammer to try and tap it through. Be careful not to put the punch in too far, as it could break off in the hole and is much more difficult to remove than the cotter pin. Once the loop is through the castle nut, grab it with a pair of needle nose, and finish removing it.
Straighten out the cotter pin for the upper ball joint. Remove it from the ball joint stud. Put a pair of needle nose pliers into the loop on the other side of the ball joint. Ours broke, so we'll try to pull them from the back side. Again, our cotter pins have broken, so we'll tap them out with a punch and a hammer.
Carefully remove the axle shaft from the housing. Be sure to place it somewhere where the splines won't be damaged. Once you've broken through the cotter pin, you can finish removing the nut with a 22 millimeter socket and ratchet. Our axle fluid started leaking out of the tube here, so we took a rubber glove, wadded some paper towels into it, tied the end off, and stuck it into the end of the axle tube to keep the fluid in there while we work.
Using a 28 millimeter socket and a breaker bar, remove the nut from the lower ball joint. Using the pickle fork between the upper ball joint and the spindle, separate your spindle from the axle. If it still isn't coming out with the pickle fork wedged in, you may have to hit the bottom in order to release the spindle from the axle.
Set up your ball joint press to push the upper ball joint up. Using a 22 millimeter socket and ratchet, press the ball joint out of the axle. Sometimes it may be necessary to change the configuration of your press to push the ball joint the rest of the way out. Set up your ball joint press to press the lower joint down into the cup.
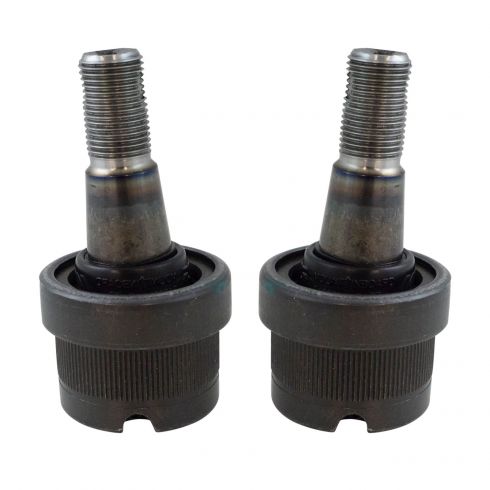
Here we have our old ball joints that we removed from the vehicle and our new ball joints from 1AAuto.com. As you can see, the ball joints are exactly the same. Our new lower ball joint comes with a snap ring to make sure that it stays in there more secure. They are both greaseable and serviceable joints, and they come with new castle nuts and new cotter pins. The ball joints on your front axle allow the vehicle's front spindle to turn as you steer the wheel. They develop in and out play over time or become jammed up, making it difficult to steer. They can also create popping and banging noises while going over bumps, as well as throw off the alignment of the vehicle.
If your old ball joints have excessive play and are creating a popping or banging sound over bumps, or while turning, as well as creating alignment issues on the front end of your vehicle, then these new ball joints from 1A Auto are going to go in direct fit just like your original equipment and fix you up right.
Insert the upper ball joint into the spindle. Sometimes it's safer to remove the rubber boot until after it's been installed. Set up your ball joint press. Using a 22 millimeter socket and ratchet, press your ball joint into the spindle. Bring the ball joint down until it bottoms out into its slot on the axle. Once the ball joint is set into the axle, reinstall the boot. Remove the boot from the lower ball joint, set it into the axle, and set up your press to install.
Reinstall the boot onto the bottom of the lower ball joint. Reinstall the spindle onto the ball joints. Start the nut onto the lower ball joint first. Bring that up as far as it will go then start the top. Using a 32 millimeter socket and ratchet, tighten up the lower ball joint nut. Tighten the upper ball joint nut with a 22 millimeter socket and ratchet. Torque the upper ball joint nut to 75 foot-pounds and the lower ball joint nut to 80 foot-pounds.
Install the bottom cotter pin with the longer leg facing down. Bend it over the bottom of the stud and cut the shorter leg off. Send the cotter pin through the upper ball joint with the longer leg facing down. Bend the longer leg onto the stud. Cut the shorter one off. With the upper ball joint greased fitting in, tighten that down with a seven millimeter wrench. Add grease to the ball joint until you see the boot swell, but do not allow the boot to pop off of the joint. Remove whatever you're using to stop the flow of axle fluid, and quickly insert your axle.
You'll have to lift up on the center portion in order to get it to set back into the differential. Once it's lined up, rotate it, and fully insert it into the axle tube. Line up the spindle. Reinstall your tie rod. Start the nut. Tighten it down with a 19 millimeter socket and ratchet. Torque the tire rod nut to 35 foot-pounds. Install the cotter pin into the tie rod. Always use a new cotter pin. With the long leg facing out, bend that leg over the top of the stud. Cut the lower one short.
Reinstall the dust shield. Line up the hub onto the splines. Set it into place, and start your three 12-point 13 millimeter bolts. Tighten down the wheel hub bolts with a 13 millimeter 12-point socket. Be sure that the hub installs back into the spindle nice and straight. Torque the hub bolts to 75 foot-pounds.
Reinstall your rotor onto the hub. Remove your caliper from wherever you secured it. Reinstall it onto the rotor. Reinstall the two 13 millimeter bolts. Secure your caliper to the spindle. Torque the caliper mounting bolts to 20 foot-pounds.
Reinstall the wheel onto the hub. Start your lug nuts by hand. Torque the lug nuts to 110 foot-pounds in a cross pattern. Using the 38 millimeter socket and the torque wrench, torque your axle nut to 175 foot-pounds. Install this cap onto the axle nut in a way that allows you to insert a new cotter pin. The pair of needle nose pliers. Then both ears of the cotter pin to opposite sides of the nut.
Thanks for tuning in. We hope this video helped you out. Next time you need parts for your car, please visit 1AAuto.com. Also check out our other helpful how-to and diagnosis videos.
Shop Products


Jeep Front Driver & Passenger Side Lower 2 Piece Ball Joint Set MOOG MGSFK00092
- 2 Piece
- (1) Front Passenger Side Lower Ball Joint
- (1) Front Driver Side Lower Ball Joint

How to Replace Upper Ball Joint 1995-2002 Ford Crown Victoria
Watch this video to learn how to replace the upper ball joint on your 95-02 Ford Crown Victoria.

