
How to Replace Fuel Tank Filler Neck 2002-04 GMC Envoy XL
Created on: 2014-09-15
If the fuel neck filler is old, rusted, or leaking, watch this video and learn how to replace it
-
step 1 :Removing the Fuel Filler Neck
- Twist off the fuel filler cap
- Pull off the fuel door insert
- Remove the two 10mm nuts from the filler neck
- Pry out the filler neck clip with a flat blade screwdriver
- Loosen the fuel hose clamp with a flat blade screwdriver
- Separate the hose from the filler neck with a flat blade screwdriver
- Remove the 10mm nut and bolt from the filler neck wire
- Maneuver the filler neck out through the fuel door
-
step 2 :Installing the New Filler Neck
- Remove the clip from the old filler neck bracket
- Feed the new filler neck into place through the fuel door
- Position the filler neck studs in the fuel door
- Start the two 10mm nuts onto the filler neck
- Push the clip into the filler neck bracket
- Clean inside the fuel hose with penetrating oil
- Slide the hose onto the filler neck
- Put the filler neck wire into place
- Fasten the 10mm nut onto the filler neck wire
- Tighten the two 10mm nuts in the fuel door
- Clean the fuel door insert
- Push the fuel door insert into place
- Twist on the filler cap
Tools needed
-
Socket Extensions
Flat Blade Screwdriver
Rust Penetrant
10mm Wrench
10mm Socket
Ratchet
Cloth Rags
Brought to you by 1AAuto.com, your source for quality replacement parts and the best service on the Internet.
Hi, I'm Mike from 1A Auto. I hope this how-to video helps you out, and next time you need parts for your vehicle, think of 1AAuto.com. Thanks.
In this video, we're going to show you how to replace fuel filler neck on this 2003 GMC Envoy XL. The items you'll need for this is a new fuel filler neck from 1AAuto.com, 10mm socket and ratchet with an extension, 10mm wrench, and flat blade screwdriver.
Start off by just opening your fuel door, twisting out the fuel cap and then pulling out this insert. Then, remove these two 10mm nuts. We'll just fast forward as Mike does that. Now, up here there's a clip that holds your fuel filler neck in place. You just want to pry up the center of it and then pull the clip free. Now, loosen up this hose clamp. Once you have the clip off, then use your screwdriver. Work it in between the rubber hose and the filler neck and you're just trying to break the seal between the hose and the metal. While you're working it through, twist as well. Then once you get it broken free, just pull, twist and pull it off the neck.
There's a 10mm bolt right here, you just want to go ahead and remove that and there's a 10mm nut on the back, so just use a 10mm wrench to hold it into place. Then, just pull that wire down and pull the bolt free. Just pull your fuel filler out of that slot and then lift it up and out of here. You do have to kind of maneuver it and twist it and just work it out. The bracket is kind of a pain in these.
Up top, is the old fuel filler neck; below it, is the new one from 1A Auto. You can see they're identical and they'll fit exactly the same. If your clip is still in here, just push it out and pull it free. Go ahead and feed the filler neck down in. From down here, I've got a hold of the top of it and I can move it around but I'm making sure that it doesn't get caught in the air hose that's coming out of the compressor. It's got to go in front of those so pull those back behind it. Then just keep pushing it down, push it forward a little bit and keep coming down with it. I'm going to take the neck, twist it down and pull those studs through. I'm just going to put these nuts on it preliminarily, just a couple of turns to hold it in place. Now, make sure your wire is not caught on anything or in the clip that goes on the frame. Make sure that it routes down to where you need to hook it onto the truck. I'm just reaching up in here and I can feel the frame where the slot where it goes. It's probably a better idea to put this in before you put the filler neck in but these little teeth have to go into the filler neck. Using some penetrating oil, just clean up inside of this hose and you want to make sure you don't spray any of the rust down into the fuel tank but just carefully spray the penetrating oil and just wipe out inside of there and clean it up. The penetrating oil will also help with this part where you have to slide the hose back into place. Once you've got it all the way back on, slide that hose clamp back into place. Tighten that up. Now take this wire put it back into place and replace that 10mm bolt and nut. We'll fast forward as Mike tightens those up. Then tighten these two 10mm nuts up the rest of the way. Clean off this insert. Then just feed it back down into place. Replace your fuel cap and you're all set
We hope this video helps you out. Brought to you by www.1AAuto.com, your source for quality replacement parts and the best service on the Internet. Please feel free to call us toll-free, 888-844-3393. We're the company that's here for you on the Internet and in person.
Shop Products
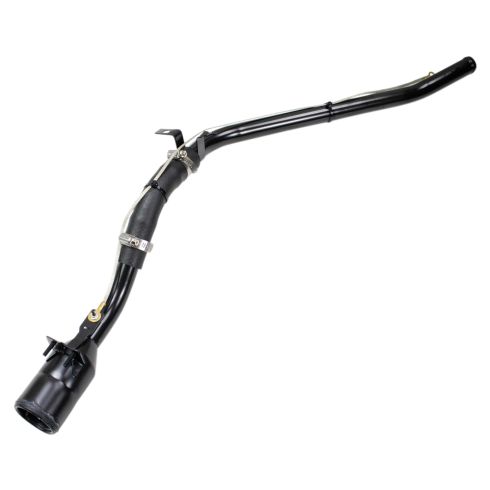
Chevrolet GMC Buick Olds Isuzu Fuel Tank Filler Neck TRQ FNA69735
- No
- No
- No
- 0
- 1.01 in
- Steel
- 33.46 in
- Gas
- No
- Yes
- Black

How to Replace Fuel Tank Filler Neck 1999-2004 Oldsmobile Alero
How to repair, install, fix, change or replace a rusted, rotted, bent or damaged fuel filler neck on Oldsmobile Alero, years 99, 00, 01, 02, 03, and 04.

