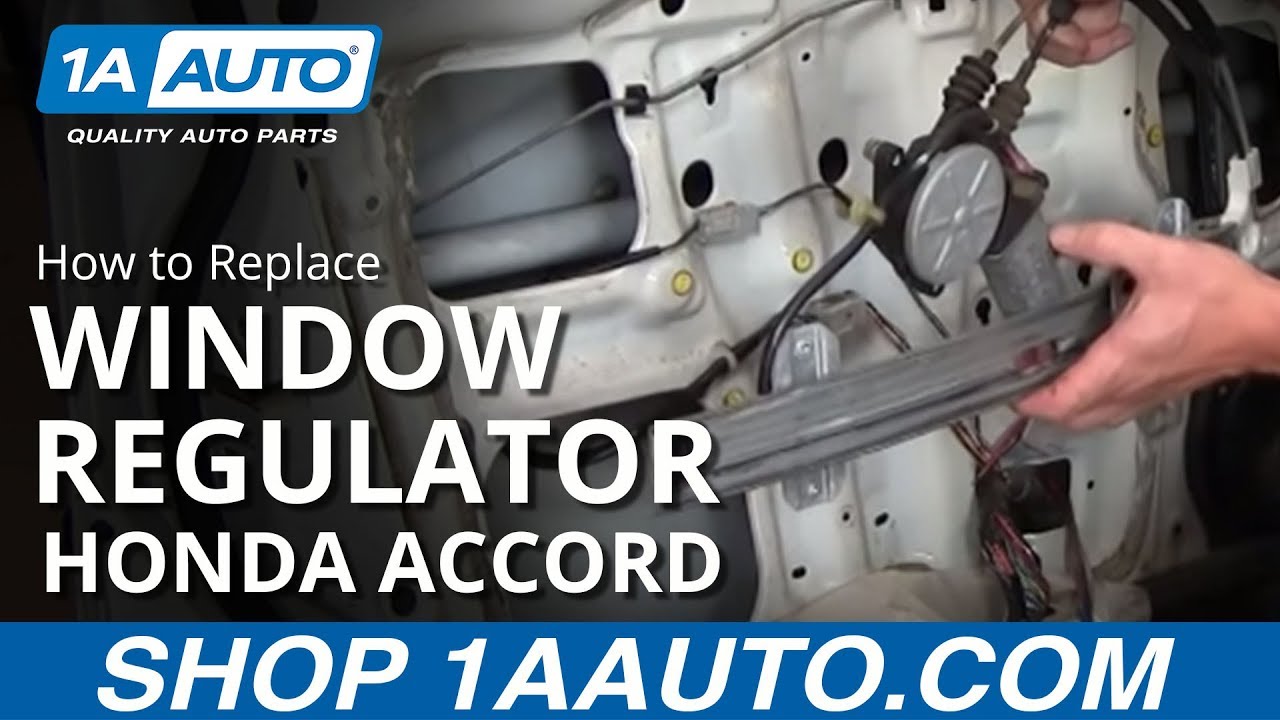
How to Replace Window Regulator 1994-97 Honda Accord
Created on: 2010-09-03
Watch this video to learn how to fix a slow or stuck window. The experts at 1A Auto will show you how to replace the window regulator in your 94-97 Honda Accord.
-
step 1 :Door Panel Removal
- Remove clips and Phillips screws-one in the door handle and one behind the latch-that hold the door panel up.
-
step 2 :Removing the Water Shield
- Remove the clips-put the flat blade screwdriver behind them, give a big pull, and they'll come out. (You really want to try and take the water shield off all in one piece so you can put it back on.)
- There are three or four different items that are screwed on top of the water shield. Just remove those Phillips screws.
- Carefully pull the water shield off. Try not to rip it so that you can reuse it when putting the door back together.
- (If you see there are holes on the tops of the clips, you can actually go from the side where they're solid.)
-
step 3 :Securing the Window
- There are two 10mm bolts in there, and those two bolts hold the window to the regulator.
- Take the window and pull it up and support it, or have somebody hold it for you.
- Loosen the two bolts. (DO NOT REMOVE)
- Take some Painter's Tape and drape it right over the frame of the door.
- Remove the two bolts. While removing them, hold the window.
- Once the bolts are out, pull your window up and secure it with the painter's tape.
-
step 4 :Removing the Regulator
- Remove the top right bolt, loosening the top left bolt, removing the bottom two bolts, and loosening all three bolts on the far right.
- Disconnect the window motor, and use a screwdriver to push through the pin on the window motor harness.
- For the second pin, pull from the backside, and pull the window motor harness through the rest of the way.
- Lift the motor up and off
- Turn the regulator on its side, and then bring it right on down through the opening on the left side of the door.
- Your regulator is out.
-
step 5 :Reinstalling the Regulator
- Make sure the bolts and motor are facing towards you.
- Reach your other hand in through the opening on the top right, and pull the regulator through. Tighten all parts.
- Pull the harness through the door and attach the clip, hooking up and tightening.
-
step 6 :Hooking up the Window
- Lift up window, and then slowly lower it down. (The window may twist).
- Keep the window back against the door rail. The holes for the 10 mm bolts should be lined up on both sides.
- Replace and tighten both, then reconnect your car window switch.
-
step 7 :Reinstalling the Water Shield
- Carefully replace the water shield using the same adhesive or a piece of tape.
-
step 8 :Replacing the Door Panel.
- Replace the door panel in the reverse order of how it was removed.
Tools needed
-
Flat Blade Screwdriver
Phillips Head Screwdriver
Putty Knife
Painter's Tape
10mm Socket
Door Panel Removal Tool
Cloth Rags
Brought to you by 1AAuto.com. Your source for quality replacement parts and the best service on the internet.
Hi, I'm Mike Green, one of the owners of 1A Auto. I want to help you save time and money repairing and maintaining your vehicle. I'm going to use my 20+ years experience restoring and repairing cars and trucks like this to show you the correct way to install parts from 1AAuto.com. The right parts installed correctly. That's going to save you time and money. Thank you and enjoy the video.
In this video we're going to show you how to replace the power window regulator on the driver-side front door on this 1995 Honda Accord, the same as any 1994 to 1997 Accord. Its a pretty straight forward repair. The tools you'll need are a Phillips screwdriver, regular screwdriver, a putty knife and a rag, or a door panel clip tool if you have one, and a 10mm socket and ratchet.
We're going to start by going fast motion through the door panel removal. If you want to see this in regular speed, just check our other videos for the door panel removal. You can probably get enough here it's just a few screws and clips.
Once you get your door panel off, to get inside the door, you want to take the water shield off. You really want to take a little time and take the water shield off all in one piece so you can put it back on. What that basically involves is removing a few clips. You put a screwdriver behind, give a big pull, and they'll come out. Then there are three or four different things that are screwed on top of the water shield. Just remove those Phillips screws. Carefully pull the water shield off. Try not to rip it so that you can reuse it when putting the door back together.
On the clips, if you see there are holes on the top, you can actually go from the side where they're solid. You'll be able to push these two together and they'll pull out easily. It's pretty dry, so I don't want to pull it anymore and rip it more. Now you can get to everything. With the window all the way up, you can see there are two bolts right inside there. There are two 10mm bolts in there. Those two bolts hold the window to the regulator. You're probably going to have a broken window regulator if you're repairing it. This one's not broken so what I'm going to do is show you how you would want to do it.
So I just moved the window down so I could see the bolts through these two holes. What you want to do is, if your window regulator is broken, you should be able to take the window and just by hand pull it up and support it or have somebody hold it for you so you can reach the bolts through these holes. Now, if your window regulator quit all the way up in the up position, then you're fine. You can get through it through those holes. Now what you want to do is loosen those two bolts. Before removing them, I'm going to take the painters tape and I'm just going to drape it right over the frame of the door. Now I'm going to remove the bolts. While I'm removing the last one, I'm holding the window. Once the bolts are out, you can just pull your window up and use your tape to support it. Now you can remove the regulator itself which is done by removing the top right bolt, loosening the top left bolt, removing the bottom two bolts, and loosening all three bolts on the far right.The last thing you need to do before you pull it out is you'll need to disconnect your window motor here which is just pushing down.
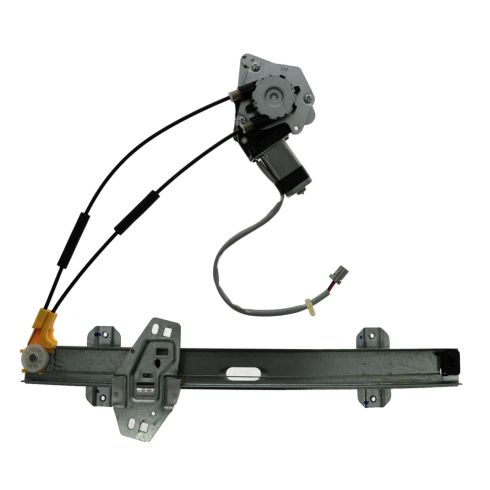
There's a pin that is on your window motor harness, so you use a screwdriver to help you push that through. Then pull from the other out from the back side. Pull your window motor harness through the rest of the way. Then you lift your motor up and off, and your window regulator still is kind of hanging by the bolt here. Turn it on its side and then bring it right on down through the large opening on the bottom left of the door. Your regulator is out. Here's the new regulator from 1A Auto. You can see our regulators are going to all bolt the same. This wheel is matted to have less friction on the cable. The other thing you would want to do is to transfer the bolt over to your new regulator so you can hang it up there. You can see also that our harness is going to connect just like the original harness. Same connection and even has the little clips to go into the door.
Okay, so there's nothing wrong with this regulator, so I'm going to show you how to reinstall it just by putting this back in. One thing you want to do when this regulator goes in, you want to make sure that your motor, and your bolts are facing towards you. Regulator and motor in. Reach in with your other hand. Pull it back, upright with the regulator. Tighten and fit the harness. Pull the harness through, and attach the clip. Pull through the door, and insert the clip. Hook up and tighten.
Now I have my bolt and my extension here. I'm going to un-tape my window, and then slowly lower it down. The window does kind of twist. You want to keep the window in the back against your door rail here and then you can see that the hole is right there lined up nicely. It is the same on the other side. Tighten that now. Reconnect your car window switch. Now we can put our water shield back on and our door panel back on and we'll be all set.
Here again we're going to employ our fast motion speed to put the door panel back on. You want to make sure that you put that water shield back on it. It just goes on with the same adhesive. I actually taped mine up a little bit so it would look a little bit better. Then put the door panel back on. If you want to see this in regular motion check out our other videos for the Accord door panel install. Beyond that we hope we helped you out.
This video is brought to you by www.1AAuto.com. Your source for quality replacement parts and the best service on the internet. Please feel free to call us toll free 888-844-3393. We're the company that's here for you on the internet and in person.
Shop Products


1994-97 Honda Accord 4 Door Front Passenger Side Power Power Window Motor & Regulator Assembly TRQ WRA51129
- Power
- No
- 8
- 2
- No
- No
- 15.75 in
- Galvanized Steel
- Nylon
- Yes

How To Replace Manual Window Regulator 1980-96 Ford F150 F250 F350
Check out this video from 1A Auto to learn how you can replace the window regulator on your 80-96 Ford F-series truck.

