
How to Replace Headlights and Bulbs 2005-10 Pontiac G6 Sedan
Created on: 2013-07-03
Learn how to replace the headlights or light bulbs in your 05-10 Pontiac G6 with this video from 1A Auto. It's a great way to freshen up a vehicle!
-
step 1 :Removing the Headlight Assembly
- Remove the two 7 mm screws from the top of the headlight
- Remove the three plastic rivets next to the light.
- Unhook it from the bumper cover lift up and pull the light out.
- Use the clip to release the connector.
-
step 2 :Changing Bulbs
- Remove the cover of the bulb that needs to be replaced.
- Twist the bulb out counterclockwise.
- Use the tabs to release the bulb and replace with a new bulb.
- Replace light and cover.
- To change smaller lights, simply twist them out.
-
step 3 :Replace the Headlight Assembly
- If locater clip is removed put the clip back into the fender of the car.
- Line up the pin on the light with the clip on the fender.
- Line up the bumper cover around the light.
- Reinstall clips and bolts.
Tools needed
-
Flat Blade Screwdriver
7mm Socket
Brought to you by: 1AAuto.com your source for quality replacement parts and the best service on the internet. Hi, I'm Don from 1A Auto. I hope this how to video helps you out. The next time you need a part for your vehicle, think of 1AAuto.com. Thanks.
In this video, we are going to show you how to replace the front headlights or service the headlight bulbs in a 2007 Pontiac G6. It's going to be the same operation for the 2005 through 2010 G6. You will need a 7 mm socket and socket wrench and a little flat blade pocket screwdriver. Locate the two 7 mm screws that go in through the top of the headlight and then the three plastic rivets on the front bumper.
I am going to fast forward through the removal of those 7 mm screws. Using a flat head pocket screwdriver to lift up on the center part of the plastic rivet and then going back and taking out the outer portion of the plastic rivet with the same screwdriver and then just remove the other two clips. To remove the light, you are kind of pull out, shove the inside in underneath the bumper cover and then pull out a little bit. It will get hung up on the bumper cover down below. So you need to reach down, kind of unhook it there and then you are going to pull it forward and out.
Pull up on the clip to release the connector and if you are looking to service your bulbs, this is where you will do it. There are three covers on the back. The first one there you will see your high beams and you twist the cover off and twist the bulb out counterclockwise and once you got that out and it can be tricky because it's in there with three prongs. You can find the connector. You will see that it's got the two tabs on either side and as you pull out on those tabs you can pull the bulb out and if you are looking to just reinstall a new bulb, go ahead and put your new bulb in now. Reconnect it, line up your three tabs with the housing. Put it in at the point which you took out the old one. Press it in and you are going to want to twist it tightly till it is seated. Once you are done with that you can go ahead and put that cover back on.
Then you have got couple of little parking lights and blinkers and those are twist as well. This particular bulb though just pulls out of the socket and the new one goes in just the same and then there is one more right on the side and that's another pull out type. You are going to twist the connector out, give it a good pull and then pull the bulb out and insert a new one and tighten it back up the way you had it.
Here's the old part and here's the new part from 1A Auto and it's got the same harness as the factory, so it will go right back in. The locator pin on our old headlight had broken off inside their body, so we are going to pull out the clip and fix that. With that broken piece out we are going to try and salvage that clip that goes in to the body so that our new headlight will be able to fit right in. I am just using a pocket screw driver, prying it out and then once I get it out I will be able to insert it back into the body. Got the clip back and I am just going to pop it right back into the body.
Reconnect the connector. Note the locating pin and the clip in the fender, insert the headlight on the inside and then move it towards the outside, get that locating pin inserted, get the bumper cover lined up around the headlight, line up everything. Now you can start by reinserting those clips, put the outside of the clip in first then lock the middle of the tab down and we will end up here kind of in fast motion as we put the other two clips in, then reinstall our 7 mm bolts and tighten those up and you should be all set.
We hope this helps you out. Brought to you by www.1AAuto.com your source for quality replacement parts and the best service on the internet. Please feel free to call us toll free 888-844-3393. We are the company that serves you on the internet and in person.
Shop Products


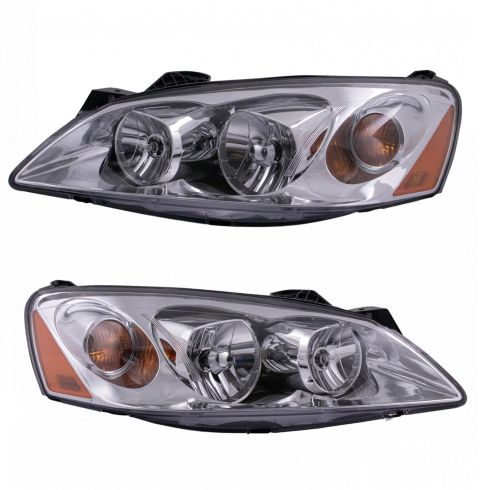
2005-10 Pontiac G6 Driver & Passenger Side 2 Piece Headlight Set DIY Solutions LHT08742
- Amber Turn Signal
- 2 Piece
- Features and Benefits
- (1) Passenger Side Headlight
- (1) Driver Side Headlight

How To Install Replace Headlight Pontiac Sunfire 1995-2002 1A Auto
Watch this video to learn how to replace and service the headlight assembly and bulbs on your 95-02 Pontiac Sunfire.

