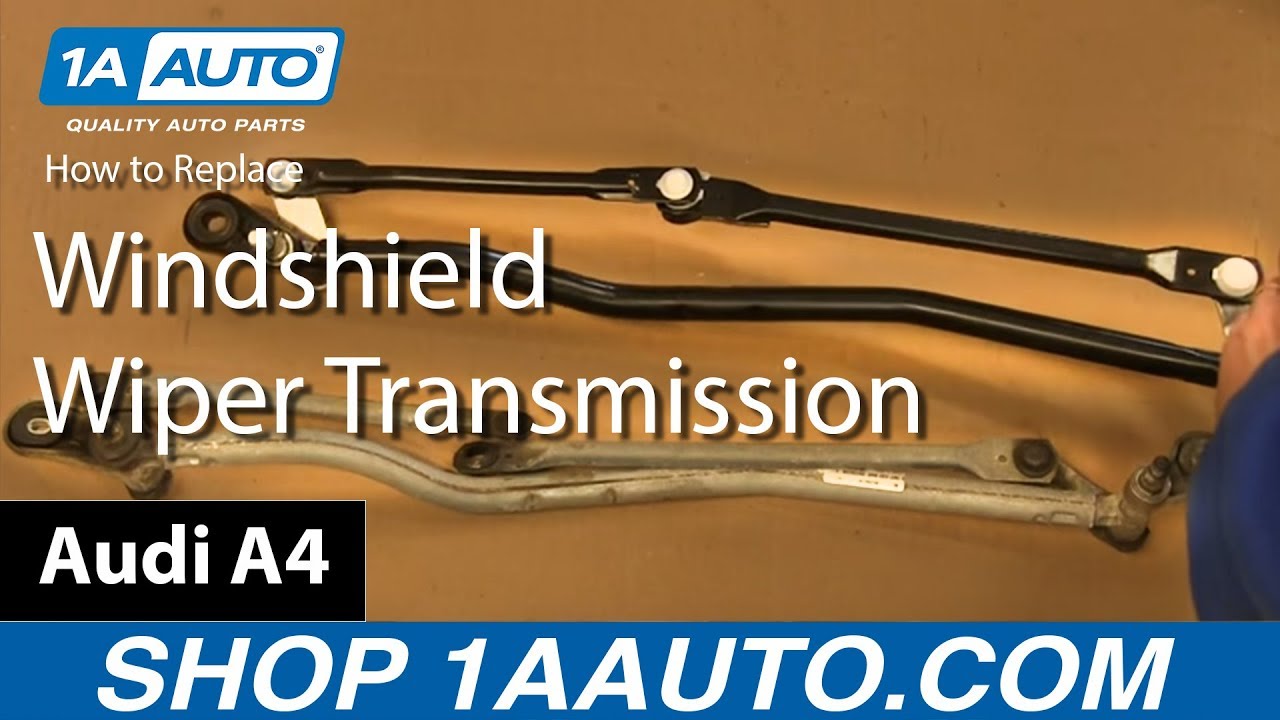
How To Replace Windshield Wiper Transmission 2003-08 Audi A4
Created on: 2015-11-24
Check out this video to learn how to replace the wiper arm transmission on your 03-08 Audi A4, S4 or RS3!
-
step 1 :Removing the Wiper Arms and the Cowl Panel
- Lift the hood
- Pry off the caps on the wipers
- Remove the 16mm nuts from the wiper arms
- Push and pull the wiper arms free
- If the wipers won't budge, turn the wipers on and shut them off in the up position
- Remove the wiper arms with a two jaw puller
- Remove the Phillips screw on the bottom corners of the windshield
- Pry up the black clip in the center of the cowl panel with a flat blade screwdriver
- Pull the cowl panel up and out
-
step 2 :Moving the Computer
- Remove the five T30 screws from the trim panel near the driver side
- Remove the band with a pair of needle nose pliers
- Lift the computer up and out of the way
-
step 3 :Removing the Wiper Transmission
- Disconnect the clip from the transmission mount with a pair of needle nose pliers
- Remove the three 10mm bolts holding the transmission
- Remove the two 10mm nuts and the 8mm nut from the computer's junction block
- Pull the wiper transmission out
- Disconnect the wiper transmission wiring harness
-
step 4 :Disassembling the Wiper Transmission
- Separate the transmission from the bracket with a flat blade screwdriver
- Remove the three T30 Torx screws from the bracket
- Remove the transmission bracket
- Draw a straight line to mark the arm's placement on the motor and transmission
- Remove the 13mm bolt from the shaft
- Tap the arm with a hammer and remove the arm
- Remove the grommet
- Remove the transmission
-
step 5 :Assembling the New Transmission
- Remove the two sleeves from the new transmission
- Mark the new transmission arm
- Turn the motor 90 degrees with a pair of pliers
- Insert the transmission to the motor
- Insert the grommet in place
- Insert the mounting bracket
- Tighten the T30 bolts to the bracket
- Reinstall the transmission arm
- Tighten the 13mm nut to the transmission arm
- Point the transmission arm to the passenger side of the vehicle
-
step 6 :Installing the New Wiper Transmission
- Connect the transmission wiring harness
- Insert the transmission into place
- Insert the grommets into the wiper studs
- Insert the metal sleeves to the mounting points
- Insert the computer's junction box
- Tighten the 10mm and 8mm nuts to the junction box
- Tighten the three 10mm bolts that hold the transmission
- Insert the clip to the transmission mount
-
step 7 :Installing the Computer
- Insert the computer into place
- Insert the bracket onto the computer
- Insert the computer cover into place
- Tighten the five T30 bolts to the computer cover
-
step 8 :Reinstalling the Wiper Arms and the Cowl Panel
- Insert the cowl panel into place
- Tighten the Phillips screws to either side of the panel
- Insert the wiper arms into place
- Press the wiper arms down and tighten the 16mm nuts to the wiper arms
Tools needed
-
13mm Socket
Socket Extensions
Pry Bar
16mm Socket
2 Jaw Gear Puller
Flat Blade Screwdriver
Phillips Head Screwdriver
T30 Bit
8mm Socket
10mm Socket
Ratchet
Flashlight
Needle nose pliers
Brought to you by 1AAuto.com, your source for quality replacement parts and the best service on the Internet.
Hi, I'm Mike from 1A Auto. I hope this how-to video helps you out, and next time you need parts for your vehicle, think of 1AAuto.com. Thanks!
In this video, we're going to show you how to replace a wiper transmission. This is a 2007 Audi A4, pretty much the same for any 2003 to 2008. Many times if your wipers stop working and they get stuck in the ice or something like that, that can strip the arms on the wiper transmission and you need to replace it. You'll need a new wiper transmission from 1AAuto.com, pliers, 8-17 millimeter sockets (and those are quarter inch to 3/8 inch drive), T30 torque driver socket, ratchets extensions and flex joints, 2-arm or a 2-jaw puller, a flashlight, and a small pry bar or a large screwdriver.
To start out, release your hood. Open up the driver's door and pull the hood release lever. Then, up underneath the center of the hood there's a lever. Pull up the safety latch and pull the hood up.
We'll need to remove the wipers. There's 16 millimeter nuts holding them in. They may have these little caps on the nuts, so use a screwdriver and pry those off. Then remove the two 16 millimeter nuts. I'll use a socket and ratchet to do that. If you're lucky, sometimes you can go into the wiper, push on it, and push and pull a little bit, and it'll break free. Unfortunately, on this Audi I don't get lucky and I have to go to a puller in order to get the wipers off. You'll want to get your wipers positioned straight up, so turn the key on, turn the wipers on, and then shut the key off when they're in the straight up position. This will make it easier to get a 2-jaw puller on.
Now I'm going to set a 2-jaw puller onto one of the wiper arms. Basically, the puller arms go down underneath the wiper arm, and then the bolt in the puller goes onto the stud that the wiper arm goes onto. Then you tighten up that bolt and pull the wiper off. Just fast-forward here as I set up the puller on the passenger side wiper arm and remove it. There's a Phillips screw on the bottom corner on the windshield, and there may be one on the other side as well, although it's missing on our vehicle.
Zooming in here, there's a little black clip that you want to remove. Just use a flat blade screwdriver to remove that. At this point, ideally you could actually start from the side and you should be able to pull this plastic trim panel out. Unfortunately, what I find on this vehicle is that the windshield was replaced and they urethaned this whole plastic trim panel in it, so I have to work around it, which is doable but it's kind of a pain. You can see right here there should be an Audi symbol if you have your original window. This is a replacement windshield. Like I said, I looked underneath, and you can see that the urethane that holds the windshield in overlaps the panel, so I can't pull it out without breaking the whole thing off. I'll just have to work around it.
Remove the top of this trim panel. It has five T30 screws. Three of them are right in the front, easy to see. One of them is a little further back. It would be easy to put an extension on and get to it if that trim panel weren't in the way, but it's not too difficult with just the ratchet and the T30 Torx driver. Then the last one, again that panel makes it hard. You need an extension on your T30 Torx driver. Go through the hole that's near the driver side wiper arm and pull that lid out.
Use a pair of needle nose pliers to take this band off. Push it down and then kind of grab on and pry out with the pliers to release it. Same thing on the other side. Remove that retainer and then pull the computer up and out. There's a clip that holds the wiring harness in place into that bracket. Basically, grab onto it with a set of needle nose pliers, and then use a large screwdriver to pry the pliers and the clip out. Three 10 millimeter bolts hold the transmission down: one there, one up underneath you can see right there, and then one on the driver side silver 10 millimeter bolts. I'll use that 10 millimeter socket ratchet and extension and remove those.
To get into where that plastic piece gets in the way, you're just going to have to pull it up out of your way and work as best you can, unless it comes off for you, and then you don't have to worry about it too much. Now that you can move it around, there are actually two 10 millimeter nuts that hold down the black plastic junction block that the computer was resting in. I'm removing one of those nuts here. Again, they're 10 millimeter. Then there's one further underneath in the corner. I'm going to pop up the little, there's a wiring harness that goes in through a molded plastic clip in that box, and then I'm going to remove the other 10 millimeter nut that holds that box down that's in the back. Then there is one more 8 millimeter nut in the front that's pretty easy to get to right there. Remove that. Then you can pull that box up and out, as well as pull your transmission out at the same time.
I've already pulled the box up and out quite a bit. You can see I pull it up more. Again, if that plastic came out of the windshield, I'd have a whole lot easier time doing this. Hopefully you don't hear it, but I have a few choice words in mind for this. Again, if you can get that plastic molding off the top, you'll make this a lot easier. Pull the box out of place and pull the transmission up and out. Then disconnect it. There's just a tab underneath. It's free.
Pry off the transmission arms. Use a large flat blade screwdriver. Work it in under there. The first one will pry off, and then you can pry the second one up and off. Three T30 Torx screws hold the bracket to the wiper motor, and so I'll remove those. Then I'm hoping I can get it apart without having to take the motor arm off. As you'll see, I do. Just by moving the motor a little bit, I'm able to get the bracket off, but then once I get the bracket off I find that I can't get the entire assembly apart. There I have the bracket off. Now here it goes. There it is. Then I'm not able to get the transmission out of the motor itself without taking that arm off. I mark the shaft of the motor by drawing a straight line right to the shaft, and then at one end I make a little bit of a pointer so that I know that that's the end that should go to where it connects to the transmission. Then I just put an alignment dot on that arm as well. This way I can line it back up when I put it back together.
13 millimeter socket ratchet, and then something to hold the arm. I use an extension. You could also use just a large screwdriver. Loosen the nut and then pull it off. Tap the arm with a hammer, and then that arm will come off. Then pull the grommet off and you should be able to pull your transmission out.
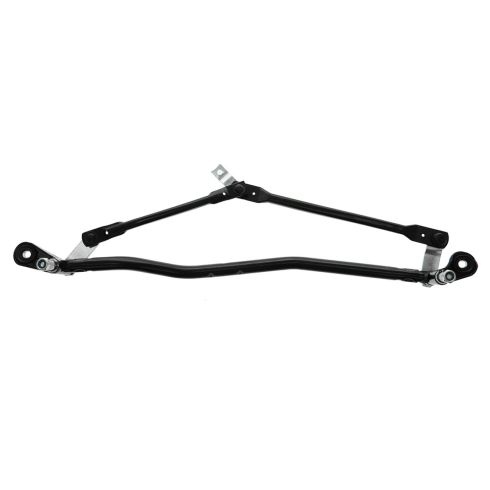
At the top is the new transmission from A1 Auto. You can see it's exactly the same as the original. I'm just going to take the two nuts off that come with it, and then I'm going to take these two sleeves out just so I don't lose them as I'm re-installing the transmission into the car.
Make a mark on the new transmission arm. You want to be very close, but it doesn't have to be exact, but if you just try and make the mark at the same spot so you can line it up when you put it on to the motor. Use a pair of pliers and turn the motor about 90 degrees so the mark on your shaft is pointing kind of to the sides of the motor. It'll make it easier to put it all together. Then put the transmission back into place.
Then put the washer back on. Re-install the mounting bracket at this point. Thread in all the T30 Torx bolts. Then, when you tighten them, tighten them up evenly. Don't just tighten one all the way and then the next one and the next one. Tighten one down some, and then another one, and just rotate around so that you push the transmission down evenly.
Now re-install the transmission arm. Just make sure that you line up the mark on your shaft with the mark on the arm. Put the 13-millimeter nut on and tighten it up. Keep in mind that the arm is held onto the shaft and it's held securely by the serrated teeth on the shaft, so you need to tighten that nut down so that those teeth can bite into the arm and hold it from slipping. Just make sure that as you're tightening it the arm and the shaft don't move independently of each other. Make sure it all stays lined up. Then I use a large screwdriver to hold the arm in place while I do the final tightening. Then I just by hand move everything so that basically the arm is pointing to the passenger side of the vehicle to install.
Reinstallation is a reversal of the procedure, so I'm going to fast-forward through a lot of this to keep the video a little bit on the shorter side. Place the transmission in there. Make sure you reconnect the electrical connector. Then you can see I'm just fighting with that plastic panel on the top and lining it up and putting it underneath there. Again, if that plastic panel weren't there, this would probably take me about half the time it did. Again, make sure that you reconnect the electrical connector first, then work it down in. Put the grommets onto the wiper studs. Also put those metal sleeves down in on the mounting points.
Then get that computer box, the plastic part, back in place. Thread the three nuts on there. The rear two are 10 millimeter, the front one is 8 millimeter. Then tighten those up. It's a lot easier to do this before the wiper transmission is tightened up because it makes it easier to get to those back nuts. Put the three bolts back that hold the transmission in place. They're three 10 millimeter bolts. You want to put the ones on the side in first, because the transmission moves back and forth a little bit, and then put the one in the middle in third. That way you can slide the transmission back and forth if you need to. Then tighten them up in the same order. I would tighten the middle one first, and then tighten up the two side ones.
Now you can put the computer back into place and press that bracket down on it to lock it in place. Tighten up that 8 millimeter nut. There's a clip that went onto the bottom of the transmission mount. Then get that weather strip back in place. Now a little test. Run it a few times. Make sure everything's clearing well. Then obviously you want to shut it off so it's in the park position so you can put the wipers on properly. Back to working fast here again.
Put the computer cover back on. The five T30 Torx bolts that hold it in place, put them back on and tighten them up. Again, with the plastic in the way it's a little bit difficult, but with different extensions you're able to get it on. Then here I'm just putting that Phillips screw that holds the side of the plastic trim panel back in. Now you can put your wipers back in place. Again, when you did the test, if you shut the switch off the motor went to its park position. You can see actually the dirt on the windshield. I left that there for a reason. I know that that's where the wiper stopped, so I can just put the wiper back down in that same spot, press it down on, and then put the nut back on and do the same thing for the driver side.
As I fast-forward, obviously one thing to notice, if you took that black plastic trim panel off, you would want to put that one before you put the wipers in place. Tighten them up. Hold the wipers in place as you tighten. Tightening those nuts and pressing the wipers down onto the transmission is what holds the wiper arms in place. I'll fast-forward as I do the other one. Put the trim caps back in place. Re-install the clip that holds the plastic panel to the body. Hood down, and then you can do a quick test.
Thanks for tuning in. We hope this video helped you out. Next time you need parts for your car, please visit 1AAuto.com. Also check out our other helpful how-to and diagnosis videos.
Shop Products

How to Replace Windshield Wiper Motor Linkage 2004-10 Dodge Ram
With this video you can learn how to replace the windshield wiper motor & linkage on your 04-10 Dodge Ram. 1AAuto shows you how to do it yourself!

