
How to Install Universal LED Light Bar Ford F250
Created on: 2014-12-31
Brighten up your truck by installing this universal LED light bar! Watch this video to see how, then buy the light at 1AAuto.com!
-
step 1 :Measuring the Light Bar Mounting Position
- Briefly attach the mounts to the light bar
- Mount your bracket to the desired position
- Record the position
- Measure a center mark
- Lower the center mark to the length of your recorded position
- Mark the bracket mounting points from the center mark
- Measure to make sure the mounting points are even with each other
- Double check the markings by inserting the light bar in place
-
step 2 :Mounting the Light Bar
- Insert a punch to the center of each bracket mounting point
- Hit the punch in with a hammer
- Drill out the holes with a 1/8" drill bit
- Drill out the 1/8" holes with a 13/64" drill bit
- Tap the hole out with a M6x1 Tap
- Insert the mounting bracket into place
- Preliminarily tighten the mounting bracket into place with an Allen wrench
- Insert the light bar into the bracket
- Preliminarily tighten the bolts to the light bar
- Insert a locking nut on the mounting bracket bolt
-
step 3 :Mounting the Light Bar Harness
- Remove the ground with an 8mm socket and ratchet
- Insert the relay to the 8mm bolt
- Tighten the 8mm bolt
- Disconnect the harness from the switch
- Line the switch wiring into place near the firewall
- Feed the second harness down to the light bar without placing it near any moving parts such as the radiator fan or engine
-
step 4 :Connecting the Light Bar
- Push on the harness ends if they're absent from the light
- Clamp the metal ends to the wire insulation with wiring pliers
- Insert each wire into its correct slot on the harness
- Connect the light bar wiring harness
- Wire-tie any excess wiring
- Connect the red cable to the positive battery terminal
- Connect the black cable to the negative battery terminal
- Connect the switch to the wiring harness
- Test the light bar
-
step 5 :Installing the Light Bar Switch
- Remove the clips from the lower dash panel with a flat blade screwdriver
- Drill a hole into the desired spot on the panel with a 1/8" drill bit
- Drill out the 1/8" hole with a 3/4" drill bit
- Slightly drill on the side of the panel to fully fit the switch into place
- Feed the harness through the hole
- Punch a hole through the steering column rubber boot on the firewall
- Push the wiring harness through
- Connect the wiring to its harness without wrapping it around the steering wheel
- Wire-tie the harness in place
- Insert the lower panel into place
- Tighten the panel's clips with a flat blade screwdriver
-
step 6 :Adjusting the Light Bar
- Push the light bar into the desired position
- Tighten the light bar with an Allen wrench
Tools needed
-
Hammer
Measuring Tape
1/8 Inch Drill Bit
13/64 Inch Drill Bit
Flat Blade Screwdriver
M6x1 Tap
8mm Socket
Center Punch
Drill
Wire Ties
Ratchet
3/4 Inch Drill Bit
Marker / Writing Utensil
Brought to you by 1AAuto.com, your source for quality replacement parts and the best service on the Internet.
Hi, I'm Mike from 1A Auto. I hope this how-to video helps you out, and next time you need parts for your vehicle, think of 1AAuto.com. Thanks.
In this video, we're going to show you how to mount a lighting bar on your vehicle. We show you on a 2000 Ford F250, but this light can be mounted to any vehicle you want. The items you'll need for this is a new light bar from 1AAuto.com, a tape measure, a marker, a hammer and a punch, 1/8", 13/64", and 3/4" drill bit, drill, and an M6x1 Tap.
Here is a shot of the entire light bar kit, with mounting brackets. You can see a lengthy wire, so you can mount it anywhere. It's an LED light bar and it has a switch that you can mount inside your vehicle.
In our first step we're going to mount the light bar. Don't shoot the messenger here because I know people are going to say I'm mounting it too low, but this is where the owner decided they wanted it. So, basically what I've done is I've just roughly mounted my mounting brackets, and I'm just using these little screws here. I lined it up here, halfway through that screw, and here, kind of halfway through that screw. That happens to be a pretty decent angle. I'm not too worried about the fine details. I just want to make sure that it's at a point on this vehicle where it's below my push bar here, and just kind of put it under here and get a rough idea. It looks like I'm about 1/2" below this bend in the plate, so that's fine, so I can just measure.
Okay, my bar looks like it's about 13/16" to the center of the hole, so I'm going to go a 1/2" plus 13/16". First, I'm going to do a centering mark, and it's 35" between these two plates, so I'm going to go 17 1/2", and then measure 17 1/2", and so there's my center mark, basically. I'm going to just measure that down 1 1/4" from here, and as long as we're close, it doesn't have to be perfect. So, this is roughly 23 3/8", so 23 3/8" divided in half is 11 11/16". So I'm going to make, from my center line, a mark at 11, 11 1/2", and so that's 9, 10, 11/16". Same thing for my centering mark here: 11 1/2", and I'm probably doing this a little bit more perfectly than most, but 11 1/2", 8, 9, 10, 11/16" is right there. Just do a sanity check here, from that mark to that mark is 23 3/8".
So, then just make sure they're even from a point, which the best we can do is really this fold here, or this bend, so this one is 1 1/2" from there, and this one is about 1". I'm going to hold it up here, and just check my mark here, right there, and there, and everything looks pretty straight. I'm going to go with those marks. Then we take a nice sharp punch, and go right in the center of my mark which is a good spot for my drill to hold into. We're going to start with a smaller 1/8" drill bit. We'll fast-forward as he drills out that hole, and then you want to repeat the process on the other side.
Now, I'm drilling the final 13/64" hole. Basically, I've got my hole where I want it now. I used a 13/64" drill bit, and this is an M6x1, which is 1 thread per millimeter, and I'm tapping the hole out. That way I can use a bolt to bolt it through there, and then I can also walk it on on the back side so it will be nice and secure. You could just drill a larger hole, put the bolt through, and then put a nut on the backside. That's good too, but this is just an extra measure of security.
So now we've got our mounting bracket with the rubber pad. Put it in place, start it. Do the same thing for over here. I'm not going to tighten them up right now, but I'm going to just get them on there snug. You have a little bit of adjustment back and forth, which is good. You can mount the light bar, and then tighten everything up afterwards with them still loose a little bit. We'll fast-forward as he tightens up that bolt preliminarily on the other side. Now, on each side I'm just going to put a walking nut, and astute viewers will notice that I did have to drill two holes. The original hole that I drilled went into that piece of angle iron right above, some I'm having to drill holes just a little bit lower. I'll just tighten up those walking nuts.
Okay, we're going to mount the harness. I'm going to use this 8mm bolt, remove it, and then just mount this relay in there. We'll fast-forward as Mike puts that bolt through that wire, mounts it back into place, and just tightens up that bolt. Okay, you can see here, there's a red wire that has a fuse in it, and a black wire. You can actually just hook these right to your battery, and we'll do that in a second. This is the switch harness, see here. I'm going to actually disconnect the switch, and this harness, I'm going to run right through here. Then we'll stuff with some wire ties, and there's actually a hole in the firewall of this truck already. You can't really see it. We'll see it from the inside, but it's right down in there, so I'm just going to run this harness, basically down into that general location, and we'll connect it later.
This harness has provisions for two lights. We're only going to use one, so one of these harnesses I'm going to just coil up and wire tie right here. The other one I'm going to feed down to connect to my light, but as you can see they're pretty long, so I'm probably going to end up wire tying quite a bit of the extra, but I'm just going to feed it right down. You actually want to make sure you don't feed it anywhere near the fan, or the engine, or any moving parts, but if you feed it right down through here, near the radiator, you should be okay.
So, I fed it down some, I found the wire, pull it down, I just want enough. I'm going to put it through here, and have it come out right here, and I'll wire-tie it in place here a little bit. I'll also clean up this wire here that's hanging down. I'm not sure what that is. That was already here though.
Your light may come with ends. If it doesn't, you'll have to put the ends on, and you can see, you basically want the insulation to go right here between those two, and then some wiring pliers, and you really want to bend these things together right on top of the wire, and then the wiring pliers crimp it. Then just make sure you put it in the right part. You can see my black wire. This would go in there like that, so I want to put the black wire in this side. It clips in, and we'll repeat that for the red wire.
Now, to connect the harness I'm just going to secure some of this up so that they don't hang down. I'll probably get a black wire tie for here eventually. Okay, so what we have here this is my extra harness from the harness that ran down to the light. I just zip-tied it up here. This harness has the ability to have two lights, and so you could actually easily add another light to this truck. That's just the extra harness zip-tied right there. My positive or red line that has a fuse in it is going now to my positive battery cable, negative is going to my negative battery cable. So, we can just do a test real quick before we mount the switch. Plug the switch in: on, off, on, and off. Working good. This bottom panel, just take these clips and turn them 1/4 turn counterclockwise, and they release, and the panel comes down and off.
All right, so you can see we've already got a couple of auxiliary switches here. I'm just going to mount it right in line with them. Small pilot hole, and then a 3/4" hole, and you can see that the flange around the switch is bigger, but it should fit the switch in there. Feed the harness through and reach up from here. Let me see if I can figure out where the harness was going. Okay, pull the harness down through. See, the harness is coming out this end, and then this switch does have a little notch in it, so I'm just going to take my drill, put my small bit back on, and see if it fits. It shouldn't fit.
It does not fit, which is good actually. The little notch is right on the side, so I'm just going to take my little drill bit. Okay, the switch is mounted. Now, you'll want to make a hole right here on your firewall, and then just bunch up some wire and push it through. Then on the other side of the firewall, you want to just grab the wire and pull it out, and then tie it to the harness for your switch, and then pull the other end of the wire. To help it through, just use a pick to kind of pry it up through the hole, and then it pulls through. This truck has a few after market things in here, but you can see here is my harness for the lights, and I routed it down, and let's see if I can show you.
I wire-tied it up to the harness at the top, and then it comes down. Obviously, you want to make sure it doesn't have a chance to wrap around the steering shaft at all, and then it goes out through the boot. All right, just aim it where you want it, and this is kind of trial and error, but once you aim it, tighten up these two Allen screws on the end. Now we can just test it out, and we can see that it works, and it looks pretty good.
We hope this video helps you out. Brought to you by www.1AAuto.com, your source for quality replacement parts and the best service on the Internet. Please feel free to call us toll-free, 888-844-3393. We're the company that's here for you on the Internet and in person.
Shop Products


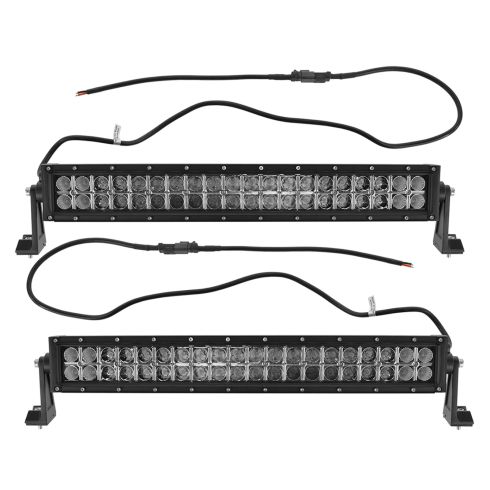
High Quality Performance LED Light Bar 2 Piece Set
- Dual Row
- Cree
- 120 Watt
- 40 LED
- 24 Inch
- Off-Road
- High Quality
- Polycarbonate Lens
- Electrical Installation Kit
- Flood & Spot Beam
- Performance
- Clearance
- 2 Piece Set

