Replaces
Part Details
Item Condition:
New
Lifetime Warranty
This item is backed by our limited lifetime warranty. In the event this item should fail due to manufacturing defects during intended use, we will replace the part free of charge. This warranty covers the cost of the part only.
Returns: Parts with electrical components cannot be returned once installed.
FREE Shipping is standard on Orders shipped to the lower 48 States (Contiguous United States). Standard shipping charges apply to Hawaii, Alaska and US Territories. Shipping is not available to Canada.
Expedited is available on checkout to the United States, excluding Alaska, Hawaii and US Territories as well as P.O. Boxes and APO/FPO/DPO addresses. Final shipping costs are available at checkout.


Created on:
Tools used
Hi, I’m Mike from 1A Auto. We’ve been selling auto parts for over 30 years!
We're going to pull this cover off. Just snaps right up.
And to pull off the coils, we're going to take these little clips one at a time. Raise these little locks on here. You just pull it back a little bit, using a flat blade screwdriver. We're going to go to each one, push it down. We're going to pull this coil out. It's the same procedure for the other three. You're going to grab in the front and lift in the back. Just work it right out. Just pull up evenly so you don't break it.
I'm going to pull one plug out at a time. We're going to use a 5/8 spark plug socket. You want to make sure you use a spark plug socket. We're taping ours to our extension so the socket won't fall in. It's a little loose sometimes, and this spark plug socket has a rubber grommet that holds the spark plug in place so that it'll come up when it's loose and easier installation. And there's the spark plug.
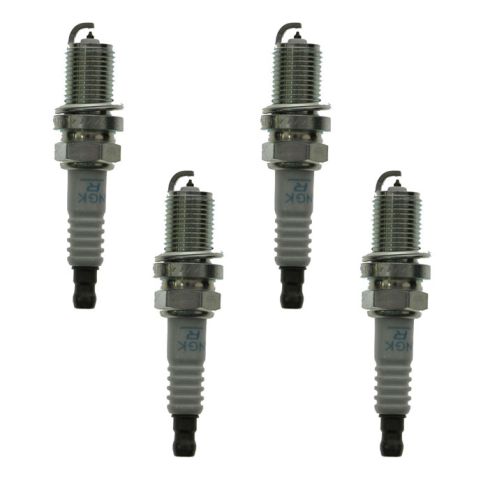
This is our old spark plug, and this is our new plug from 1Aauto.com. You can put these in your car. It's pre-gapped going easily, help your engine run better, smoother, better fuel economy, and you'll be good to go, ready to rock and roll.
This is our old coil. This is our new coil from 1aauto.com. As you can see, the coil designs are very similar. There is some slight differences. This coil has some improvements. As you can see, this is for better cooling, whereas this one does not have that. You can see the connectors are the same. These will work great and fit great in your vehicle.
We're going to reinstall our new spark plug with our socket and extension. We're going to start with number one. We're doing these one at a time. Take the old one out, and put the new one in. That way it's easier to not mess anything up. You won't forget what you're doing. Now we're going to move on to number two. Take number two out. You're going to repeat this for the other two. Start them by hand, twist them down, and we'll torque them after. Now we're going to torque these one at a time to 25 newton meters or 18 foot pounds. Once you hear the click, that's when you stop.
Installing the coil, you're going to line it up with the hole, slide it down. You want it to set on the spark plug. You're going to use those two tabs to line up at back and those will push down, get it to seat, and you'll do the same for the other three. Now I'm going to install the connectors. Kind of want to get them lined up, all of them. I'm going to push them down until they lock in place.
We're going to install the cover. It's going to install on these little tabs right there. Just line it up, push down
Thanks for watching. Visit us at 1AAuto.com for quality auto parts, fast and free shipping, and the best customer service in the industry.
Tools used
Brought to you by 1AAuto.com, your source for quality replacement parts and the best service on the Internet.
Hi, I'm Don from 1A Auto. I hope this how-to video helps you out, and next time you need parts for your vehicle, think of 1AAuto.com. Thanks.
In this video, we're going to show you how to replace a spark plug on this 2004 Volkswagen Jetta with the 1.8T engine. The items you'll need for this are new spark plugs from 1AAuto.com, a Phillips screwdriver, a flat-blade screwdriver, a gap tool, a 5/8 inch spark plug socket and ratchet, and for spark plugs three and four, you're going to need a 10 millilmeter socket, and for four, you're going to need a 5 millimeter Allen bit.
First, we have to remove the engine cover by loosening these four Phillips clips. Just loosen it while pulling up on the engine cover. Then, the engine cover pulls off, and you can set it aside.
To access spark plugs one and two, you just push on the tab on the harness on your ignition coil and pull the harness free. Then, pry up the ignition coil, and your spark plug is down there. We're going to show you on a harder one the full process. For this, we'll just put the ignition coil back and reconnect the harness.
For three and four, you're going to first have to remove this 10 millimeter nut, right here. Then pull this small air box off and set it aside. You can now access three, and it's the same process as one and two. To get to the fourth one, you have to remove these three 5 millimeter Allen bolts. We'll just fast-forward as Don removes those. Pull the bracket off and set it aside. Then, just like before, push on the tab and pull the harness free. You may need to pry it to separate it. Then just pry the ignition coil up and out.
Using a 5/8-inch spark plug socket and a ratchet, you just want to loosen up and remove the spark plug, and it pulls right out.
On the left is the old spark plug. On the right is the new one from 1A Auto. You can see they're identical, and they'll fit exactly the same. You should always check to make sure the gap is right using a gap tool. You want it to be .028, and you want it to have just a little bit of resistance on the gap tool. If it doesn't, push the tab in or pry it out a little bit so that it does. Then put it into your spark plug socket, lower it down into the cylinder, and tighten it up.
Push your ignition coil back down into place and reconnect the harness. We'll fast forward as Don tightens those up. Now replace that small air box and the 10 millimeter nut that holds it into place, and just tighten that up. Line up the four Phillips clips with these four holes. Just push the engine cover down into place and tighten up those four clips. You're all set.
We hope this video helps you out. Brought to you by www.1AAuto.com, your source for quality replacement parts and the best service on the Internet. Please feel free to call us toll-free, 888-844-3393. We're the company that's here for you on the Internet and in person.
Tools used
Tools used
Brought to you by 1AAuto.com, your source for quality replacement parts and the best service on the Internet.
Hi, I'm Don from 1A Auto. I hope this how-to video helps you out, and next time you need parts for your vehicle, think of 1AAuto.com. Thanks.
In this video, we're going to show you how to replace a spark plug on this 2004 Volkswagen Jetta with the 1.8T engine. The items you'll need for this are new spark plugs from 1AAuto.com, a Phillips screwdriver, a flat-blade screwdriver, a gap tool, a 5/8 inch spark plug socket and ratchet, and for spark plugs three and four, you're going to need a 10 millilmeter socket, and for four, you're going to need a 5 millimeter Allen bit.
First, we have to remove the engine cover by loosening these four Phillips clips. Just loosen it while pulling up on the engine cover. Then, the engine cover pulls off, and you can set it aside.
To access spark plugs one and two, you just push on the tab on the harness on your ignition coil and pull the harness free. Then, pry up the ignition coil, and your spark plug is down there. We're going to show you on a harder one the full process. For this, we'll just put the ignition coil back and reconnect the harness.
For three and four, you're going to first have to remove this 10 millimeter nut, right here. Then pull this small air box off and set it aside. You can now access three, and it's the same process as one and two. To get to the fourth one, you have to remove these three 5 millimeter Allen bolts. We'll just fast-forward as Don removes those. Pull the bracket off and set it aside. Then, just like before, push on the tab and pull the harness free. You may need to pry it to separate it. Then just pry the ignition coil up and out.
Using a 5/8-inch spark plug socket and a ratchet, you just want to loosen up and remove the spark plug, and it pulls right out.
On the left is the old spark plug. On the right is the new one from 1A Auto. You can see they're identical, and they'll fit exactly the same. You should always check to make sure the gap is right using a gap tool. You want it to be .028, and you want it to have just a little bit of resistance on the gap tool. If it doesn't, push the tab in or pry it out a little bit so that it does. Then put it into your spark plug socket, lower it down into the cylinder, and tighten it up.
Push your ignition coil back down into place and reconnect the harness. We'll fast forward as Don tightens those up. Now replace that small air box and the 10 millimeter nut that holds it into place, and just tighten that up. Line up the four Phillips clips with these four holes. Just push the engine cover down into place and tighten up those four clips. You're all set.
We hope this video helps you out. Brought to you by www.1AAuto.com, your source for quality replacement parts and the best service on the Internet. Please feel free to call us toll-free, 888-844-3393. We're the company that's here for you on the Internet and in person.